

Amazon Music owns an extensive music library and provides subscribers with good music streaming services. But there are many available music streaming services now, and you may want to try another one, or if you have subscribed to several paid streaming services, you may want to cancel one of them.
Whatever reason you have, if you want to cancel your Amazon Music Prime/Unlimited subscription, read this article and follow the instructions. Remember, if you cancel your paid subscription plan, the offline playback function will no longer be available —— but no worries. Surely we can solve this problem, too. Read till the final part of this article, you will find the best solution for enjoying Amazon Prime/Unlimited music offline.
Related Articles:
- Part 1: Cancel Amazon Music Subscription on Computer
- Via Amazon Music Web Player
- Via iTunes/Music App
- Part 2: Cancel Amazon Music Subscription on iPhone
- Part 3: Cancel Amazon Music Subscription on Android
- Bonus Tip: Keep Amazon Music Songs Forever Without a Subscription
- FAQs about Amazon Music Subscription
Part 1: Cancel Amazon Music Subscription on Computer
It won't be a tough job to cancel your Amazon Music subscription in two ways - you can select to cancel your subscription either on Amazon Music web player or in iTunes. In the following, a detailed guide will clearly show how both ways work. Please scroll down and read.
Via Amazon Website
For users subscribing to Amazon Music Prime/Unlimited through the official platform in order to download Amazon Music to computer, the following procedures will guide you on how to cancel Amazon Music on Amazon official website effortlessly now.
Step 1. Go to Amazon Music web player using any web browser on your PC or mobile device.
Step 2. On the upper-right corner of the website, move your mouse to the Account & Lists, the pull-down menu will automatically expand, and then choose Memberships&Subscriptions.
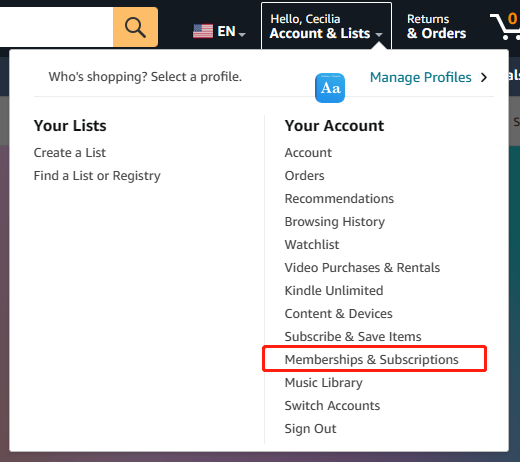
Step 3. Click Music Unlimited, and then choose Amazon Music Unlimited.
Step 4. In the Subscription Renewal section, you can see the renewal date of your subscribed plan. Choose Cancel Subscription, and then Confirm Cancellation to cancel Amazon Music Unlimited or Premium subscription in no time.
Via iTunes/Music App
If you are an iOS user, you probably subscribed to Amazon Music through iTunes, and all payments were made on your Apple account. In this case, it is convenient for you to cancel your Amazon Music subscription through iTunes or Music app. Therefore, please walk through the guide below and learn how to cancel Amazon Music through iTunes. Let's get started:
Step 1. Launch the iTunes app on your Windows PC/Mac, or open the Music app if your Mac is macOS Catalina version or later.
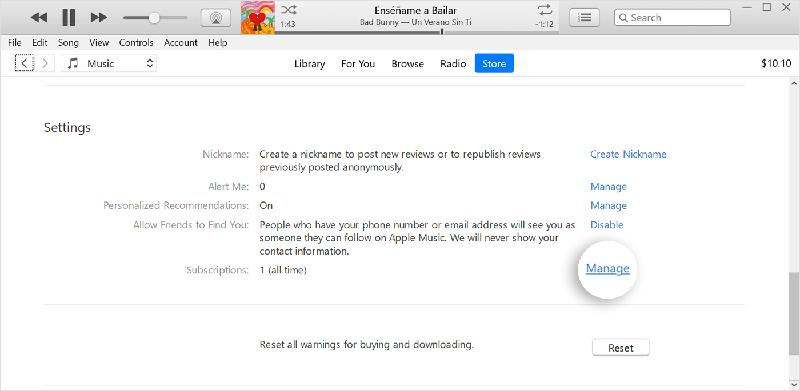
Step 2. At the top of the iTunes/Music app, find the menu bar, tap Account, and choose View My Account. The next page shown will be as below. Scroll down to find the Settings section, and then tap Manage.
Step 3. The Subscription page will pop up. Now scroll down to find Amazon Music, and click Edit next to it.
Step 4. Click Cancel Subscription. Finally, directly press the Confirm button to finish the Amazon Music subscription cancellation process.
Do note that once your subscription ends, you are not allowed to access your songs offline. However, you can pick a powerful Amazon Music downloader from this post of the best Amazon Music downloaders to keep listening to Amazon Music for free without a subscription.
Part 2: Cancel Amazon Music Subscription on iPhone
For iPhone users, canceling Amazon Music subscriptions is also easy as a piece of cake. You even don't need to open a web browser, but can directly complete the Amazon Music subscription cancellation in the Settings on your iPhone. In the following, you can walk through the detailed procedures and see how to cancel your Amazon Music subscription on your iPhone step-by-step:
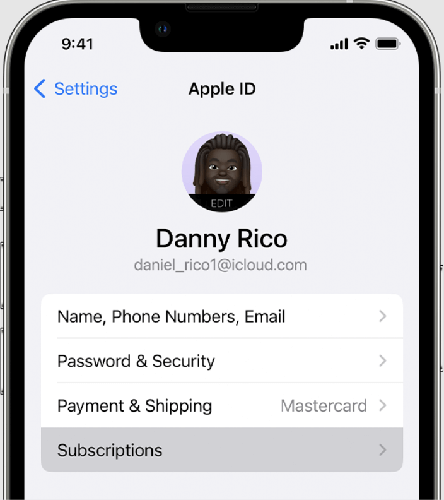
Step 1. Open the Settings on your iPhone. Next, tap your name to enter your Apple ID and click Subscriptions.
Step 2. On the next screen you can see all your subscription plans. Find Amazon Music and simply tap Cancel Subscription.
Step 3. The pop-up window will tell you the end date of your current subscription plan. Tap Confirm to complete the cancellation.
Quick tip: After canceling your subscription, you can enjoy your songs until the subscription ends. Check this post and learn how to download Amazon Music to MP3 on iPhone to enjoy your songs offline without a subscription.
Part 3: Cancel Amazon Music Subscription on Android
The whole process of canceling an Amazon Music subscription on Android is similar to the way to do it on iPhone devices. So for Android users, follow the guide below and master how to cancel Amazon Music on its Android app in one shot:
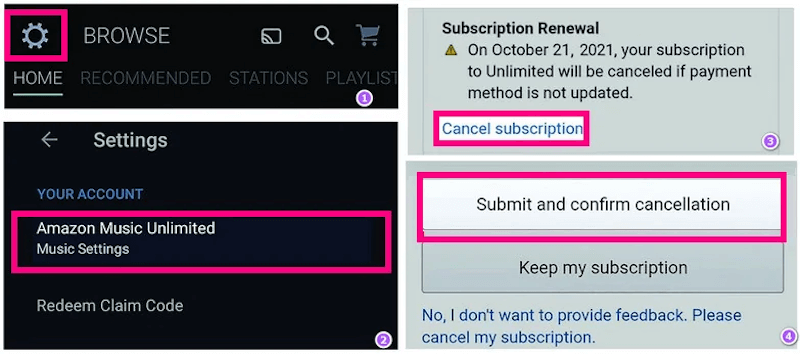
Step 1. Open the Amazon Music app on Android. In the main feed of the application, open Settings by tapping the gear icon.
Step 2. Under Your Account, tap Amazon Music Unlimited. A pop-up window will appear. Here, you can find the Subscription Renewal section.
Step 3. Subsequently, simply click Cancel Subscription. By tapping the Submit and Confirm Cancellation option, your Amazon Music plan will directly be cancelled.
After your Amazon Music subscription is canceled, you can still access your paid content on Amazon Music within your current subscription period. Once it expires, you can no longer enjoy your offline music library or other premium features anymore. Don't panic! Here's the solution.
Bonus Tip: Keep Amazon Music Songs Forever Without a Subscription
After your subscription ends, you might find you are not allowed to access the music downloads offline anymore. Therefore, before the subscription expires, a trick to keep all your favorite Amazon Music songs forever is to download all of them with TuneFab Amazon Music Converter.
TuneFab Amazon Music Converter is a music downloader oriented for Amazon streaming sources. It performs well in downloading all sorts of Amazon Music tracks, including songs, playlists, and podcasts released for Amazon Music Unlimited, Amazon Music Prime, HD, and Free users.
The program can function at 35X faster speed to batch download Amazon Music songs with lossless quality retained and high-compatible formats equipped. Making you enjoy the Amazon Music streaming journey later on even without continuing to subscribe to its premium plans.
Key Features of TuneFab Amazon Music Converter
● All Amazon streaming music download supported;
● Lossless 320Kbps to keep Amazon Music tracks offline;
● Popular formats such as MP3, M4A, WAV, FLAC and AIFF to select;
● Raise batch downloading speed to at least 35X faster;
● Retain ID3 information for every Amazon Music download.
TuneFab Amazon Music Converter is also easy to use, making it an easy job to download songs and playlists from Amazon Music streaming web player. Next, the procedures will guide you on how it works:
Step 1. Install TuneFab Amazon Music Converter
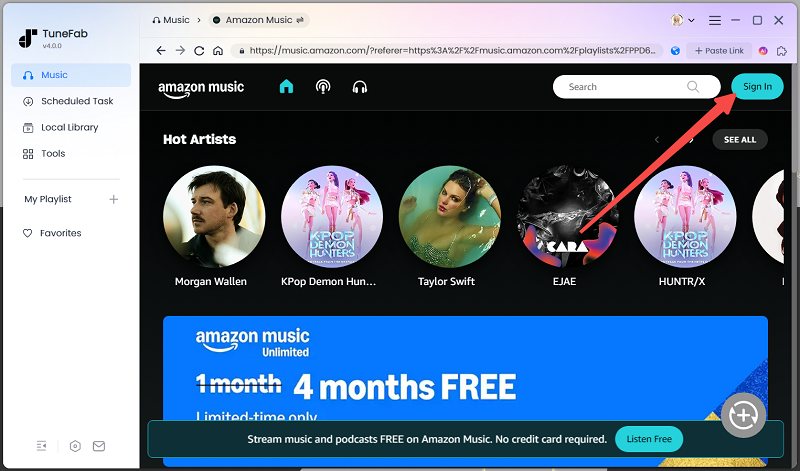
Download, install, and launch the converter. Subsequently, enter Amazon Music service and log in with your own Amazon Music account (paid subscription is not needed).
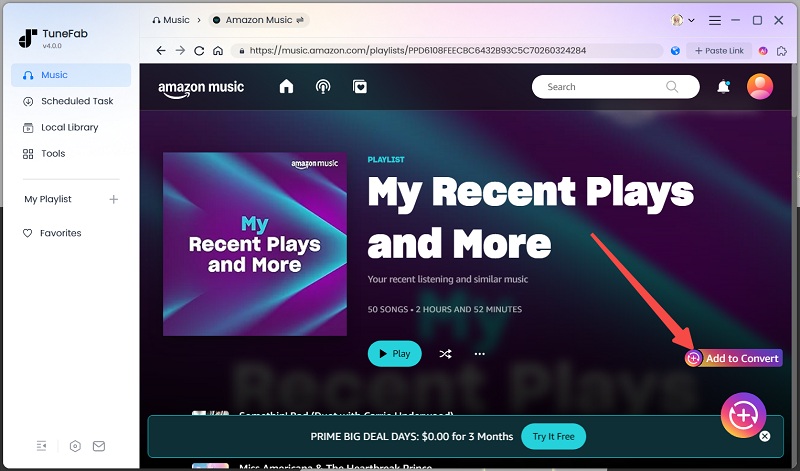
Step 2. Add Song or Playlists to the Conversion List
Search songs by their names in the upper-right search bar. Drag them to the conversion list on the right side for conversion.
Step 3. Choose Audio Format
The default output format of this tool is MP3. You can adjust it from the drop down menu on the conversion list. Besides, you can change the output quality here.

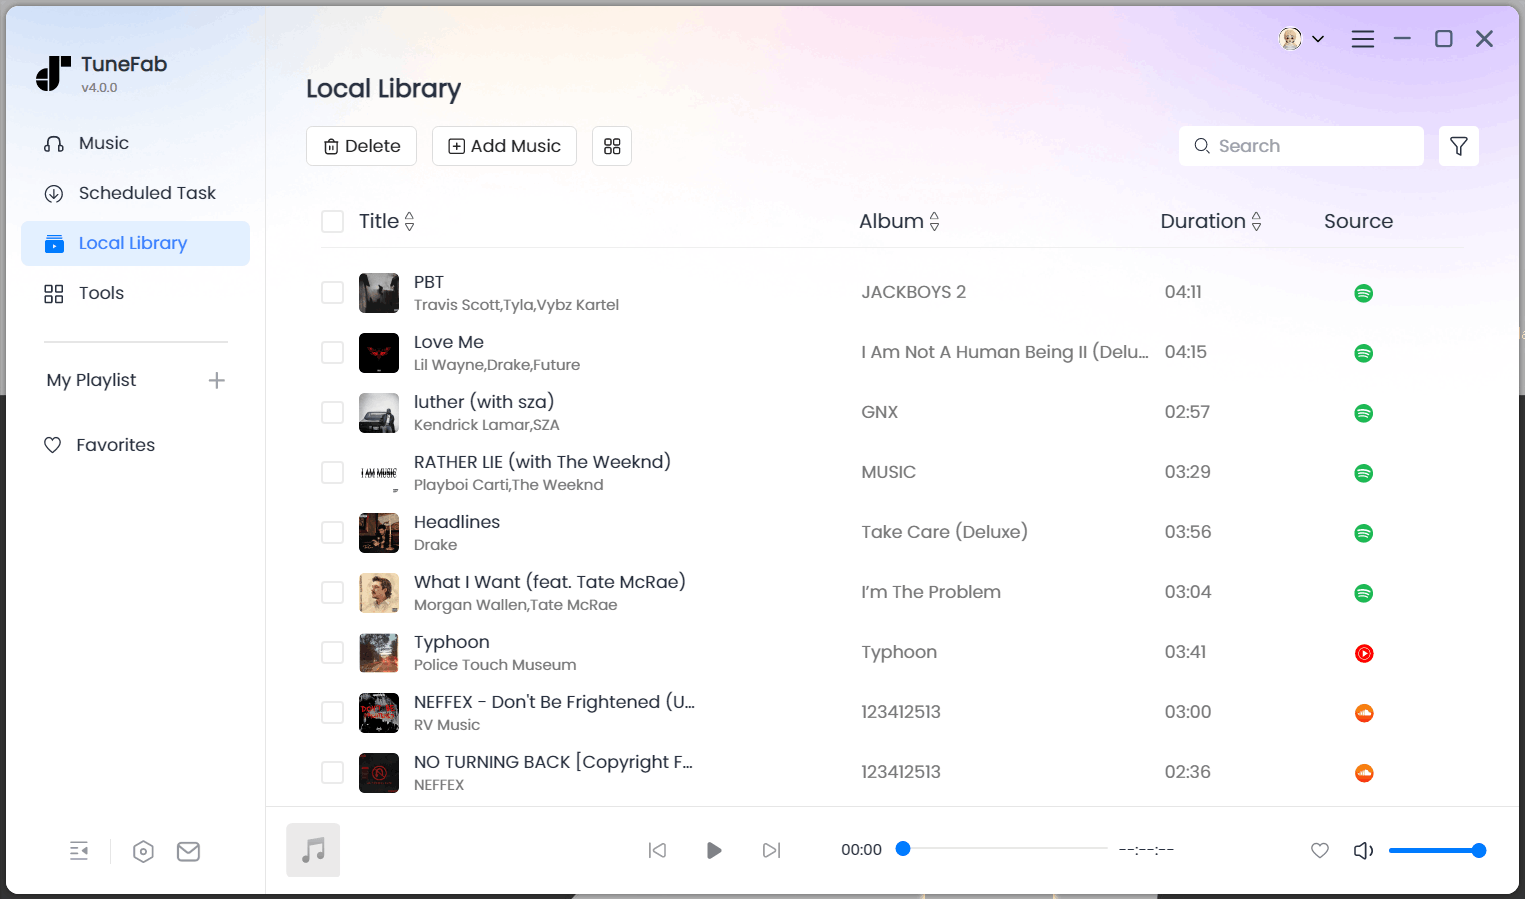
Step 4. Download All Amazon Music Songs
Click Convert All to convert selected Amazon Music tracks. The conversion process will be quick and the listed songs will be saved to your chosen audio formats. Check the converted songs on the Finished page by tapping the File icon.
FAQs about Amazon Music Subscription
Q1: Can you get a refund after canceling Amazon Music subscription?
If you select to cancel your Amazon Music subscription at your personal will, no refund will be issued back to you. But when your Unlimited Plan is discontinued by Amazon official, a prorated refund of any feed paid for the plan can be given back to you (only for direct signup users on Amazon's official website). If you subscribe to the premium plan through a third party, you need to contact the third party for a refund instead.
Q2: Why am I being charged for Amazon Music?
Sometimes you probably notice that your balance has decreased suddenly, consider the following causes leading to Amazon Music charge:
● Some music resources are not included in your subscription plan, which takes an extra charge to access and stream.
● You have linked multiple accounts, so Amazon Music charges premium services for all of them.
● Sudden errors happening to the platform and cause mistaken charges on you.
Based on them, you can find out what causes extra costs on you. If something goes wrong, you can contact Amazon Music's technical team to help you out in no time.
Q3: How to cancel Amazon Music on Alexa?
For subscribers of Alexa Together, you can follow the steps to cancel Amazon Music on Alexa:
Step 1. In the Amazon Music app, go to Your Memberships & Subscriptions.
Step 2. Find Alexa Together subscription from the menu.
Step 3. Confirm the subscription cancellation by clicking on the Cancel Subscription option.
Conclusion
If you want to cancel your Amazon Music Prime/Unlimited subscriptions, you can finish the cancellation process on a Windows PC/Mac via web browsers or on a Mac via iTunes/Apple App. The cancellation process is also available on iPhone/Android Smartphones.
For those wishing to keep all downloads before your subscription expires after cancellation, try TuneFab Amazon Music Converter to convert Amazon Music to MP3 or other formats to get rid of Amazon Music DRM protection. Once you get the DRM-free Amazon Music songs, you can keep them offline and stream whenever you want as long as you like.
