

Have you ever been stuck with a bunch of songs you've long grown tired of, wishing to delete your Apple Music library and start over? Or maybe your device is running out of storage, and those old favorites are now a burden you have to part with? Or perhaps you just want a fresh start for a new music collection that is more in tune with your current mood?
You are not alone. In this article, we will walk you through the guides on how to delete Apple Music library on your iPhone, iPad, Mac, and Windows, so you can take full control of your music library. Now, let's get started!

You May Also Like:
Part 1. How to Delete a Song from Apple Music Library
Sometimes, you may want to delete a song or two from your Apple Music library. Maybe it no longer suits your taste, or you added it by mistake. Fortunately, this is a simple task. Next, we will show you how to delete songs from Apple Music Library on iPhone/iPad, Mac, and Windows.
On iPhone/iPad
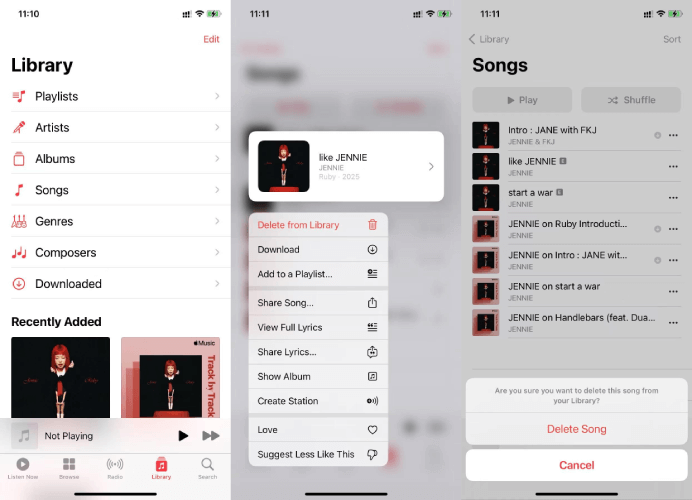
Step 1. Open the Apple Music app on your iPhone, iPad, or Android device. Then, make sure you have logged in to your subscribed account.
Step 2. Go to "Library" > "Songs" to browse your music collection. Locate the song you no longer need.
Step 3. Tap the three-dot icon or tap and hold the song to initiate a pop-up menu.
Step 4. Select the "Delete from Library" option.
Step 5. Tap on "Delect Song" to confirm your action. Then, you can easily remove a song from the Apple Music library.
On Mac/Windows
Step 1. Launch the Apple Music app or iTunes on your Windows/Mac computer.
Step 2. On the left side bar, head to the "Songs" section under Library.
Step 3. Scroll through your music collection and find the song you want to delete.
Step 4. Right-click or click on the three-dot icon next to the song title. Then, click "Delete from Library" to get an Apple Music song deleted from your library successfully.
Part 2. How to Remove Downloaded Music from Apple Music Library
Apple Music lets you download songs for offline listening, but over time, these downloads can take up a significant amount of storage space on your device. If you want to free up some space, here are solutions on how to clean up your Apple Music storage.
On iPhone/iPad
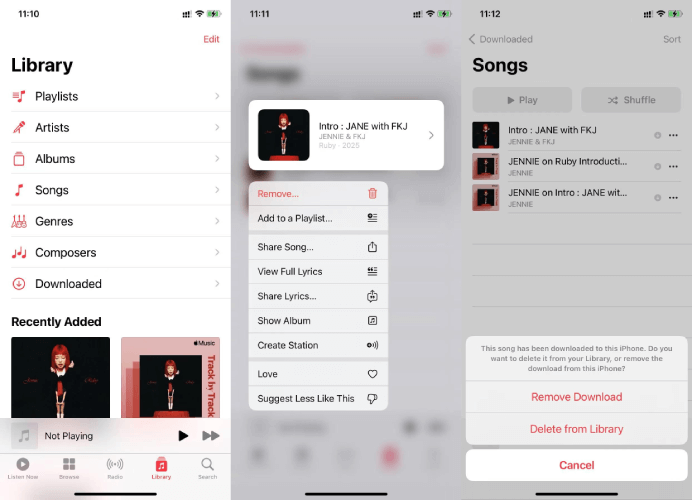
Step 1. Open the Apple Music app on your mobile device, and then move to the "Library" tab.
Step 2. Go to the "Downloaded" section. You will find all your downloaded songs, albums, and playlists on Apple Music.
Step 3. Find your target music track. Then, tap on the three-dot icon and choose "Remove...".
Step 4. You will have two options popping up at the bottom.
- Select "Remove Download" to remove the song from your iPhone but keep it in the library.
- Choose "Delete from Library" to delete music from the Apple Music library.
Tips. Delete All Downloaded Apple Music Songs from Settings
Step 1. Head to "Settings" on your iPhone or iPad.
Step 2. Scroll down to go to "Music".
Step 3. Tap on "Downloaded Music" under the "DOWNLOADS" section. You will see all downloaded songs classified by "ARTISTS".
Step 4. Hit "Edit" in the upper corner, and then tap on the delete icon in front of "All Songs" to clear up Apple Music storage.

On Mac/Windows
Step 1. Run the Apple Music app or iTunes on your computer.
Step 2. Click on "Songs" from the left sidebar.
Step 3. To see all downloaded songs together, click "View" on the navigation bar and select the "Only Downloaded Music" option from the list.

Step 4. Select the downloaded songs and right-click on them.
Step 5. Choose "Remove Download".

Part 3. How to Delete All Songs from Apple Music Library at Once
If your Apple Music library has become a mess or you are looking to rebuild your music collection from scratch, then resetting your Apple Music library could be the way to go. Next, let's take a look at how to delete the entire Apple Music library on various devices.
On iPhone/iPad
Unfortunately, the Apple Music app on iPhone/iPad does not offer a one-click option to delete all songs from your Apple Music Library. However, you can uninstall the Apple Music app itself as an alternative. Doing so will erase all app data from your device, including your songs, albums, playlists, and more.
Keep in mind that deleting the app does not immediately remove your music library stored online. Even if you cancel your Apple Music subscription, you can still recover your previous library within 90 days by enabling the "Sync Library" feature. If you want to completely reset your Apple Music library, it is recommended to first go to "Settings" > "Music". Then, toggle off "Sync Library".
On Mac/Windows
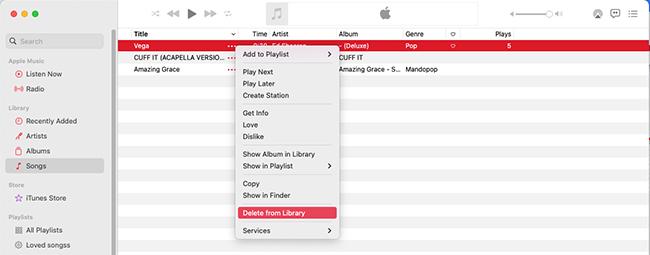
Step 1. Launch the Apple Music app or iTunes on your Mac or Windows computer.
Step 2. In the left sidebar, click on "Songs" under "Library" to show all your added music on Apple Music.
Step 3. Select all songs by clicking "Edit" > "Select All". Or you can use keyboard shortcuts to do so (Ctrl + A on Windows, Command + A on Mac).
Step 4. Right-click on any song and hit the "Delete from Library". Then, you can effortlessly reset your Apple Music library for a fresh start.

Pro Tips. How to Keep Apple Music Forever Before Deleting
Before deleting the Apple Music library, have you ever been concerned that your precious music collection might disappear once deleted? If you want to clean up your Apple Music library while keeping those beloved tunes forever, TuneFab Apple Music Converter has got you covered.
As a professional downloading tool, TuneFab Apple Music Converter is able to help you effortlessly download songs, albums, and playlists from Apple Music to MP3 and other formats, without DRM restriction. This means you can transfer Apple Music songs to any device for offline listening without any hassle. More importantly, they are permanently available! This way, you do not need to worry about subscription expiration, Apple Music playlists disappearing, and more issues.
Explore More Highlights of TuneFab Apple Music Converter
- Download Apple Music songs to DRM-free MP3, M4A, FLAC, WAV, AIFF, etc.
- Convert multiple Apple Music tracks in batches at a 35X faster speed.
- Preserve 100% of the original sound quality with up to 320kbps.
- Keep the original ID3 tags to ensure a well-organized music library.
- Include a built-in Apple Music web player for a beginner-friendly download process.
Next, let's go through the detailed steps to download and save your Apple Music songs permanently before deleting your library.
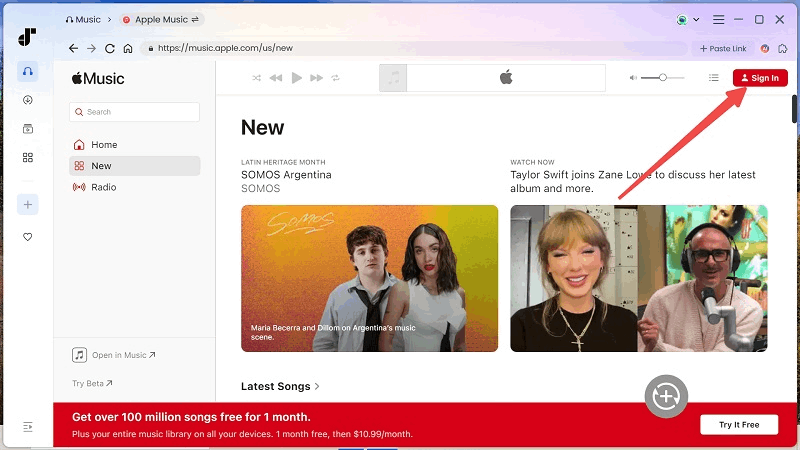
Step 1. Log in to Your Apple Music Account
After installing TuneFab Apple Music Converter on your Windows/Mac computer, launch the program. You will need to access the Apple Music web player within the software and log in using your Apple ID. This step is essential to properly load your music library and proceed with the download process.
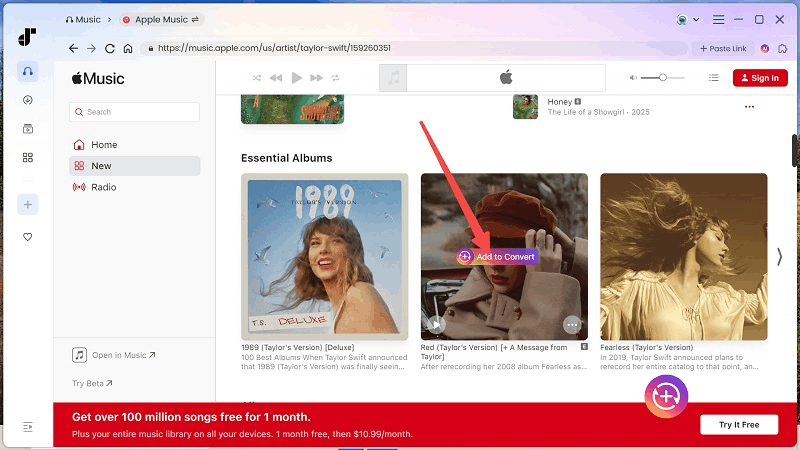
Step 2. Add Apple Music Songs to the Conversion List
Once logged in, you can freely browse your Apple Music library within the built-in web player. When you hover over any song, album, or playlist, you will see an "Add to the conversion list" button. Simply click it to add tracks to download. Alternatively, you can drag and drop songs onto the floating "+" icon for quick selection.
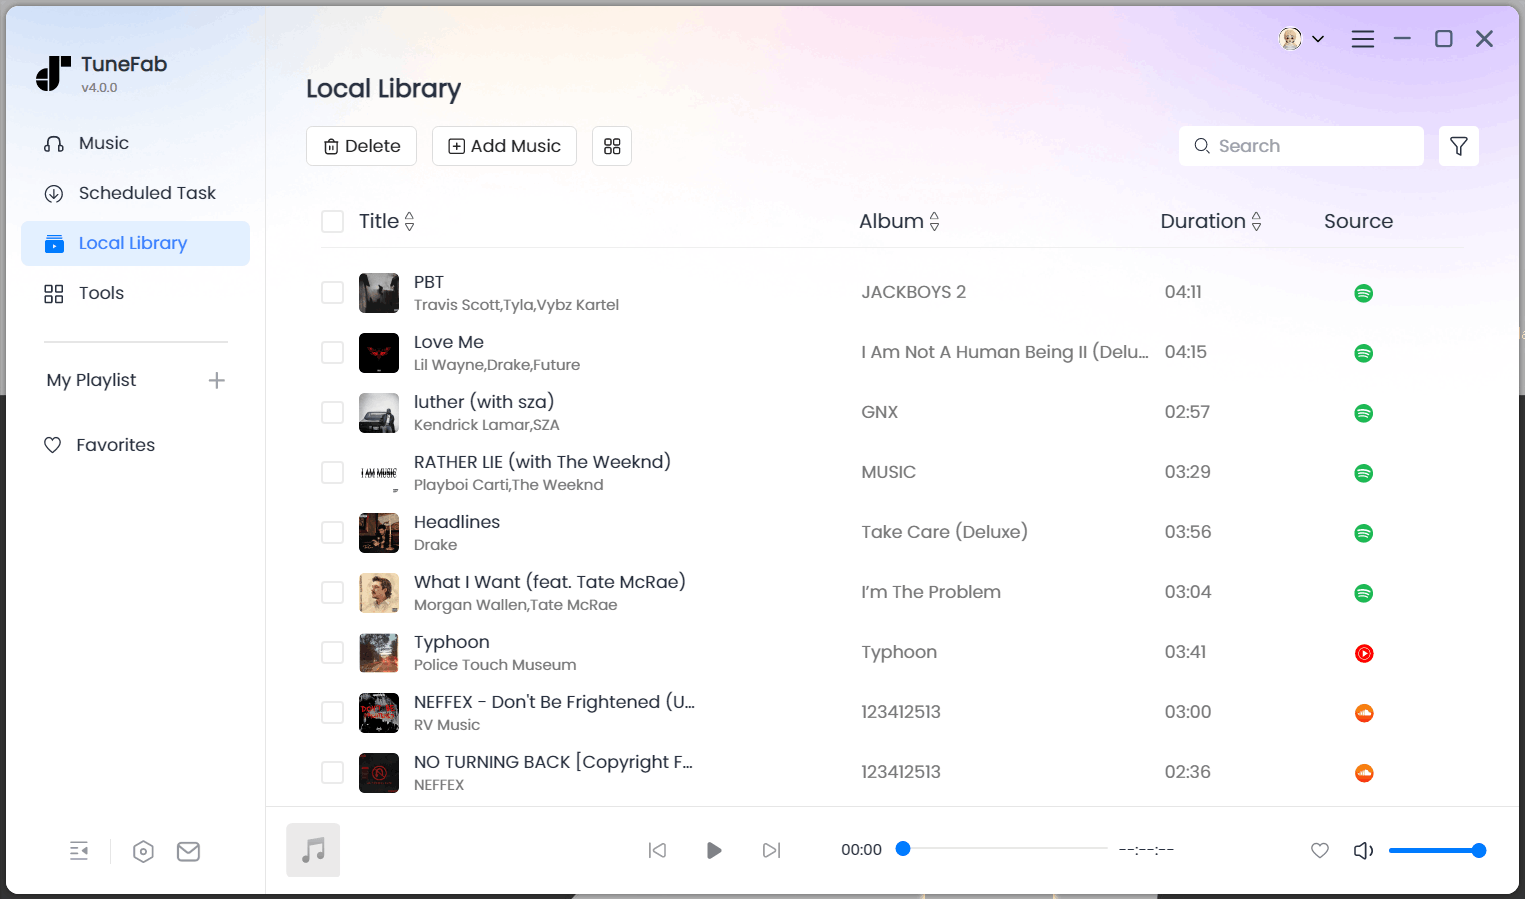
Step 3. Customize Output Settings
On the right panel, you will find the conversion list with all the songs you have added. By default, the output format is set to MP3, but you can choose other formats like M4A, WAV, or FLAC by clicking the format dropdown menu.
Additionally, you can adjust bitrate, sample rate, and output folder to ensure the best listening experience on different devices. If you want to apply the same settings to all tracks, simply click "Apply to All".

Step 4. Download Apple Music Songs
Once everything is set, hit the "Convert All" button to start downloading Apple Music songs as DRM-free audio files. To access the downloaded files, navigate to the "Finished" tab and click the folder icon to locate your saved tracks effortlessly. Now, you can keep Apple Music songs offline permanently on any device!
Final Words
This article has shown you how to delete Apple Music library on iPhone/iPad, Mac, and Windows, along with detailed step-by-step guides. Overall, the process is simple and easy to follow, no matter if you want to manage your Apple Music library or free storage on your device.
However, it is important to back up your favorites before continuing the deletion process, as it can prevent you from losing precious songs. This is where TuneFab Apple Music Converter comes in. Not only can it download all Apple Music songs as DRM-free MP3 files, but it also delivers high output quality, ensuring you a crystal-clear listening experience. Let's download it now and have a try!
