


M4A offers good audio quality and works well with Apple devices, but it isn't supported everywhere. You may run into compatibility issues when playing M4A files on an older MP3 player, car stereo, or other device or app that only accepts MP3. MP3 is also a more convenient choice when you need smaller, widely compatible audio files for everyday playback.
Fortunately, converting M4A to MP3 on a Mac is straightforward once you choose a suitable method. This guide covers three practical ways to convert your M4A files and walks you through the process step by step.
Quick Answer
To convert local M4A files to MP3 on Mac, you can use Apple Music, a desktop converter, or an online tool. Apple Music is convenient for occasional conversions, while TuneFab All-in-One Music Converter's Format Converter is designed for batch local conversion and supports additional formats such as FLAC, WAV, ALAC, and AIFF. CloudConvert provides a browser-based alternative without requiring a desktop installation.
3 Ways to Convert M4A to MP3 on Mac at a Glance
We tested all three methods with 20 M4A files totaling 62 minutes of audio. The comparison below focuses on the factors that matter when converting a local music collection: batch support, setup, output formats, and cost.
| Method | Installation | Batch Conversion | Time to Convert | Max. MP3 Quality | ID3 Tags Preserved |
| TuneFab | Desktop app | ✓ | 2.6 min | 320 kbps | Yes |
| Apple Music | Built-in | ✓ | 5 min | 320 kbps | Yes |
| CloudConvert | None | ✓ | 10 min | 320 kbps | Yes, but no album artwork |
All three methods get the job done, but they aren't equally convenient for every situation. The table below shows which option makes the most sense based on the number of files you have, whether you want to install software, and how much control you need over the conversion.
| Use Case | Method | Why |
| Occasional conversion of a few files | Apple Music | Built into macOS and free to use |
| Batch conversion of local M4A files | TuneFab | Designed for direct local file conversion |
| Conversion to multiple audio formats | TuneFab | Supports MP3, FLAC, WAV, ALAC, AIFF, and more |
| No software installation | CloudConvert | Runs directly in a web browser |
| Browser-based batch conversion | CloudConvert | Supports multiple files and adjustable audio settings |
Related Articles
Method 1. Convert M4A to MP3 on Mac with TuneFab Format Converter
TuneFab All-in-One Music Converter includes a Format Converter for converting audio files already stored on your computer. Instead of adding local M4A files to a music library or uploading them to a website, you can add the files directly to the converter and select the format you need.
The Format Converter supports common audio formats including M4A, MP3, FLAC, WAV, ALAC, and AIFF. Batch conversion also makes it suitable for larger collections of local audio files.
Step 1: Add Your M4A Files to Format Converter
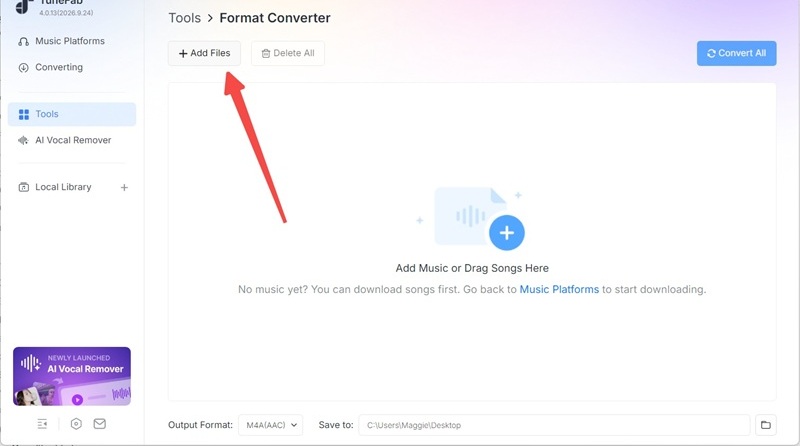
Open TuneFab All-in-One Music Converter on your Mac and select Tools > Format Converter.
Click the option to add files, then select the M4A files you want to convert. Multiple files can be added to the conversion list for batch processing.
Step 2: Select MP3 as the Output Format
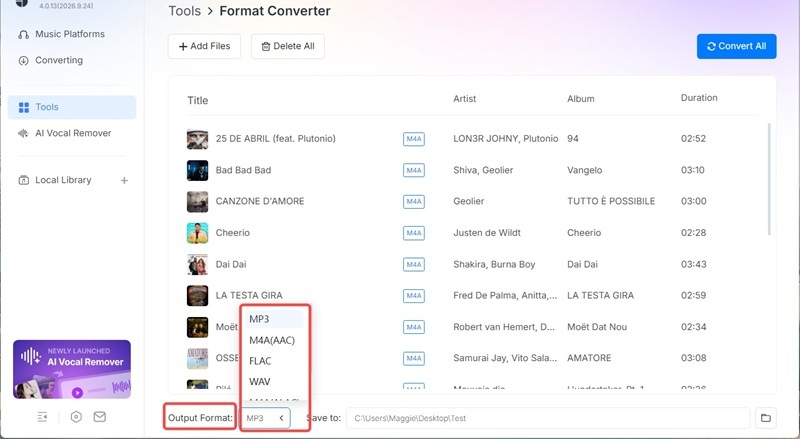
Open the output format menu at the bottom left and choose MP3.
TuneFab also provides available audio settings for the selected format (MP3, FLAC, WAV, ALAC, AIFF), allowing you to adjust the output according to your needs.
Step 3: Start Converting M4A to MP3
Select an output folder for the converted files. Then click the Convert All button to start processing the files.
Once the conversion finishes, open the output folder to access your MP3 files. The original M4A files remain unchanged.
Method 2. Convert M4A to MP3 with Apple Music
Apple Music comes with a built-in audio conversion feature on Mac, so you can convert M4A files to MP3 without installing additional software. It is free to use, supports batch conversion, and can output MP3 at up to 320 kbps, making it a convenient choice for converting multiple local audio files.
One thing to keep in mind is that Apple Music works through its music library, so your local M4A files need to be added to the library before conversion. For straightforward M4A to MP3 conversion, however, it provides a simple and reliable option.
Step 1: Set Apple Music to Use the MP3 Encoder
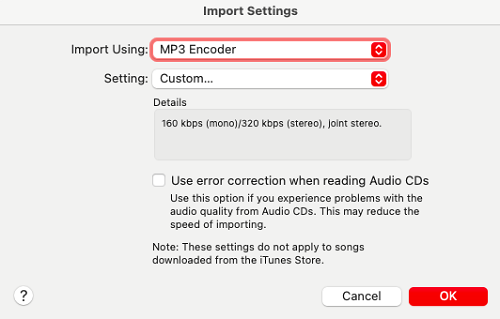
First, tell Apple Music to create MP3 files instead of using its default import format. Open Apple Music on your Mac, then go to Music > Settings from the menu bar.
Under the Files tab, click Import Settings. From the Import Using dropdown menu, select MP3 Encoder and click OK to save the setting.
Step 2: Add Your M4A Files to Apple Music
Open Finder and locate the M4A files you want to convert. You can drag multiple files into Apple Music at once to add them to your library.
Once they're imported, select the M4A files you want to convert. The Recently Added section can make them easier to find, especially when you've just added a batch of files.
Step 3: Create MP3 Versions in Batch
With the M4A files selected, go to File > Convert > Create MP3 Version.
Apple Music will create an MP3 copy of each selected M4A file and keep the original files in your library. This allows you to convert multiple M4A files in one go instead of processing them individually.

Method 3. Convert M4A to MP3 Online
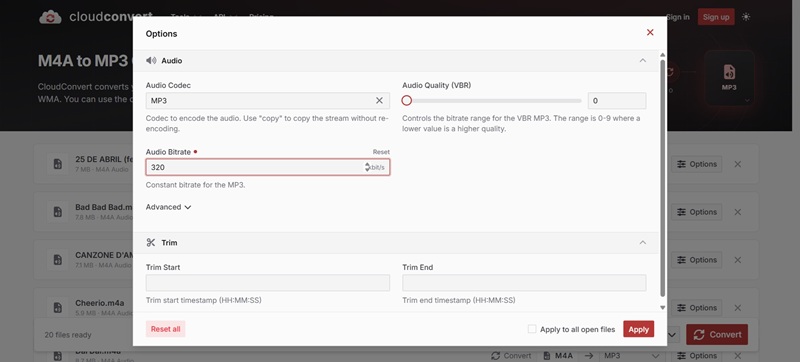
CloudConvert is a browser-based audio converter that supports M4A to MP3 conversion without requiring desktop software. It supports multiple files and provides several audio settings, including VBR quality, constant bitrate, and trimming options, giving you more control over the resulting MP3 files.
The trade-off is that online conversion requires your M4A files to be uploaded to a third-party service. Conversion time can also depend on your internet connection and the size and number of files. File size limits, batch-processing restrictions, and the service's file retention policy are other factors worth checking before uploading a large or private audio collection.
Note: Your upload and conversion time can vary depending on your internet connection and file size. It's also worth checking any file-size or batch limits and CloudConvert's file retention policy before processing a large or private music collection.
Step 1: Open CloudConvert's M4A to MP3 Converter
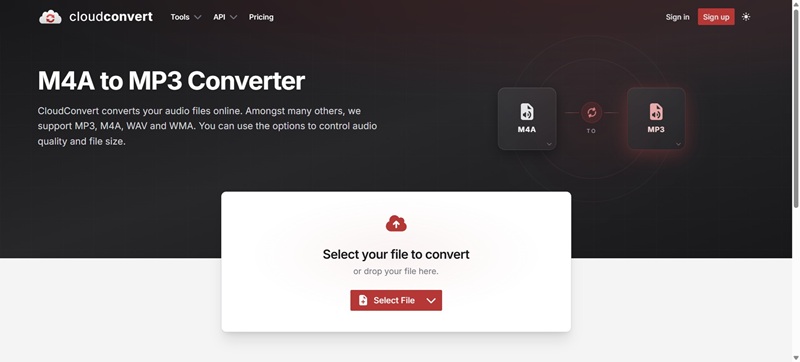
Open CloudConvert's M4A to MP3 Converter in your browser. The converter works directly online, so there is no desktop software to install.
Step 2: Upload Your M4A Files
Click Select File and choose the M4A files you want to convert from your Mac. CloudConvert supports multiple files, so you can add several M4A files at once and process them together.
Step 3: Choose the MP3 Settings
Once your files are uploaded, make sure MP3 is selected as the output format. CloudConvert also gives you some control over the resulting audio:
- Audio Codec: MP3
- Audio Quality (VBR): Adjusts the VBR quality level. Lower numbers indicate higher quality.
- Audio Bitrate: Sets a constant bitrate for the MP3 file such as 256kbps/320kbps.
For a normal full-length conversion, you can leave the trimming options unchanged and adjust the quality or bitrate based on your needs.
Step 4: Convert and Save the MP3 Files
When you're ready, start the conversion and let CloudConvert process the uploaded files. Once the conversion is complete, download the resulting MP3 files to your Mac.
Frequently Asked Questions About M4A to MP3 Conversion
Is M4A better than MP3?
M4A and MP3 use different compression methods, so neither format is universally better. M4A can offer good audio quality at a relatively small file size, while MP3 has much broader compatibility across devices, players, and apps. If compatibility is your priority, converting M4A to MP3 can make your files easier to play and transfer.
What bitrate should I choose for MP3?
The right bitrate depends on how you plan to use the converted files. 128 kbps produces smaller files, while 192 kbps is suitable for general listening. 256 kbps offers a higher-quality option, and 320 kbps preserves more audio detail at the cost of larger files. For everyday playback, 192–256 kbps can be a reasonable balance, while 320 kbps is useful when you want higher-quality MP3 files.
Will converting M4A to MP3 make the file smaller?
Not always. The resulting file size depends on the original M4A codec and bitrate, the MP3 bitrate you choose, and the length of the audio. For example, converting a high-bitrate M4A file to a lower-bitrate MP3 will usually reduce its size. Choosing 320 kbps may result in a file that is similar in size to the original or, depending on the source, even larger.
Does converting M4A to MP3 reduce audio quality?
It can. MP3 is a lossy format, so converting M4A to MP3 may remove some audio information, especially when the source M4A is already compressed. Choosing a higher MP3 bitrate, such as 256 or 320 kbps, can help retain more detail, but it cannot restore information that was already lost during earlier compression.
Final Words
Converting M4A to MP3 on Mac doesn't require a complicated workflow. Apple Music is a convenient built-in option for free batch conversion, while TuneFab All-in-One Music Converter is more flexible for converting local files in batches or switching between formats such as MP3, FLAC, WAV, ALAC, and AIFF. CloudConvert is another option when you prefer a browser-based converter without installing software.
Choose the method based on how you plan to use it: Apple Music for a straightforward built-in solution, TuneFab for more flexible local conversion, or CloudConvert when you want to work directly from your browser.

