

While Spotify Premium lets you download songs for offline listening, those downloads are protected and can only be played inside the Spotify app. That means you can't burn Spotify music to CD directly.
To make a playable Spotify CD, you first need to convert Spotify songs into common audio formats like MP3 or WAV. Then, you can use CD burning software on Windows or Mac to create an audio CD easily. In this guide, we'll show you step-by-step methods to burn Spotify playlists and songs to CD in high quality.
Quick Answer: Can You Burn a CD from Spotify?
Yes, but Spotify songs cannot be burned to a CD directly because the contents are protected. To burn a CD from Spotify, you need to:
1. Convert Spotify songs to CD-compatible formats like MP3 or WAV.
2. Use a CD burning tool such as Windows Media Player, iTunes/Apple Music, VLC, or ImgBurn.
3. Burn the converted Spotify files onto a blank CD.
Related Reading:
How to Download Music from Spotify to SD Card (2 Methods)
Part 1: What You Need Before Burning Spotify to CD
Before you burn a CD from Spotify, there are several things you need to prepare. Since Spotify songs are protected and cannot be written to a CD directly, having the right tools will make the process much smoother.
1. A Spotify Music Converter
Spotify downloads are encrypted and only playable within the Spotify app. Therefore, the first step is to convert Spotify songs, playlists, or albums into common audio formats such as MP3 or WAV.
A professional Spotify music converter like TuneFab Spotify Music Converter can help you:
- Download Spotify songs as local audio files
- Remove DRM restrictions
- Convert Spotify music to MP3, WAV, FLAC, and more
- Preserve original audio quality and ID3 tags
- Batch download playlists at high speed
Get the best lossless Spotify converter for Audiophile >>
2. A Blank CD
You'll also need a writable blank disc for burning Spotify music.
Common CD types include:
- CD-R: Can only be burned once
- CD-RW: Can be erased and reused multiple times
If you plan to update the songs later, CD-RW is a better option.
3. A CD/DVD Drive
To burn a CD on your computer, make sure your device has a built-in or external CD/DVD burner drive. Many modern laptops no longer include one, so you may need a USB external CD drive.
4. CD Burning Software
After converting Spotify music, you need software to burn the files onto the CD. Popular options include:
- Windows Media Player
- iTunes/Apple Music
- VLC Media Player
- ImgBurn
- Burn (Mac)
- CDBurnerXP
Most of these tools are free and support both audio CDs and MP3 CDs.
5. Enough Storage Space
Before converting and burning Spotify songs, ensure your computer has enough free storage space for temporary audio files, especially if you are burning large playlists or using lossless WAV format.
Part 2: Convert Spotify Playlist to WAV/MP3 Before Burning
To burn Spotify playlists or songs to a CD, you have to convert Spotify music formats to MP3, or WAV first. And lucky you, TuneFab Spotify Music Converter, the versatile desktop application, supports downloading Spotify to computer as MP3 and WAV. Better yet, the top-rated Spotify downloader can retain the lossless Spotify quality for you. With its usage, you can easily burn CDs from Spotify.
Key Features of TuneFab Spotify Music Converter:
#1 Convert every Spotify single song/playlist/album/podcast/artist.
#2 Support output format as MP3, M4A, FLAC, WAV, ALAC, AIFF and AAC.
#3 Customize the audio bitrate (reach up to 320kbps), sample rate, and more.
#4 Default 35X conversion speeds are available.
#5 Keep the original metadata like ID3 tags for the converted music.
#6 Define the file title for the downloaded audio and automatically archive your downloaded songs in folders.
#7 Easy to operate with a built-in web player without the Spotify app.
With TuneFab Spotify Music Converter, you can download Spotify songs in audio formats like MP3 from Spotify Premium or Spotify Free. The following tutorials will take the Windows version as an example and show you the process of getting Spotify downloads, after which you can continue to check how to burn a CD from Spotify.
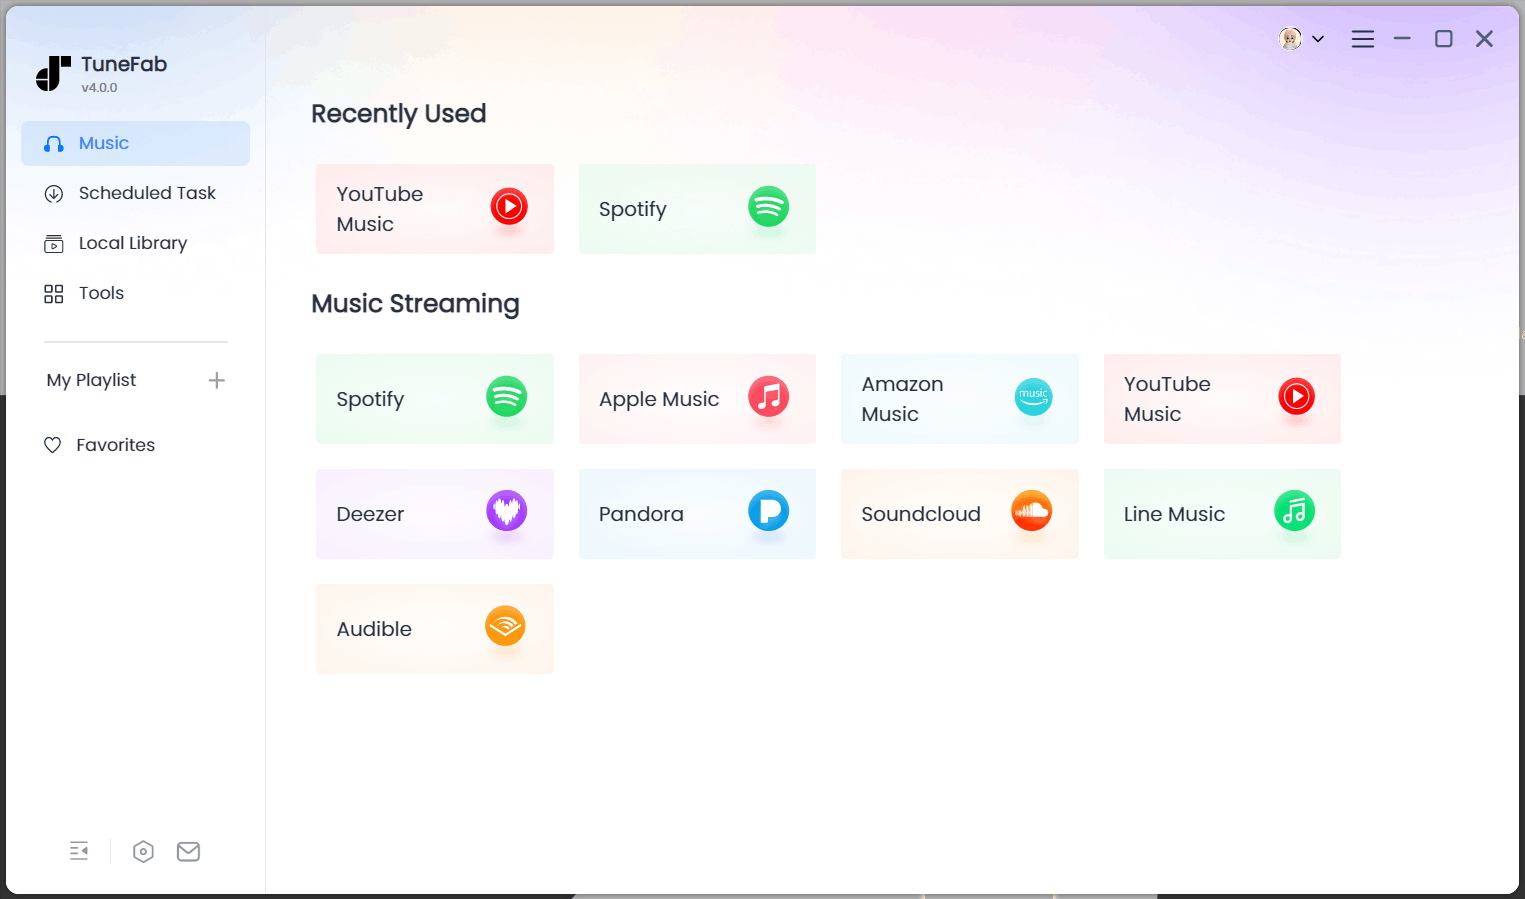
Step 1. Click the download button above to download and install TuneFab Spotify Music Converter. Once launched, you will see various streaming services on the interface. Enter the Spotify service, but you don't necessarily have to log in. However, if you want to boost your success rate, it is recommended that you sign in to your Spotify account.
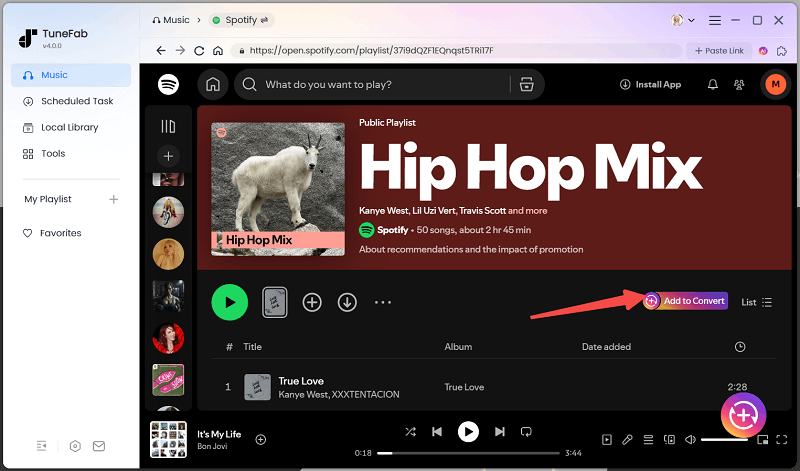
Step 2. Then, you will access the built-in Spotify web player. Browse or search for any songs to add to the conversion list. If you want to burn a lot of songs from different albums or playlists to a CD, create your own playlist and click "Add to Convert" on its info page.
Step 3. After adding songs to the list, you can select your desired output format. You can also change the sample rate or bitrate if needed. Then, hit the blue "Convert Now" button to start converting the music.

Tips on Output Format and Quality Settings:
For MP3 CDs: MP3 with a bitrate of 320 kbps and a sample rate of 44100 Hz.
For audio CDs: WAV or FLAC with a bitrate of 320 kbps and a sample rate of 44100 Hz.
Some older players don't support MP3 CDs, so make sure to pick a compatible one for burning Spotify songs.
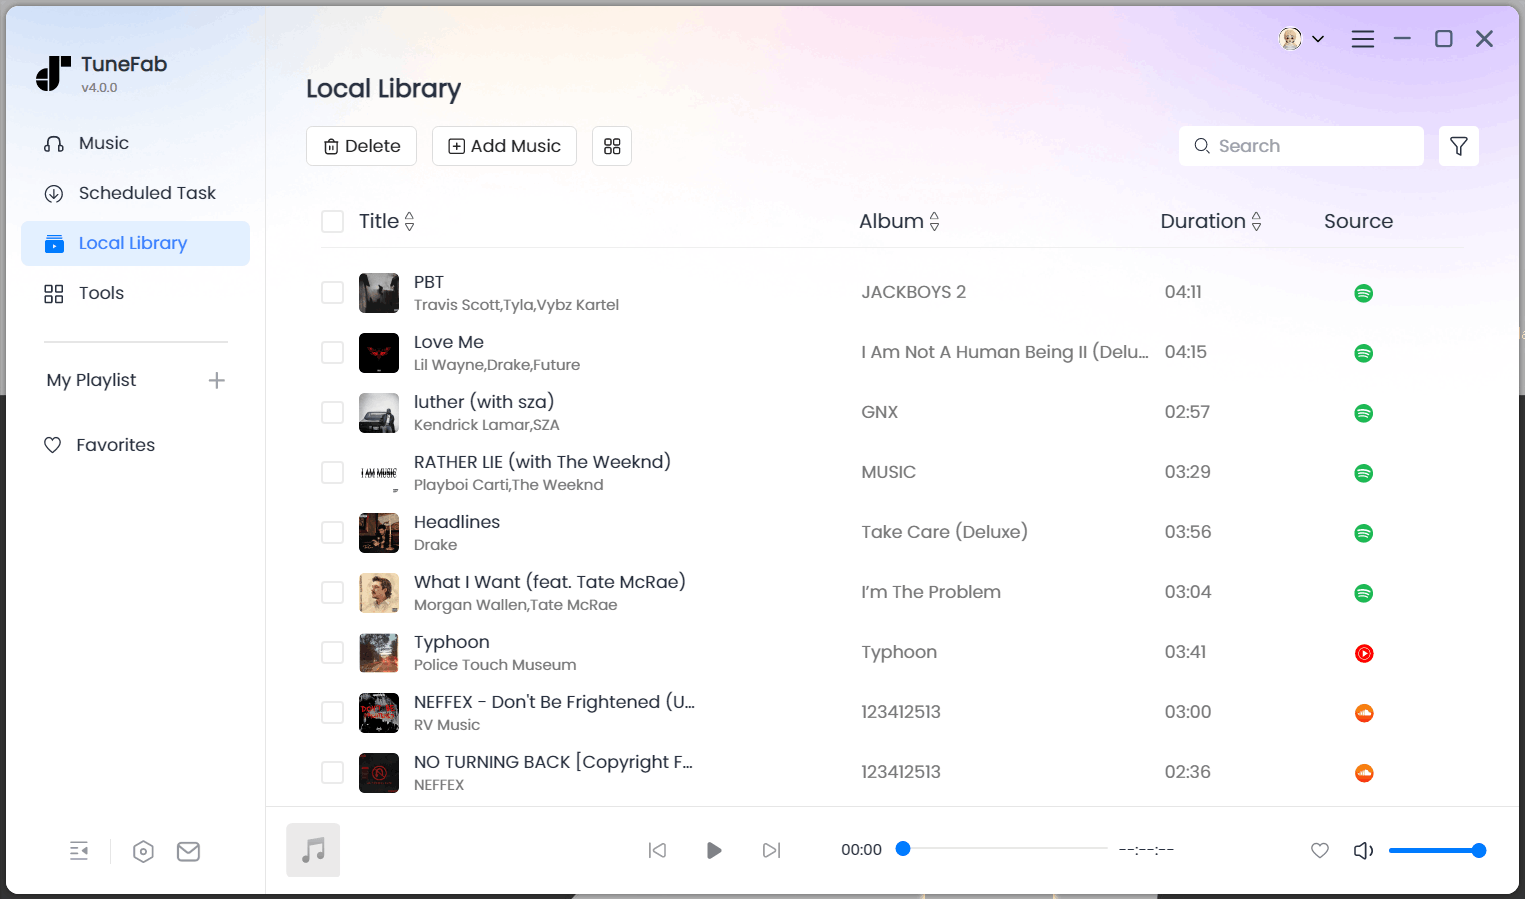
Step 4. Wait for a while until the conversion is done, and you can find the converted Spotify music in the destination folder. Then, you can burn your favorite songs onto a CD and enjoy them on a CD player.
Note:
For those who want to convert Spotify Music to WAV to burn a CD, you can turn to this page to learn more: Convert Spotify Music to WAV Losslessly via Spotify Music Converter
Alternative: Record Spotify Songs into a Single Audio File
In addition to using TuneFab Spotify Music Converter to download Spotify playlists directly as WAV or MP3 files for burning, you can also use professional recording/audio editing tools like Audacity to record all the Spotify songs you want into a single audio file before burning.
When recording Spotify songs with Audacity, you can select specific song segments (or even record your own voice if needed). After recording, you can edit the audio to keep only your favorite parts, trim segments, crossfade, or add sound effects.
Audacity is completely free software and supports various audio output formats, including WAV and MP3. You can choose your preferred format for saving the file.
Here's how to use Audacity to record Spotify music to WAV:
Step 1. Download and install Audacity. It supports Windows/Mac/Linux.
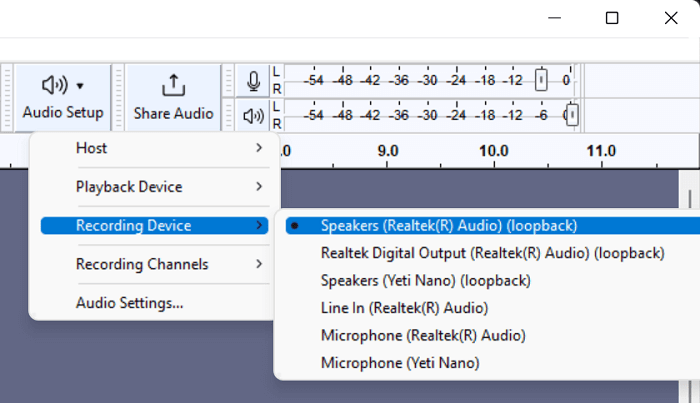
Step 2. If you want to record Spotify songs while adding your own voice, you can start recording right away (just make sure you're in a quiet environment). However, if you only want to record Spotify songs, go to Settings > Windows WASAPI and select the device you want to record from, such as your speakers or headphones.
Step 3. Start playing Spotify songs and hit the red circle record button. When all songs are finished, hit the black square button to stop.
Step 4. Now you can export the recording by going to "File > Export > Export to WAV". When it's done, you can create a copy of the file and edit the songs, remix them, or make any other adjustments you like.

Part 3: How to Burn Spotify Music to CD on Windows/Mac
Now we come to the final step: burning Spotify music files to CD. Once you are ready, you can follow the 6 methods in the next section to burn a CD from Spotify on either Windows or Mac. The CD-burning software to be used for each method is as follows. You can choose the one that suits you the best.
How to Burn Spotify to CD on Windows
Method 1: Burn Spotify Playlist to CD via Windows Media Player
As a Windows user, you can have the third method to burn Spotify songs to CD except for iTunes and ImgBurn. And the third approach is called Windows Media Player, which is a pre-installed application on Windows computers and is quite easy to operate. Follow the steps below, you can learn how to burn a CD from Spotify and listen to Spotify via CDs immediately.
Step 1. Insert a blank CD into the disc drive, launch Windows Media Player on your computer, and create a new playlist for saving Spotify songs by clicking the "Playlist" panel. To transfer Spotify songs, you can click the "Organize" > "Manage Libraries" > "Music" > "Add" option.

Step 2. Click on the "Burn" button in the top right corner and drag and drop the Spotify playlist to the "Burn" list or you can directly choose the "Import Unsaved list" option.
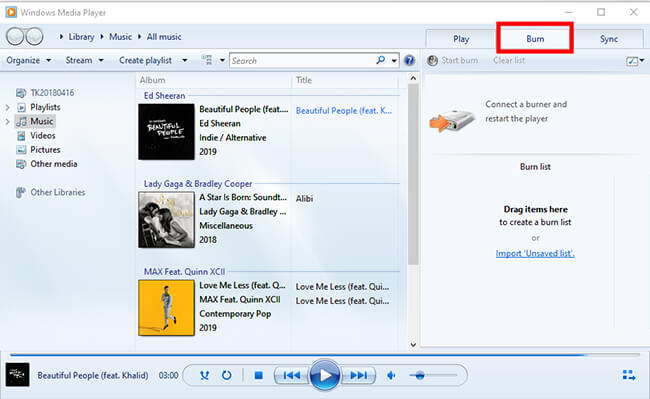
Step 3. Now click the "Menu" button in the Burn panel, then select "Audio CD".

Step 4. After that, you can click the "Start Burn" button to start burning the Spotify playlist to a CD.

Method 2: Burn CDs from Spotify with CDBurnerXP
Compatible with Windows, CDBurnerXP is also a workable CD burner that can help you burn Spotify Music for free. Apart from burning CDs, this tool also can make DVDs and Blu-ray discs for you. Follow the guide to make a CD from Spotify on Windows via CDBurnerXP.
Step 1. Insert a CD drive into your computer, then install CDBurnerXP from its official website to your PC.
Step 2. Choose "Data Disc" or "Audio Disc" to begin your project.
Step 3. Drag and drop the converted MP3 or WAV files into the CDBurnerXP window. Then click "Burn" button. CDBurnerXP will start burning a CD from Spotify.

Method 3: Burn a CD from Spotify Through VLC
VLC is an all-in-one audio and video player, but it can also help you burn songs onto CDs from Spotify. And for your convenience, you can walk through the compiled steps to get started.
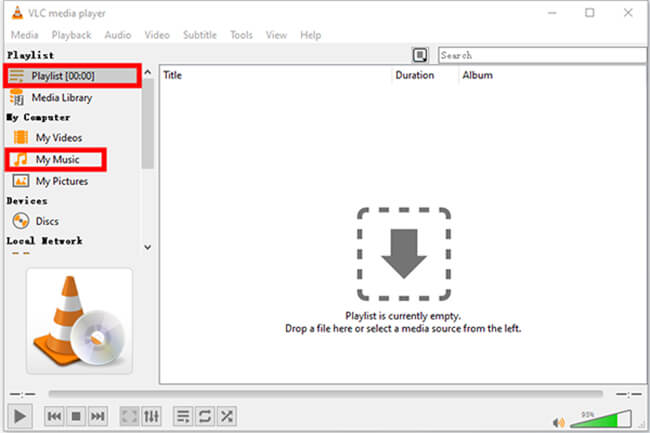
Step 1. Launch VLC on your computer. And then you need to create a new playlist to save Spotify music.
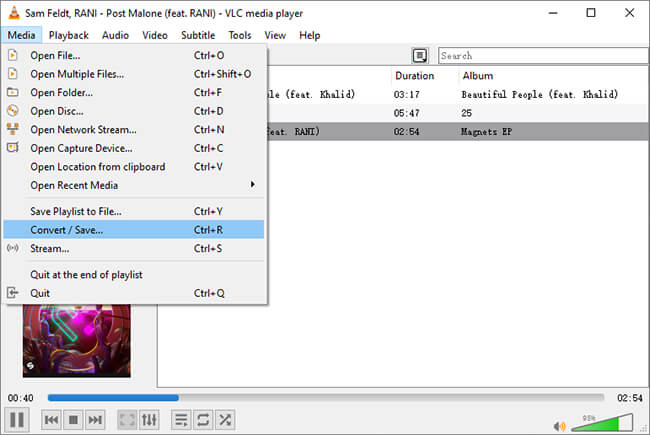
Step 2. Click the "Media" menu, then choose the "Convert/Save" option, where you can do some settings by choosing "File", "Disc", "Network", and "Capture Device".
Step 3. Insert a blank CD into the disc drive of your computer, then click on the "Disc" button and go to the "Audio CD and Browse" button, which allows you to find the CD you've inserted.

Step 4. To customize audio parameters, you can go to "Settings" and choose "Tool" > "Form" > "Audio codec". After that, you can click the "Start" button to burn a CD from Spotify with VLC.
How to Burn Spotify to CD on Mac
Method 1: Burn Spotify Playlist to CD Using Apple Music App
If you are using macOS Catalina or later, the Apple Music app is one of the easiest ways to burn Spotify songs to a CD after converting them to MP3 or WAV files. Once the Spotify tracks are saved locally, you can import them into Apple Music and create an audio CD quickly. Here's how to burn a Spotify playlist to CD using the Apple Music app:
Step 1. Import Converted Spotify Songs into Apple Music
Open the Apple Music app on your Mac. Then click "File" > "Import" and select the converted Spotify songs or playlist folder from your computer.
You can also directly drag and drop the Spotify music files into the Apple Music library.
Step 2. Create a New Playlist
In the left sidebar, click the "+" button and choose "New Playlist". Give the playlist a name, then drag the imported Spotify songs into it.
Step 3. Insert a Blank CD
Insert a blank CD-R or CD-RW into your Mac's internal or external CD drive. Wait for the system to recognize the disc.
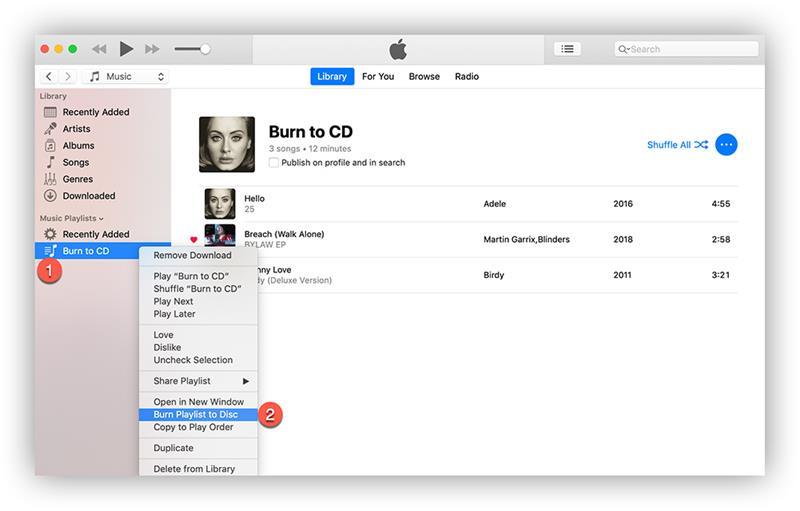
Step 4. Burn Spotify Music to CD
Right-click the playlist you created and select "Burn Playlist to Disc".
In the pop-up window, choose your preferred settings, such as:
- Disc Format: Audio CD, MP3 CD, or Data CD/DVD
- Preferred Speed
- Gap Between Songs
For better compatibility with car stereos and standard CD players, "Audio CD" is recommended. Then, click the "Burn" button to begin burning Spotify songs to the CD. Once the process is complete, you can eject the disc and play it on your car stereo, CD player, or other compatible devices.
Method 2: Burn CD from Spotify on ImgBurn
If you want to seek a more professional application on Mac, then "ImgBurn" in this method and "Burn" in the next method can work for you. The two methods may be more complicated, but detailed instructions have been compiled for your help. And now you can refer to the steps below to burn a CD from Spotify.
Step 1. Download ImgBurn and install it on your computer.
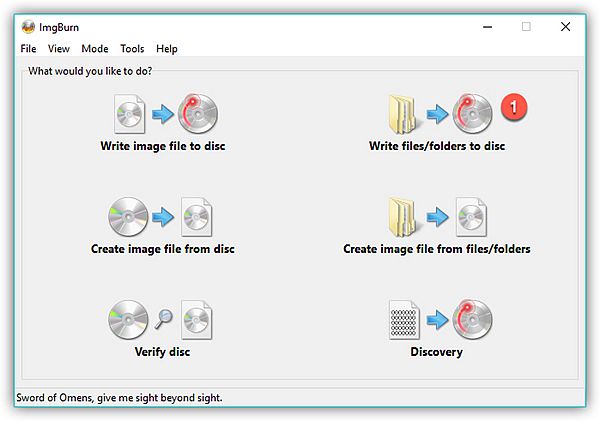
Step 2. Run ImgBurn, insert a blank CD, and click on "Write files/folder to disc" on the main interface of ImgBurn to enter the Burn CD mode.
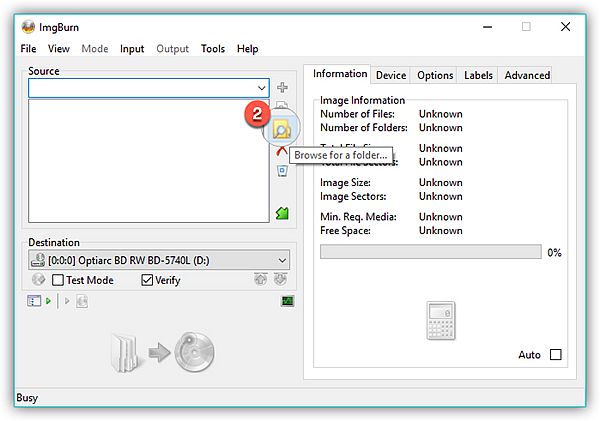
Step 3. Click on "Browse for a folder" to import the converted music folder to get ready for burning the CD from Spotify.
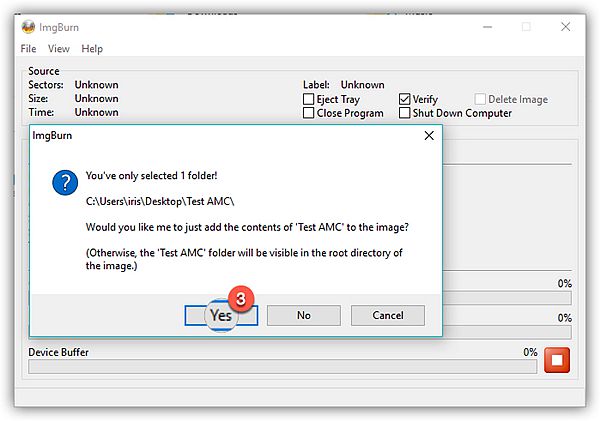
Step 4. Hit the "folder-to-disc-shaped" button to start burning CDs from Spotify. However, before burning CDs, a window will pop up to confirm the folder for CD burning. Please make sure to click "Yes" to move on burn CDs step.
Now, you can just wait for the burning progress to finish, and then you can enjoy Spotify songs with CDs on your TV or even when driving.
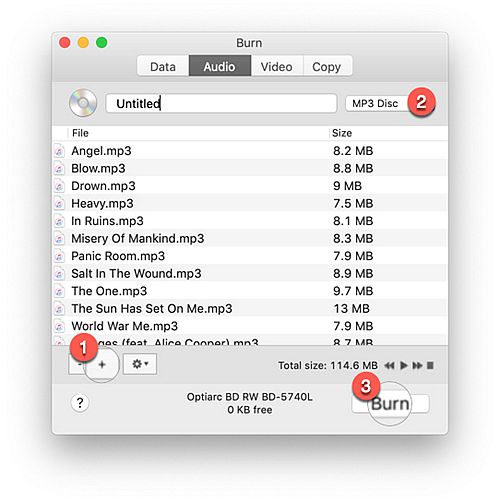
Method 3: Burn Spotify Songs onto a CD with "Burn"
If you are a MacBook user, the specialized "Burn" application is well-designed to help you burn Spotify songs onto a CD. For more specific tutorials, here is how the "Burn" works for you to burn CDs from Spotify Premium.
Step 1. Download Burn on your MacBook or Windows computer and install it for burning.
Step 2. Insert a blank CD into the CD-RW or DVD-RW drive. And onto the main interface of Burn, click the "Audio" and then the "+" button to import your converted Spotify music folder. Then you can click on the Select button to select the CD type from the drop-down list in the top right corner. Here we recommend MP3 Disc or Audio CD for burning a CD.
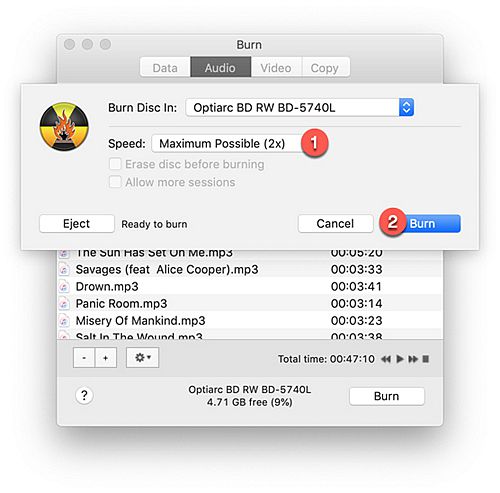
Step 3. Click to Burn and then get ready to burn a CD from Spotify.
Step 4. Select your burning Speed from Maximum Possible and 2X on the pop-up window. Here we recommend choosing Maximum Possible to speed up the whole burning CD progress. Then click the "Burn" button to start burning a CD from Spotify.
Part 4: Common Problems When Burning Spotify Music to CD
When burning Spotify music to a CD, you may occasionally run into issues such as playback errors, failed burns, or compatibility problems. Below are some of the most common problems and practical fixes you can try.
1. Burned CD Won't Play in the Car or CD Player
Some older CD players and car stereos do not support MP3 CDs or unsupported audio formats. You can try the following solutions:
- Choose "Audio CD" instead of "Data CD" when burning
- Use MP3 or WAV files with a 44.1kHz sample rate
- Try using CD-R instead of CD-RW for better compatibility
2. CD Burning Failed or Stopped Midway
Burning may fail because of unstable discs, high burning speed, or insufficient system resources. Check these items may help:
- Use a high-quality blank CD
- Lower the burning speed (such as 4X or 8X)
- Close unnecessary programs during burning
- Make sure your CD/DVD drive works properly
3. The Burned CD Has No Sound or Missing Tracks
Sometimes the CD seems successfully burned, but songs are missing or cannot be played normally.
- Recheck whether the Spotify songs were converted completely
- Ensure the output files are not corrupted
- Avoid interrupting the conversion or burning process
- Try reburning the CD with another burning software
Part 5: FAQs About Buring CD from Spotify
Q1: Which Format to Choose for Burning Spotify to CD: WAV or MP3?
Actually, the answer to this question depends.
The WAV format is a lossless, uncompressed, universally used CD-quality format while MP3 is a compressed music format. And WAV can create seamless loops but the MP3 format can not. That is to say, MP3 will create a small silent gap when songs switch. So for better sound quality and seamless listening, you had better choose WAV for burning.
However, if you take compatibility into consideration, then you may have to prefer the MP3 format. After all, the MP3 format is the most classic and most compatible music format. If your device doesn't support MAV or you want to upload CDs to Spotify or other music platforms for playback, MP3 is the format you can count on.
Q2: How to Import CDs into Spotify for Playback?
You can burn CDs from Spotify. Then can you import CDs into Spotify for playback? The answer is affirmative. All you have to do is prepare your CDs, iTunes, and Spotify. Extract music from CD to iTunes, then add songs to Spotify. And here is how it works.
1. Launch iTunes on your computer and insert the CD you want to import to the CD drive of your computer.
2. Click "Yes" on the pop-up window.
3. Click the "Import CD" icon on the top-right. Then choose your import setting and click "OK" to initiate the import process.
4. Once finished, click "Eject". Then go to "File" > "New" > "Playlist" to create a new playlist. Afterward, add the songs from your CD to the playlist.
5. Open Spotify, go to your profile, and select "Settings".
6. Scroll your screen to find the "Show Local Files" and select "iTunes". Then the songs you imported from the CD can be found in the "Local Files" Playlist on Spotify.
Q3: How to Play the CD Burned with Spotify Songs in Your Car?
If your car is equipped with a CD player, you can enjoy CDs burned with Spotify music on the go. Before you start, just find a safe place like a parking lot, and turn on the engine to start your audio system. Then follow the instructions below to get your Spotify playlist CD playing in your car.
1. Gently insert the Spotify playlist CD into the CD player.
2. Then the audio system should automatically recognize the CD and start playing songs. If it fails, just set the CD as the audio source and choose songs to play.
3. You can then check whether all the tracks can be played by using the controls to go through all of them.
4. Once all set, feel free to adjust the volume and customize settings to your needs.
Q4. How Do I Burn a CD from Spotify on a Laptop Without a CD Drive?
If your laptop doesn't have a built-in CD drive, you can purchase an external USB DVD/CD drive. Simply connect it to your laptop via a USB port, and then use the previously mentioned burning method to burn Spotify songs onto a CD.
Conclusion
You can burn a CD from Spotify as long as you convert Spotify tracks to a CD-supported format such as WAV or MP3. And TuneFab Spotify Music Converter is such a helpful tool. After you successfully convert the audio on your computer, you can use any CD burner to finish the burning task.
