

Choosing proper music is very important for creating a wonderful video, which helps enhance the overall atmosphere and attract the audience’s attention. You may want to add Spotify music to Premiere Pro to improve and perfect your video, since Spotify has rich music resources. However, Premiere Pro only accepts songs uploaded as local files, while Spotify downloads are encrypted due to DRM (digital rights management), making these downloads unable to be played and edited on Premiere Pro.
Facing this limitation, how can we get rid of DRM and add Spotify music to Premiere Pro? Don’t worry! In this article, we’ll introduce a powerful tool that can help you to remove DRM from Spotify, and provide detailed steps for adding music from Spotify to Premiere Pro.
Related Article:
Can You Directly Add Spotify Music to Premiere Pro?
Unfortunately, you can’t directly add Spotify music for videos in Adobe Premiere Pro. The core reason leading to it results from the fact that Spotify has adopted DRM encryption technique to protect its streaming content, which will prevent you from downloading and exporting Spotify Music for using outside the official platform.
Even you have subscribe to a Spotify Premium membership and can download Spotify songs for streaming offline, it doesn’t mean that you can extract the songs and use them as you wish - The downloaded Spotify songs are encoded in Ogg Vorbis format with DRM protection, which Premiere Pro can’t recognize or support at all.
Therefore, to add Spotify Music to Premiere Pro, you need to bypass the obstacle brought by DRM and convert Spotify songs to the formats that Premiere Pro can support. For such a purpose, a third-party program to remove DRM is a must. Please keep reading and get the best tool to help.
How to Get DRM-Free Music from Spotify to Premiere Pro
As mentioned, Spotify local files not playing or being used directly since the music files are encrypted, the priority you should do is to remove DRM from Spotify songs first. For now, the best option to get DRM-free Spotify songs can be using TuneFab Spotify Music Converter.
TuneFab Spotify Music Converter delivers a powerful DRM decryption and music encoding solution, which can help you download and convert Spotify songs to DRM-free audio formats such as MP3, M4A, and so forth that can be fully compatible with Premiere Pro. With the official Spotify player directly embedded inside the software, you can directly access all music resources and download Spotify songs even without premium.
With advanced music encoding techniques equipped, TuneFab Spotify Music Converter will retain Spotify lossless quality to export Spotify Music as local audio files (at up to 320Kbps audio quality), ensuring the best condition for later editing in Premiere Pro, allowing you to create awesome outputs effortlessly.
Key Features of TuneFab Spotify Music Converter
- Support full Spotify resources – it can download songs, albums, and playlists from Spotify without Premium
- Diverse formats available - MP3, M4A, WAV, FLAC, AIFF, AAC, and ALAC
- High sound quality – downloaded songs are kept near lossless
- Fast speed – the downloading and converting speed can reach up to 35X
- Great Compatibility - support Windows and macOS
Now, let’s see how to download and convert Spotify songs with TuneFab Spotify Music Converter step by step!
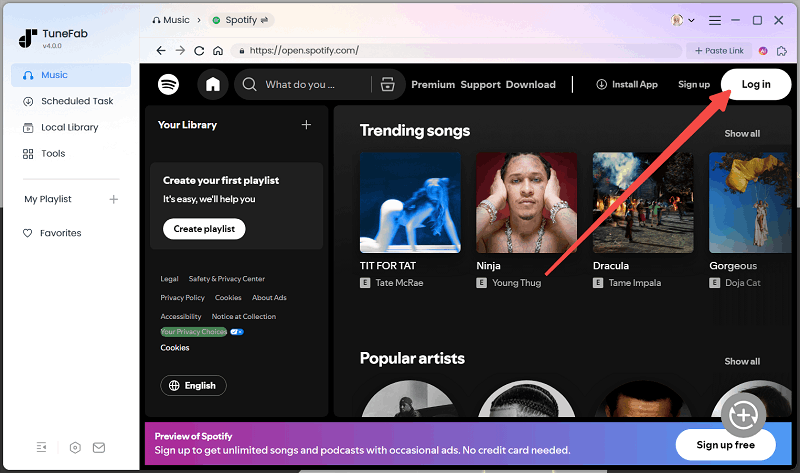
Step 1. Log into Spotify Web Player in TuneFab
First, install TuneFab Spotify Music Converter on your computer. When you run the program and select Spotify from the main feed, you will enter the embedded Spotify web player. Please use your Spotify credentials to log in to prevent unstable conversion and music recognition failure.
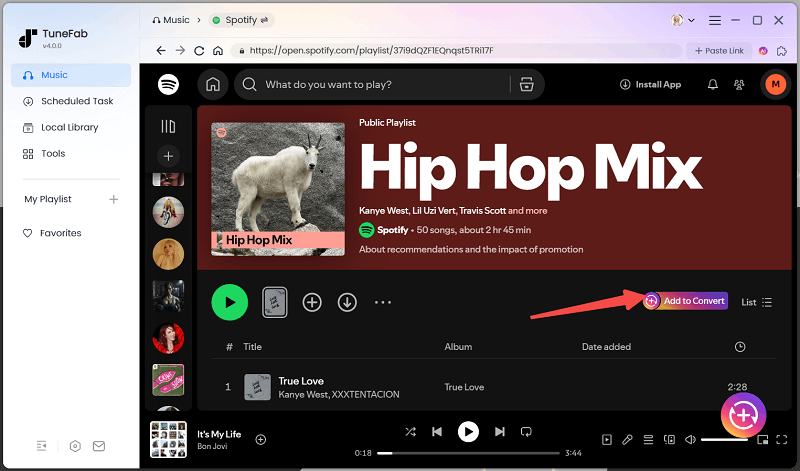
Step 2. Add Spotify Music to Download
In the web player, you can browse the tracks you need for extracting to Premiere Pro for editing later. Simply open the song information page and tap the Add to Convert button, the conversion window will pop up instantly.
Step 3. Customize Parameters to Download Spotify Songs
When the conversion window shows up, you can personalize both the Format and Quality settings (including both the SampleRate and Bitrate) in your preference. You can select the format supported by Premiere Pro, including MP3, AAC, or WAV.

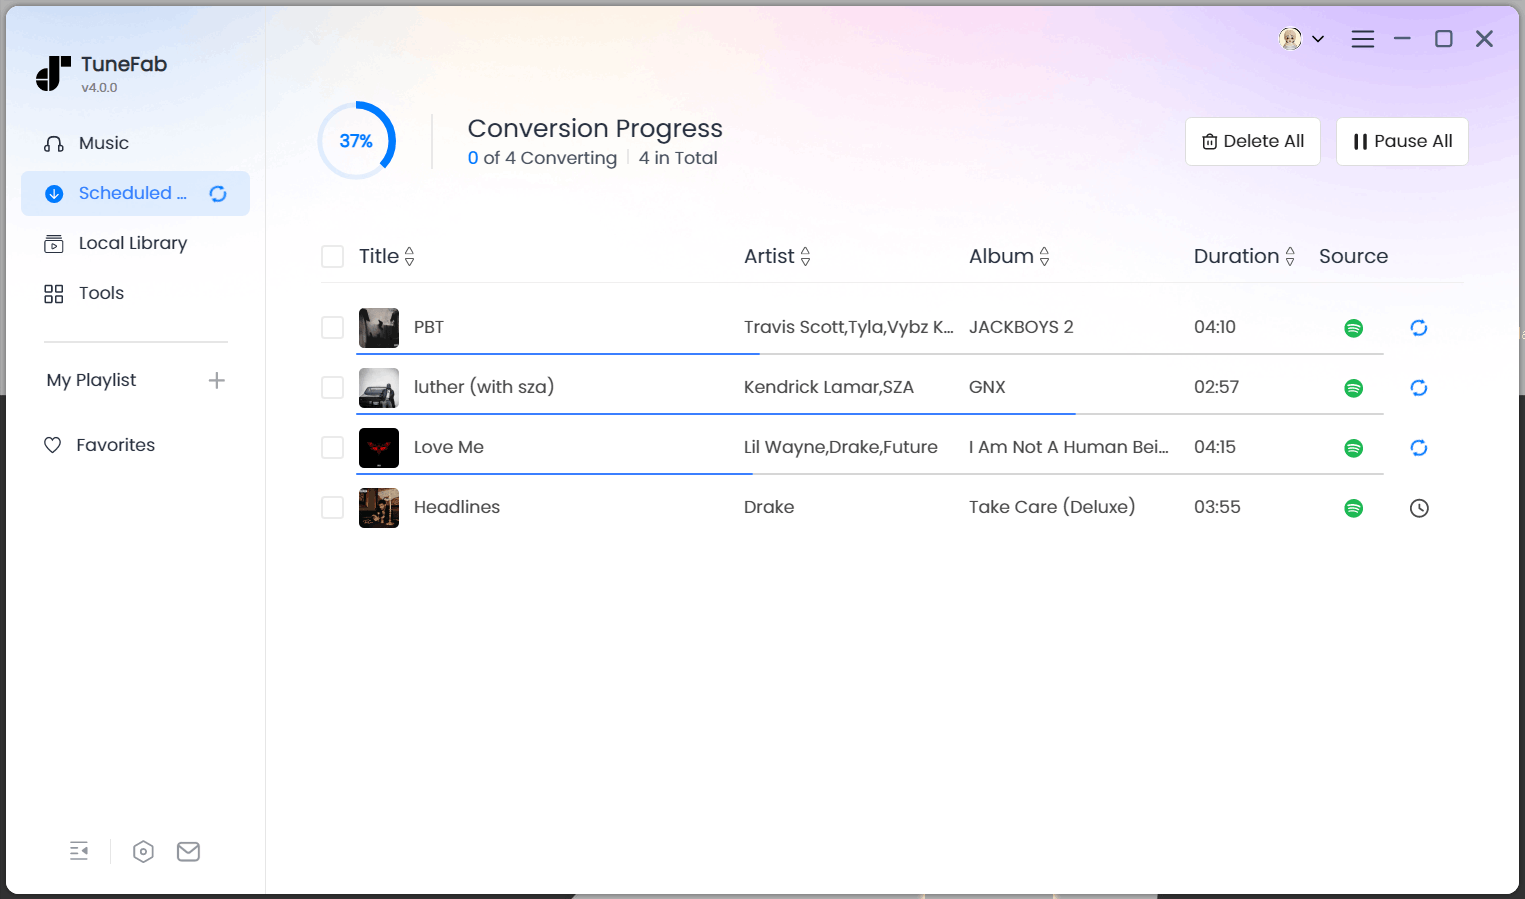
Step 4. Download Spotify Songs As Local Files
Eventually, when all parameter settings are completed, directly click on the Convert Now button to download Spotify songs in no time. Once complete, you can get your favorite tracks as local files offline.
Learn more about the best streaming music converter for content creators.
How to Import Music from Spotify to Premiere Pro
Now, you’ve successfully downloaded DRM-free music from Spotify. From here, the only task is to import songs to Premiere Pro. In this section, we will guide you with step-by-step instructions, to support you in adding your favorite Spotify track to your video project on Premiere Pro.
STEP 1. Launch Premiere Pro
Open Premiere Pro and create/import your video project.
STEP 2. Access Media Browser
On top of the interface, tap "Audio" to enter the Audio workspace. In this section, choose "Window" > "Media Browser" to access the Media Browser panel, so that you can view and choose your local music files.
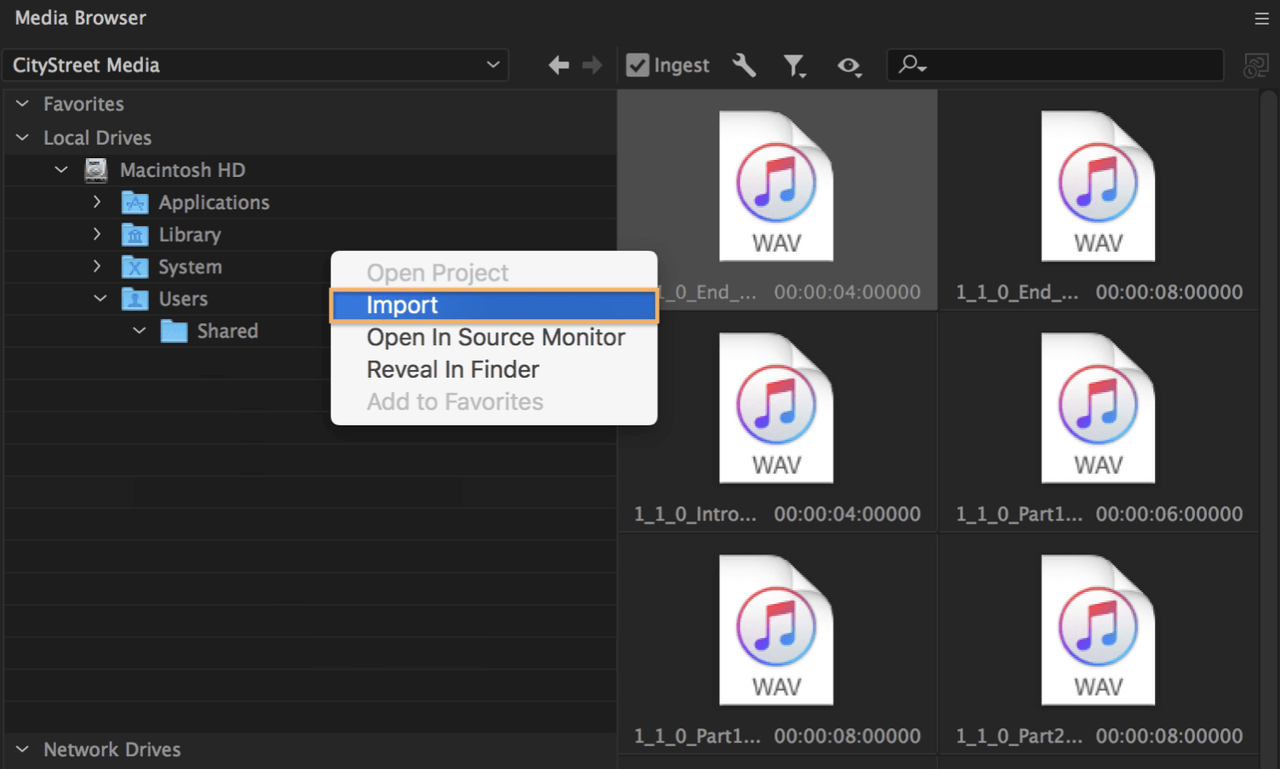
STEP 3. Locate and Import Converted Spotify Files
In the Media Browser, double-click to open the folder which includes the downloaded Spotify music file you need. Right-click (Windows) or control-click (macOS) the file and tap "Import" to add it to the Project panel.
STEP 4. Add Spotify Music to Premiere Pro
To add the source to your video, you need to go to "Window" > "Project" to access the Project panel. The latest added resource will be pre-selected in the Source panel. You can also double-click to open the music file and play it to check if it’s the one you need, and then drag it to the Timeline panel and below the video track that you’re editing.
The whole process of importing music from Spotify to Premiere Pro is now completed! After you add the music to the editing video in Premiere Pro, you can edit it to make your work perfect.
Tips for Editing Music on Premiere Pro
To ensure that you can get a more professional output by editing music in Premiere Pro, here are some useful tips available for you to edit download Spotify songs after getting them as local MP3 or WAV files offline. Now, get these practical tips and have a try:
- Use keyframes for precise volume control: Add keyframes to use the built-in Audio Track Mixer and adjust music levels during dialogue and transitions.
- Cut and sync to the beat: Trim or split the track to match important visual moments, ensuring the rhythm complements the scene.
- Apply audio transitions: Smooth out cuts between music clips using crossfades or exponential fades for a natural flow.
- Balance sound levels: Use the Audio Track Mixer to maintain consistent loudness between background music, voiceovers, and sound effects.
- Experiment with effects: Add reverb, EQ, or pitch adjustments to make your soundtrack more dynamic and cinematic.
By following these tips, you can make your Premiere Pro projects sound as polished as they look - turning ordinary background music into a powerful storytelling tool.
FAQs About Adding Spotify Music to Premiere Pro
Before ending the post, grab if you still have some problems that can be answered by the FAQs below:
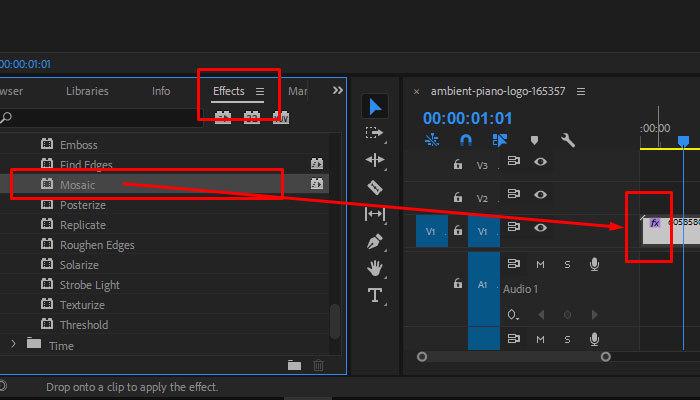
How to add effects in Premiere Pro?
To add audio effects in Premiere Pro, simply follow the easy guide below:
Step 1. Select your audio clip on the timeline, and go to the Effects panel.
Step 2. Browse under Audio Effects. In this module, you can drag and drop effects such as Reverb, DeNoise, EQ, or Highpass onto your clip in your preference.
Step 3. Subsequently, open the Effect Controls panel to fine-tune each setting. Experimenting with audio effects can make your Spotify music sound more cinematic, balanced, and immersive in your final video.
How to edit audio tracks in Premiere Pro?
Editing audio tracks in Premiere Pro can be even more straightforward:
- You can trim, cut, and rearrange your music clips directly on the timeline to match your video’s pacing.
- Use keyframes to adjust volume levels at specific points or add fade-in and fade-out transitions for smoother changes.
- The Audio Track Mixer also allows you to control multiple tracks at once, ensuring your background music, sound effects, and voiceovers blend harmoniously.
With these tools, you can turn Spotify songs into perfectly timed and professionally mixed soundtracks for your videos.
Summary
Surely, it is frustrating that encrypted Spotify music can not be added to Premiere Pro. With an appropriate tool, you can easily convert and download music from Spotify and import it to Premiere Pro as a DRM-free local file. To deal with the limitation, we highly recommend TuneFab Spotify Music Converter which can save your time and effort.
Whether you are a Spotify user or a Free user, you are allowed to get DRM-free Spotify music in perfect quality so that you can freely import downloaded Spotify files to Premiere Pro. A free trial is now available. If you’re interested in it, you can download it and give it a try.
