

Quick Overview: Can you add Spotify music to iMovie? How to do it?
Yes, but you can not directly add Spotify music to iMovie due to DRM protection. To do so, you can try 2 workable methods:
1. Use a Spotify music converter to convert songs from Spotify to high-quality MP3 or other compatible format.
100% Secure
100% Secure
2. Screen record the Spotify audio on your device.
After that, you can easily import DRM-free MP3 music to iMovie from Spotify.
Adding your favorite Spotify tracks to your iMovie project can elevate your video editing game. However, Spotify Music is protected by DRM, which restricts its use outside of the Spotify app. Since iMovie only supports standard audio formats (MP3, MP4, WAV, AAC, AIFF, BWF, CAF, and RF64), you can't directly import Spotify's DRM-protected songs.
But don't worry! In this guide, we will show you two workable methods to remove Spotify DRM, allowing you to easily add Spotify music to your iMovie videos. The steps are straightforward for both beginners and professionals. Let's get started!
Why Can't You Directly Add Spotify Song to iMovie?
Importing Spotify music into iMovie for video enhancement or projecting editing is impossible currently. The main reason lies in Digital Rights Management (DRM) protection, which is an encryption technology applied for protecting streaming media. With DRM, all tracks on Spotify are encrypted, which prevents users from directly copying, downloading, or using them outside the Spotify app. Even if you have a Premium account and download songs for offline listening, those files are still locked within the Spotify ecosystem - they aren’t standard audio files like MP3 or WAV that iMovie can recognize.
Except for DRM’s restriction, another reason stops you from adding Spotify songs to iMovie directly should result from the format incompatibility. iMovie allows you to add audio files of MP3, WAV, M4A, and AAC for further editing, but Spotify music is streamed in an encoded format (Ogg Vorbis) and not stored as standalone files. Hence, if you want to download and import Spotify to iMovie, you will need to decrypt DRM protection from Spotify and convert Spotify to MP3 or other iMovie’s supported audio formats in advance.
Method 1: Convert Spotify to MP3, Then Add Them to iMovie
Converting your Spotify songs to MP3 or other files that iMovie will recognize on your local device before actually applying them to iMovie might be the easiest method for you to add some killer tunes from Spotify. Keep in mind that the process may vary slightly depending on the IOS device you are using.
How to Make Spotify Music Compatible with iMovie
As long as your audio file format is compatible with iMovie, you've already won half the battle. The most efficient way to do this is by using a third-party Spotify converter such as TuneFab Spotify Music Converter. This professional and reliable downloader allows you to batch download Spotify music, playlists, albums, and podcasts in MP3, M4A, WAV, FLAC, AIFF, AAC, and ALAC while maintaining lossless quality. Additionally, all music information such as the artist, title, and album name will also be saved while converting.
After the conversion is done, you can add the output songs to iTunes, then you can add them from the song list to your iMovie project.
More remarkable features of TuneFab Spotify Music Converter:
- Fast Conversion Speed: Able to convert Spotify songs at 35x faster speed in batches improves your efficiency (faster network speed and more stable device performance means even faster conversion);
- Personalized Output Settings: The sample rate and bitrate can be customized for different output formats. The sample rate can be adjusted from 22,050Hz to 48,000Hz, and the bitrate from 128kbps to 320kbps;
- ID3 Tags Preservation: Download important information such as song titles, artists, album names, album covers, etc. by embedding it in converted files for easy organization.
- Exceptional Music Listening Experience: Capable of preserving high-quality Spotify music in up to 320kbps MP3.
- User-friendly Interface Design: The arrangement of the menu and the buttons is succinct, enabling users to effortlessly navigate and locate the desired functions by simply clicking a few times.
After the introduction, let's read on and see how to make Spotify music compatible with iMovie in 4 steps using TuneFab Spotify Music Converter:
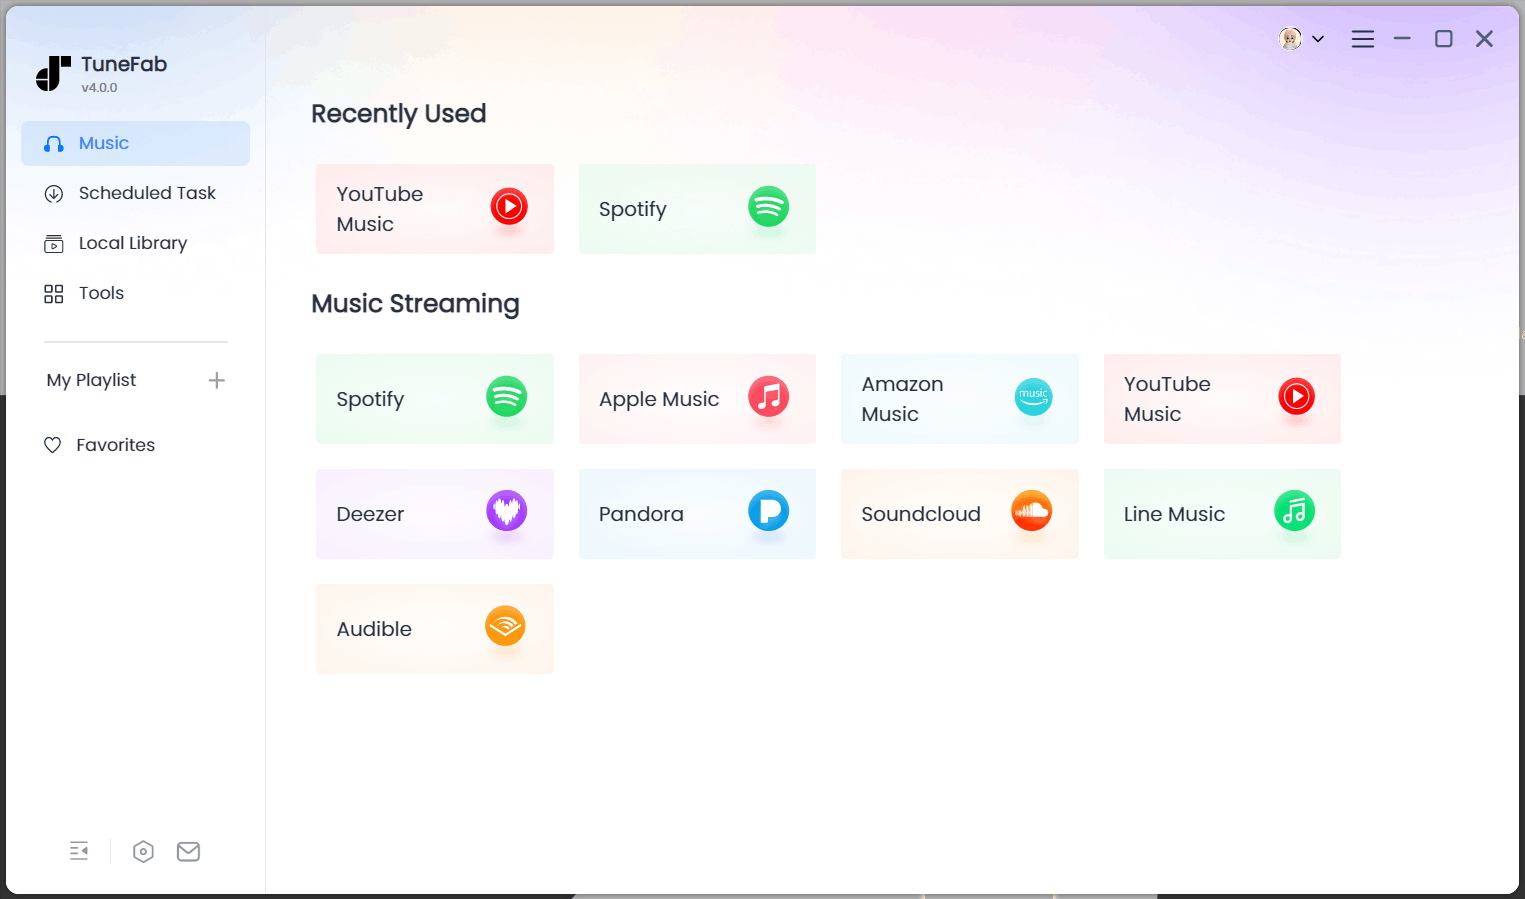
Step 1. Launch TuneFab Spotify Music Converter
After installing the software from the official website, run it and select Spotify from the home page. When the built-in Spotify web player is opened, you are recommended to log in via your Spotify account.
NOTE: Using a free account to log in is possible. You can also skip the login process but the music recognization accuracy and conversion success rate will be affected.
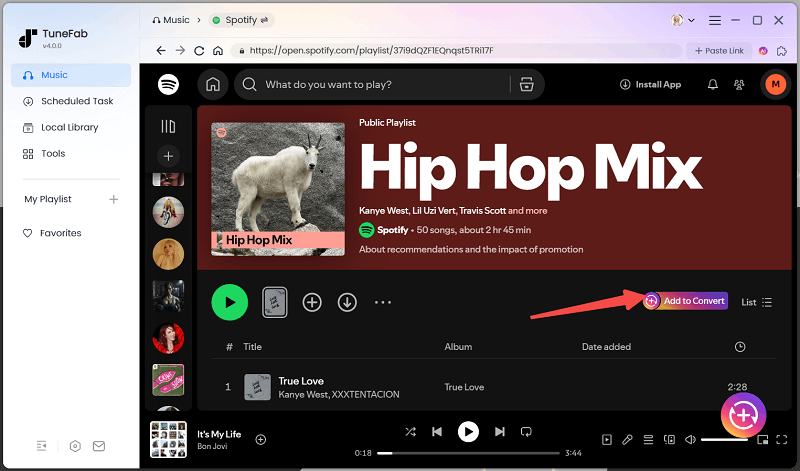
Step 2. Add Spotify Music to Convert
Now, browse the web player and select tracks, playlists, or albums you want to download for later importing to iMovie. Directly tap the "Add to Convert" button or the "+" icon in the playlist page. Then TuneFab Spotify Music Converter will detect the playlist for you.
Step 3. Set Up Output Format and Audio Parameters
Once the pop-up window appears, you are able to select songs you’d like to download. In addition, customizing audio parameters like selecting output format and adjusting quality settings (including both the sample rate and bitrate) can be done here.
NOTE: As iMovie supports MP3, WAV, M4A, and AAC audio formats, you are able to select any of them as you desire.

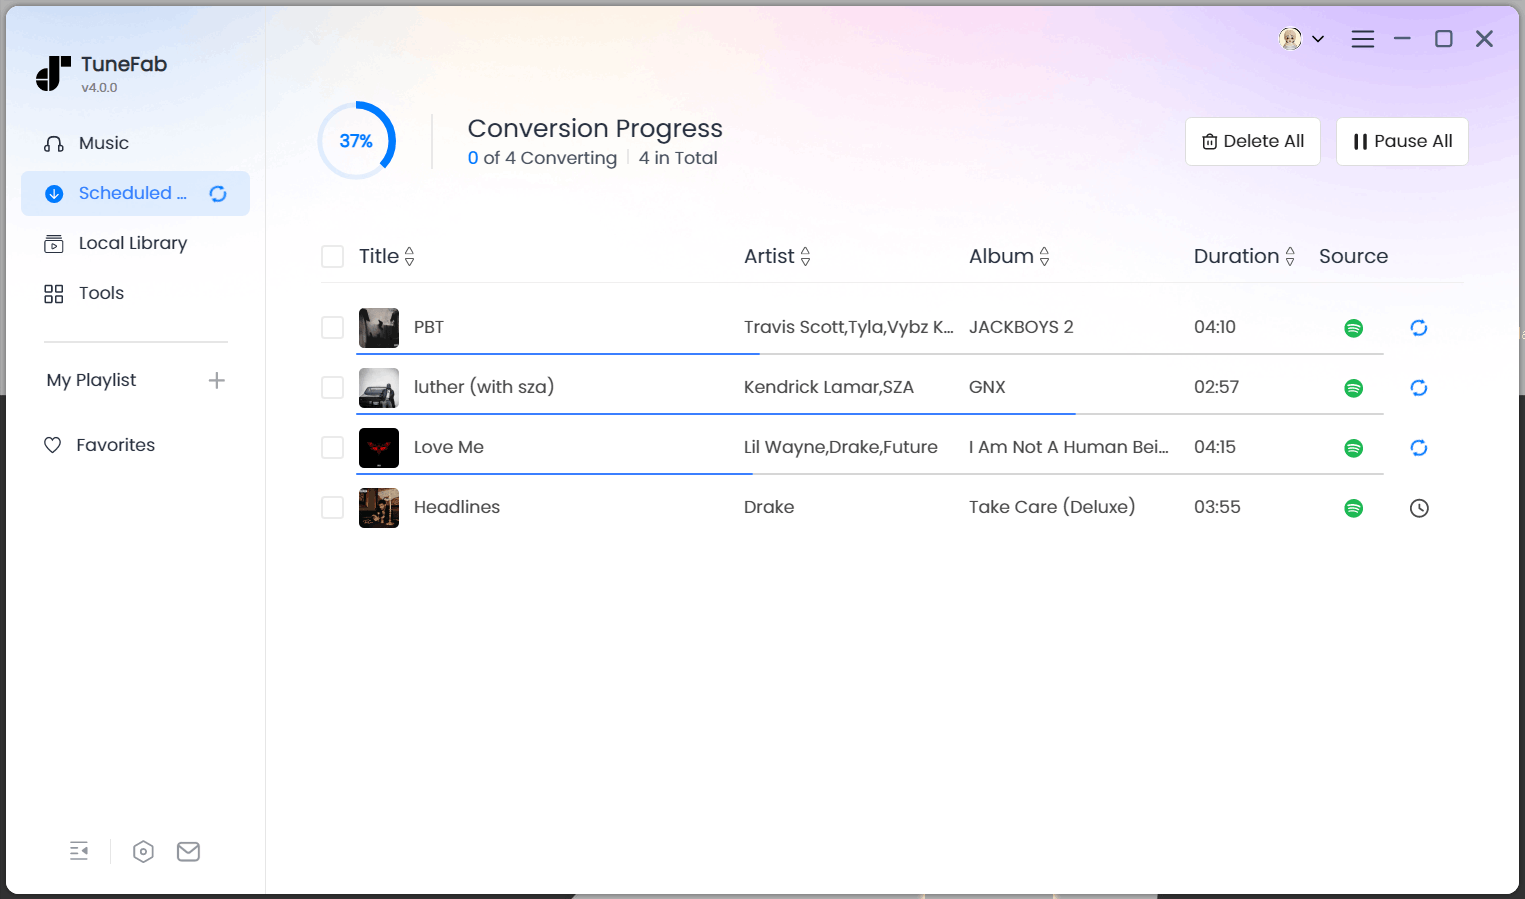
Step 4. Download Spotify Songs in an iMovie-Compatible Format
Finally, simply tap the "Convert Now" option in the upper-right place of the window, TuneFab Spotify Music Converter will process the conversion and download Spotify to your selected format right away. Once the songs are downloaded, you are able to directly import them to iMovie for further project editing without any limitation!
For more information about downloading Spotify Music to your local device, you can refer to:
- How to Convert Spotify Song/Playlist to MP3 (7 Helpful Ways)
- How to Download Music from Spotify to Computer [3 Methods]
How to Add Spotify Music to iMovie on Mac
Now that you have converted Spotify music to MP3 or other iMovie’s compatible formats, the most challenging part is gone. If you are using a Macbook and trying to add Spotify Music to iMovie on it. There are two ways to do that.
TIP #1. Add your local Spotify music directly to iMovie
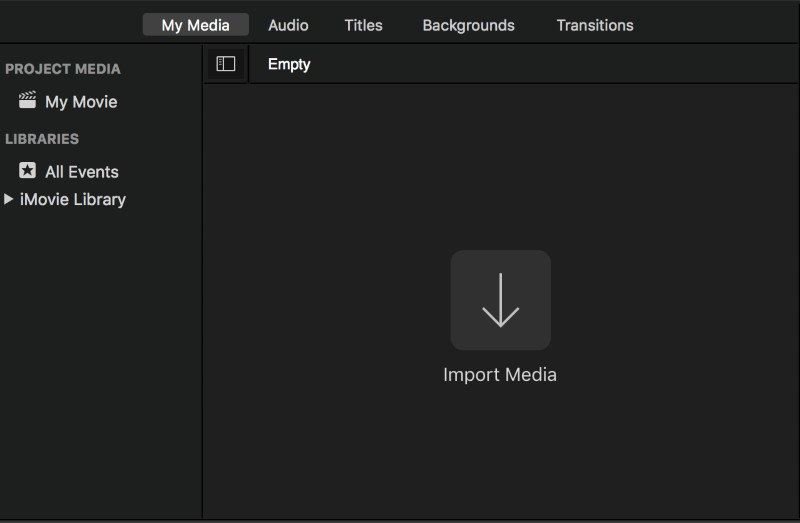
Open iMovie > Click "Create New" in the project browser > Tap"Import Media" > Locate local Spotify songs > Select and add them to the project
TIP #2. Upload to iTunes first and then synchronize with iMovie
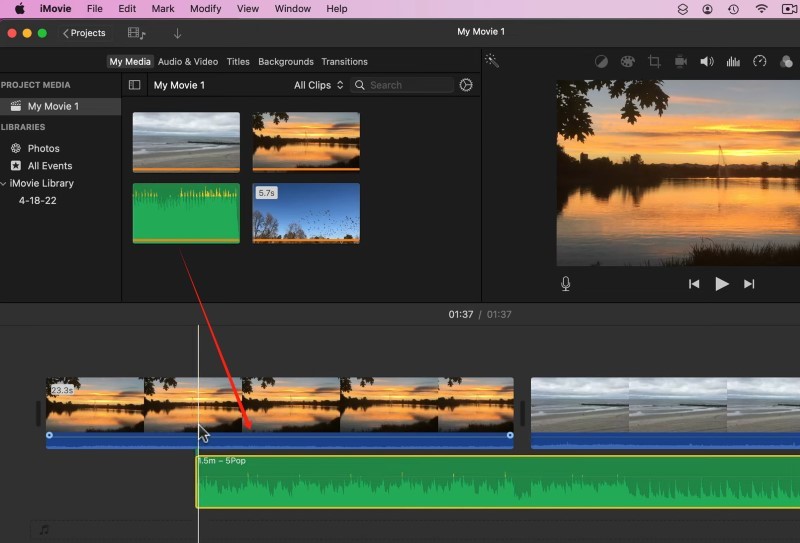
Transfer the music to iTunes library > Open iMovie > Click on"Audio" > Select"Music" > Click"Play" to preview the target music > Drag and drop your Spotify song/songs to the timeline
Note: iTunes is not available on macOS 10.15 Catalina and above. If you are one of these users, you can first import a group of downloaded Spotify songs to Apple Music and then add them to iMovie.
How to Add Music from Spotify to iMovie on iPhone/iPad
After converting your Spotify songs to MP3 format, adding them to your iMovie project on an iPhone or iPad is pretty straightforward. If you are in the market, here are the steps to add background music to your iMovie video from Spotify:
Step 1. Sync your converted Spotify music to your iPhone/iPad using iTunes on PC.
Step 2. Tap on "Create Project", and open the project in the iMovie timeline.
Step 3. Press the add media button, which is displayed as "+" on the left.
Step 4. Locate "Audio", go to "My Music", and look for the Spotify songs you want to add.
Step 5. Click on the play button next to each song to preview.
Step 6. Hit the add audio icon "+" next to each song, and add them to the project.
Method 2: Screen Record Spotify and Add the Recordings to iMovie
Actually, there's another way to save Spotify music besides downloading and converting. If you just want to use the climax of a song or your favorite part as background music, you can simply use the screen recording function of an iPhone/iPad to record and save Spotify music locally. After that, you can transfer the saved music to iMovie. The basic steps for the two major parts are listed below:
How to Screen Record Spotify Songs on Your iPhone/iPad
Step 1. Select "Settings", scroll down until you catch "Control Center", and click on it.
Step 2. Entering the control center, check and see if "Screen Recording" is listed under "INCLUDED CONTROLS".
Step 3. After checking up, open Spotify on your device, find and select the song you want to use in iMovie.
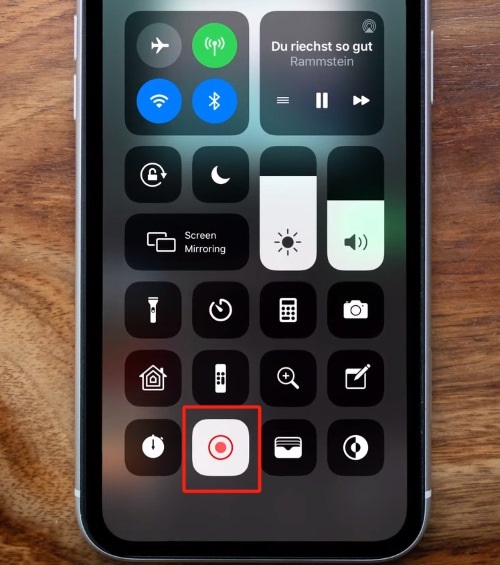
Step 4. Swipe up from the bottom of the screen, bring up the control center, and press the screen recording button.
Step 5. Click "stop recording" when you are done, and your recorded Spotify music is now stored on your device.
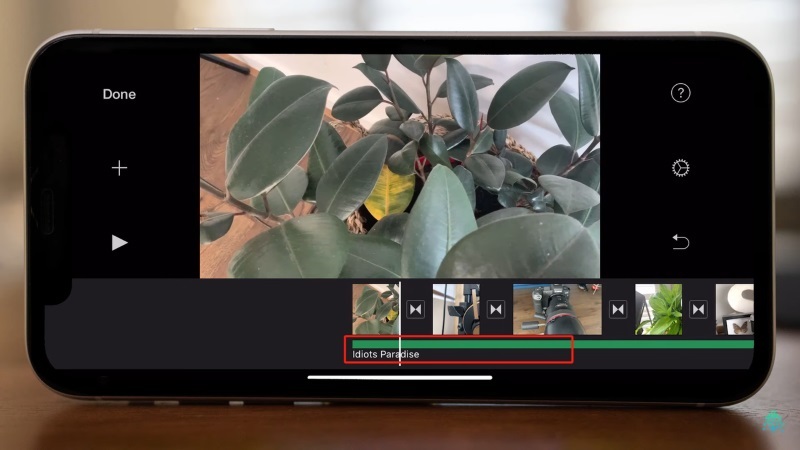
How to Add Your Screen Recording to iMovie
Once you get the Spotify recording clips, simply follow the brief guide below to add them to iMovie for video editing:
Step 1. Open the iMovie project on your device used for screen-record your Spotify music
Step 2. Hit the Add Media button and navigate to the place where you keep the screen recording.
Step 3. Choose your target screen recording, click on the three dots, and select "Audio Only".
Note: However, this method has certain shortcomings. For example, the whole process can be relatively time-consuming, and it is unlikely to get high-quality audio for your listening experience. So to get your satisfactory Spotify Music with relatively high efficiency, it's best to use TuneFab Spotify Music Converter.
Tips for Editing Spotify Music in iMovie
When you’ve successfully converted Spotify songs into iMovie-compatible formats like MP3, M4A, or WAV, you can import them to iMovie and start editing the video projects freely in the app. However, to make your music fit perfectly with your visuals, here are some practical techniques you can try to create professional, well-balanced soundtracks using Spotify music in iMovie:
- Trim and cut precisely: Use iMovie’s timeline tools to shorten or split Spotify tracks to match the length and rhythm of your video scenes.
- Adjust volume levels: Lower or raise the music volume to ensure clear dialogue and a balanced overall sound.
- Use fade-in and fade-out effects: Smooth transitions help your video feel more natural and professional.
- Sync music with visuals: Align beats or tempo changes with specific moments in your clips to enhance emotional impact.
- Add multiple audio layers: Combine Spotify music with voiceovers or sound effects for a richer sound design.
Following these editing tips can help your Spotify music blends seamlessly with your iMovie project, making the output results to be more amazing.
FAQs on How to Add Music to iMovie from Spotify
Q1. Can you export music from Spotify?
Yes, but you will need help like using a downloader or screen recorder. If you don’t take use of third-party software to remove Spotify DRM in advance, you will surely fail to export music from Spotify. As DRM has encrypted the streaming media, preventing you from copying, downloading, or extracting them outside the Spotify app, it won’t be possible for you to directly get the songs saved as common audio files. Hence, to get music from Spotify and save the songs as independent audio files, you will need extra help to unlock DRM protection first. For such a purpose, professional music converters like TuneFab Spotify Music Converter can help.
Q2. How do I transfer converted MP3 files from my computer to my iPhone/iPad?
To get Spotify downloads to your iPhone or iPad from your computer, use iTunes (or Finder on macOS Catalina and later). Connect your device to your computer, open iTunes or Finder, select your device, go to the "Music" tab, and choose "Sync Music." Drag the MP3 files into the music library and sync your device to transfer the files. Alternatively, you can use cloud services like iCloud Drive or third-party programs like FonePaw DoTrans to transfer MP3 files to your iPhone/iPad.
Q3. Is it legal to add Spotify songs to iMovie?
It depends. Adding Spotify songs to iMovie for personal use is generally acceptable, but using them for commercial purposes or distributing the video with Spotify music could violate copyright laws and Spotify's terms of service. Always ensure you have the proper rights or permissions for any commercial use.
Q4. Why is there no sound after adding Spotify songs to iMovie?
If you import Spotify to iMovie but just find the music is muted and no sound can be heard, check if the volume is set to be muted or too low. You need to improve the volume and unmute the track so the sound will come out again.
Conclusion
So there you have it - two different ways to add your favorite Spotify songs and playlists to your iMovie projects. Meanwhile, thanks to TuneFab Spotify Music Converter, you can get high-quality Spotify songs (protection removed) that are compatible with iMovie in just a few clicks at 35x faster speed.
Now, you're all set to start adding some music to your iMovie masterpiece today!
