

iCloud Music Library would be a great place for you to store your iTunes or Apple Music. If you have changed a new iPhone such as the iPhone 8 Plus or iPhone X, you can get the iTunes or Apple Music which have stored in iCloud Music Library easily if you enable iCloud Music Library on your new iPhone. But sometimes when you are enabling iCloud Music Library, it would give out a notice that "iCloud Music Library Can’t be Enabled". How to solve this problem? Here you can get two tips to solve it.
Re-enable iCloud Music Library Again
Firstly, if you are new to enable iCloud Music Library on iOS 11, follow the steps below to see whether you could enable iCloud Music Library.
Step 1. Go to Settings > Music.
Step 2. Tap on "iCloud Music Library".
Note: On iOS 11, only when you have subscribed for Apple Music Membership will "iCloud Music Library" option appear.
Step 3. Click on "Keep Music", then the iCloud Music Library could be enabled successfully.
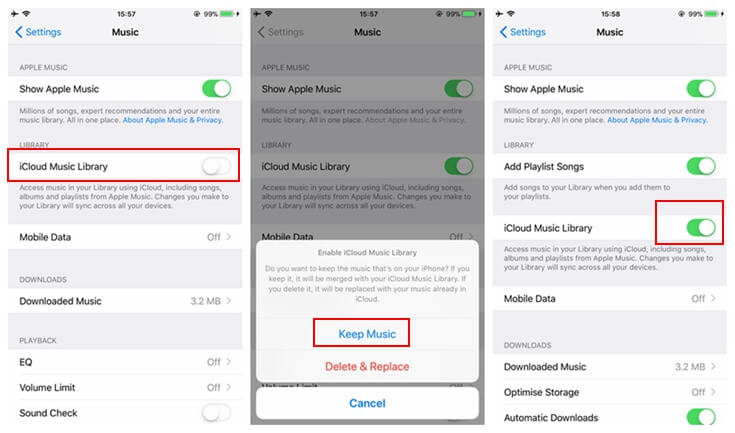
If you get the notice that "iCloud Music Library Can't be Enabled", firstly, you could try to negative your iCloud account and login again. Secondly, check if your iCloud Library still has enough space, then go to Settings > Music to enable iCloud Music Library again. Repeat these steps if it keeps failing.
Save iTunes/Apple Music Without Using iCloud Music Library
If your iCloud storage has no much free space or you are failing to enable iCloud Music Library constantly, you can try another method to save iTunes/Apple Music. But a problem would confuse most people, that is Apple Music and some music files in iTunes are protected by DRM (Digital Rights Management). To save the music outside iTunes Library, you have to remove DRM from these iTunes/Apple Music.
Here you can use TuneFab Apple Music Converter to finish the DRM removal job. TuneFab Apple Music Converter provides the high conversion speed (up to 16X faster) and high quality of converting the iTunes/Apple Music into DRM-free ones. TuneFab Apple Music Converter provides the free trial version to both Windows and Mac users, so you can experience it without any cost.
To use TuneFab Apple Music Converter to rip DRM from DRM-protected iTunes/Apple Music, you can follow the steps below:
Step 1. Download and Install TuneFab Apple Music Converter
Click on the download button above to download TuneFab Apple Music Converter, then install it to your PC.
Step 2. Select DRM-protect iTunes/Apple Music
Run TuneFab Apple Music Converter. The program would connect to your latest iTunes and detect your music library. You are able to select the DRM-ed iTunes/Apple Music that you want to save in Playlists > Music directly and tick them out.
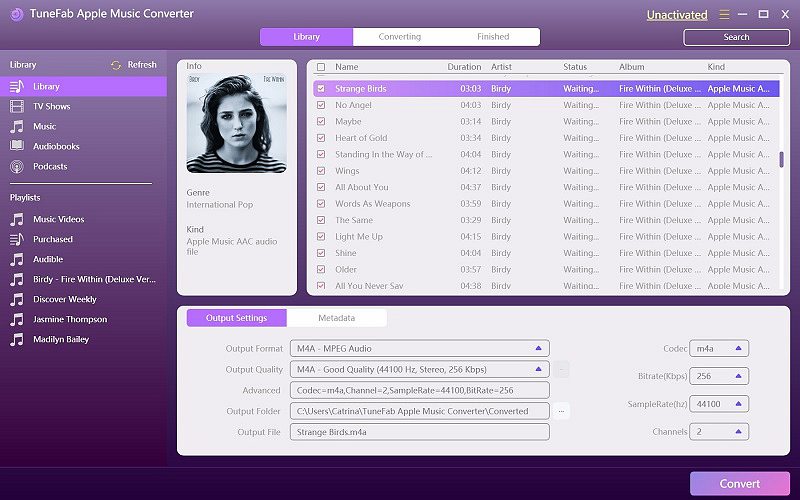
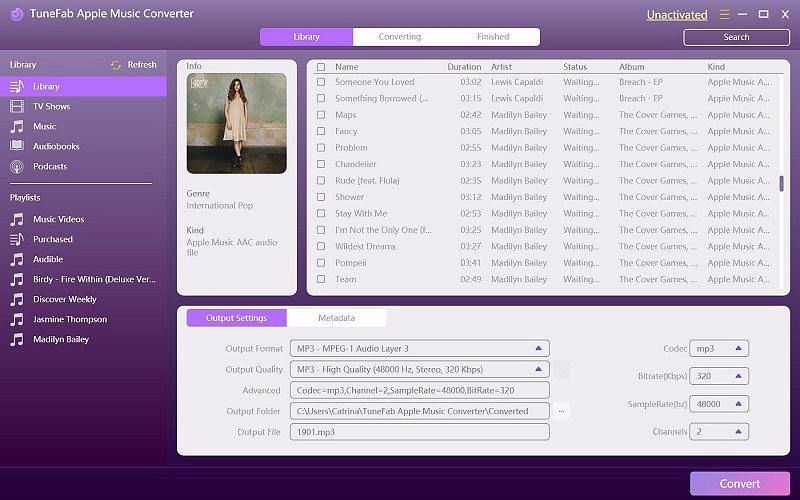
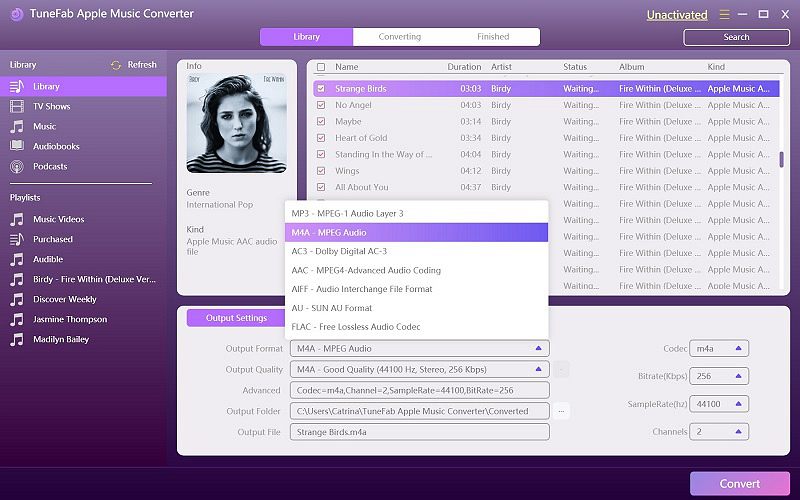
Step 3. Output Settings
Under the selection box, you can amend the output format and select the output folder to save the converted iTunes/Apple Music songs you have selected.
Step 4. General Settings
On the interface of TuneFab Apple Music Converter, click on Options and you would go to General Settings. Here is where we could amend the conversion speed. You can choose the speed from 1X to 16X according to your need.

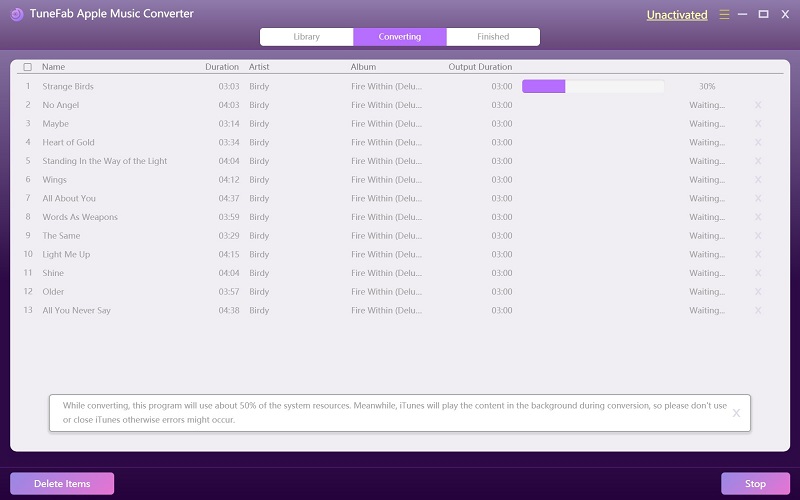
Step 5. Convert the Music
The last step is to start removing DRM from these select DRM-ed iTunes/Apple Music. Click on "Convert" to start conversion. The DRM of the selected songs would be ripped in few minutes.
When you get the DRM-free iTunes/Apple Music, you are able to upload them to your iTunes Library again and save them freely on any of your devices or media players, because they have been DRM-free. You can also backup them onto your computer to prevent the data losing of your iPhone. With this method, you could keep these iTunes/Apple Music as long as you like without any limitation, and also fix the problem that iCloud Music Library fails to be enabled. Why not have a try?
Other Problems You May Meet...
