

As we all know, Apple Inc. has hardly ever offered services on Android, but here is an exception, Apple Music. As Apple Music wants to compete with Spotify, Amazon Music and Pandora, so it is not difficult to understand that Apple Inc. released Apple Music for Android on 2015 as Android is the most widely-used mobile platform. However, there are some differences in the usage of Apple Music for Apple and Android. Here are some instructions that you need to know for getting started with Apple Music on Android.
Part 1. Before You Get Started
Before you get started with Apple Music on Android, you need to make sure you have already prepared well.
#1. Apple Music can only be available for Android devices running Android 4.3 (Jelly Bean) or later. To check your Android version, you can go to "Apps" > "Settings" > "About device" on the Android devices.
#2. Download the Apple Music app from Google Play and then install it on your Android devices.
#3. Create your own Apple ID. To do that, you need to have a valid email address and a strong password.
Part 2. Subscribe to Apple Music on Android
First of all, if you have never joined Apple Music before, then you need to subscribe to Apple Music and you can get three months of free music. To sign up Apple Music on Android, here is what you need to do:
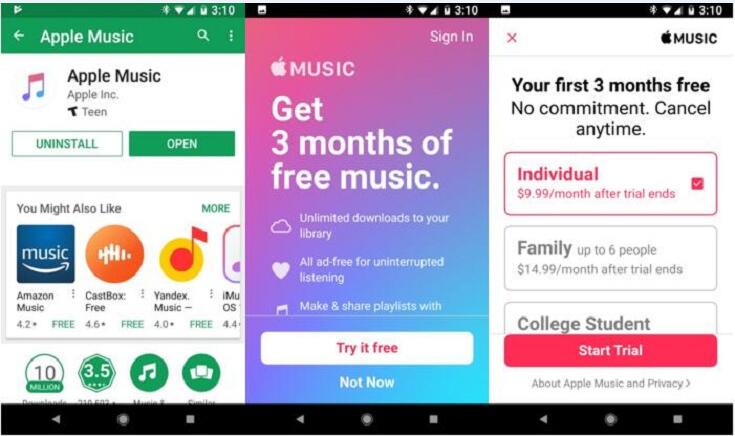
Step 1: Once you launch Apple Music, you will see a screen indicating the benefits of subscribing to Apple Music, just click on "Try it free" button to go to the subscription plan screen.
Step 2: As you can see, there are three options for you to choose: Individual Plan for $9.99/month, Family Plan for $14.99/month and College Student Plan for $4.99/month, just choose one of them according to your need and click on "Start Trial" button.
Step 3: As you have already created your own Apple ID, so directly click on "Use Existing Apple ID" button on the pop-up window, then enter your Apple ID and password and click on "Sign in" button.
Step 4: After that, you will see a pop-up window asking you to verify payment information, just click on "Continue" button.
Step 5: Now you need to choose PayPal or Credit/Debit Card as your payment method. If you select Credit/Debit Card, then you are supposed to enter the card information and billing address.
Step 6: At last, click on "Agree" button to agree to the terms of the subscription.
Part 3. Choose Genres and Artists That You Like on Android
Apple Music features "For You" section which offers personalized music recommendations and mixes, so it's important to choose the artists and genres that you like when you first joined Apple Music.
To choose genres:
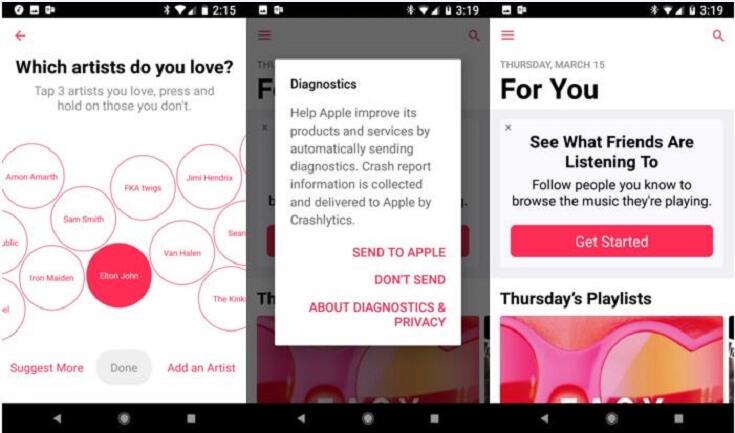
After you click on "Agree" button, you need to choose your favorite genres, the genres that you selected will be turned into red. Then click on "Next" button to choose artists.
To choose artists:
After that, choose the artist that you like on the screen or click on "Add an artist" button to add your favorite artist, then click on "Next" and "Send to Apple" buttons.
Tell us what you love or dislike:
While you listen to a song, click on the player at the bottom to open the Now Playing screen, then click on the three-dot button and choose like or dislike button.
Part 4. Create and Share a Playlist on Android
Except enjoying others' playlists, you can also create and share your own playlist on Android devices.
Step 1: When you want to add a song to your playlist, long press on the song and then click on "Add to a Playlist" > "New Playlist".
Step 2: Input the name, description and cover image of your playlist, then click on "+" to search or browse songs. Check the song that you want to add it to the playlist and then click on the tick button twice.
Step 3: After you create your playlist, don't forget to turn on "Show on My Profile and in Search" to make your playlist public so that others can find your playlist on Apple Music.
Part 5. Download Apple Music Tracks to MP3
Though Apple Music is really an excellent music streaming service, some of you may want to cancel the Apple Music subscription for your own reasons. However, once you cancel the subscription, you won't be able to enjoy Apple Music tracks that you downloaded before because of DRM protection. To avoid that happen, you can download Apple Music to MP3 with TuneFab Apple Music Converter before you cancel the subscription.
TuneFab Apple Music Converter is dedicated for removing DRM from Apple Music and converting them to 8 common audio formats such as MP3, FLAC, AIFF and M4A so that you can enjoy Apple Music tracks on multiple devices. Moreover, it is also an professional AAX to MP3 converter. It's so easy to download Apple Music to MP3 with TuneFab Apple Music Converter.
Step 1: Download TuneFab Apple Music Converter by clicking on the download button below.
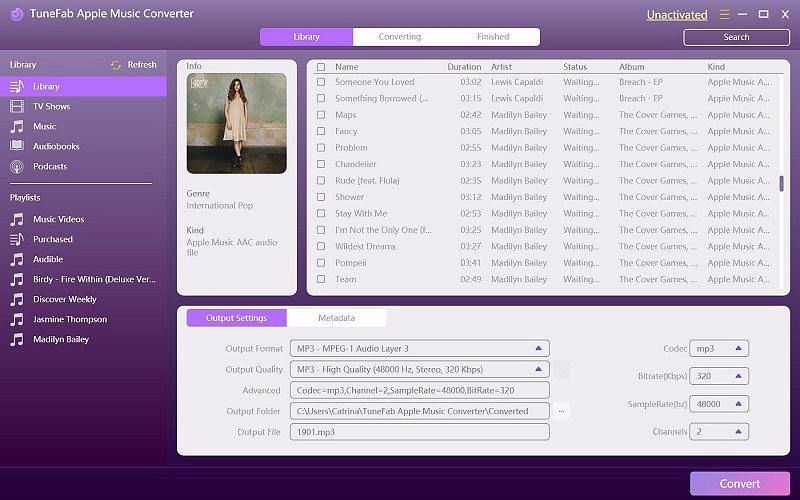
Step 2: Click on the relevant playlist on the left side and then select the tracks.
Step 3: Adjust the output format and output file on the "Output Settings" section. Also you can change the conversion speed by click on "Options" on the menu bar.
Step 4: After that, just click on "Convert' button to let the software start the conversion.
Now you can try to download Apple Music for Android and get started with Apple Music on your Android devices by following the above guides. But attention that for those Apple Music subscribers who want to enjoy Apple Music tracks on multiple devices, TuneFab Apple Music Converter can be an indispensable tool.
