

"I am a premium member and whenever I go to my PC and open Spotify, a window constantly pops up showing Spotify Error code 4, which means there is no Wi-fi connection. But I checked my PC, I have a perfect connection. Can anyone tell me how to fix it?"
Recently, many Spotify users have encountered Error Code 4 Spotify problems even if they have a full WiFi network. Some of them suck in finding a way to fix the Error Code 4 on Spotify. Therefore, this article will give 2+1 solutions to back up Spotify Music on PC and fix Spotify Error Code 4. Check it out!
👉 You May Also Need:
Method 1. Allow Spotify through Computer Firewall
Error Code 4 on Spotify will appear due to your computer firewall has blocked Spotify. So, in order to fix error code 4 on Spotify, all you need to allow Spotify through Firewall. Solutions will be different according to your operating system.
Solution For Windows:
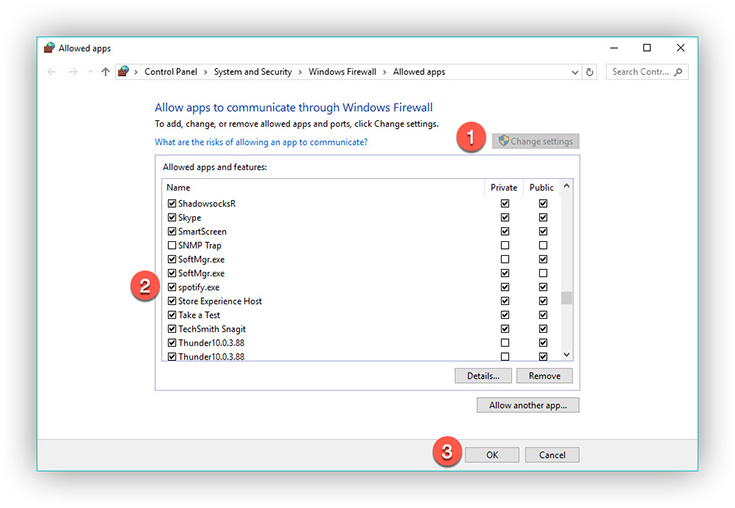
Step 1. Press the Win key and search for "Firewall And Internet Protection".
Step 2. On this page, click "Allow an app through firewall".
Step 3. Click "Change Settings".
Step 4. Scroll down to find Spotify and tick the checkbox.
Step 5. Click "OK" to confirm.
Solution For Mac:
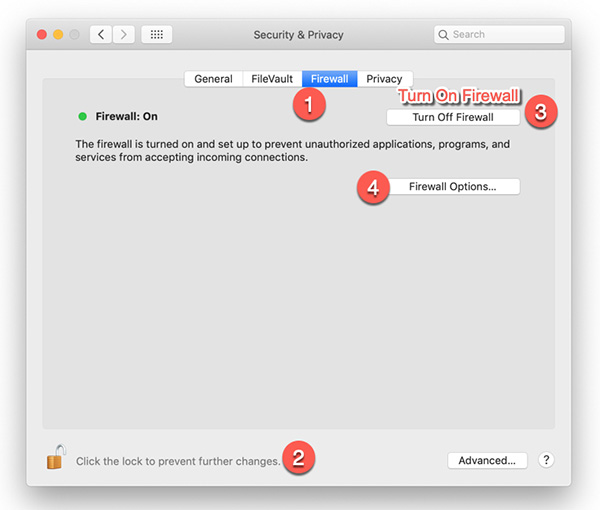
Step 1. Tap on "System Preferences" and choose the "Security & Privacy" section.
Step 2. Click on "Firewall".
Step 3. Click the Lock to Prevent Further changes and then click "Turn On Firewall" and further "Firewall Options" to shift to the new page which can add Spotify to the whitelist.
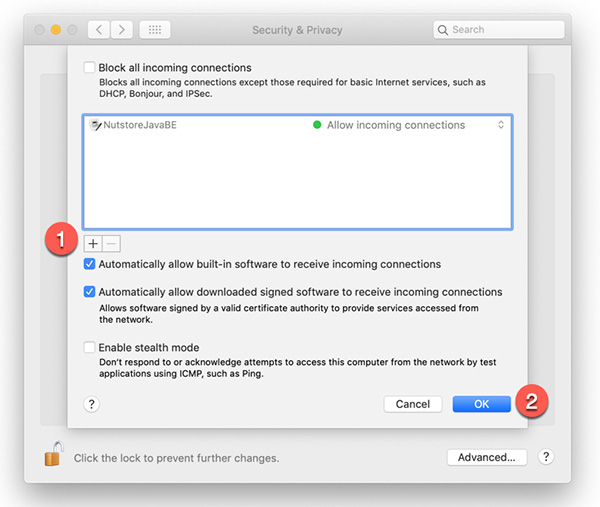
Step 4. Click the "+" right below "Block All Incoming Connections".
Step 5. Select Spotify from the Browse dialog box.
Step 6. Click "Add" to confirm.
Method 2. Fix DNS Problems on Your Windows/Mac
The existing DNS is not working will also cause the Spotify Error Code 4 happened. So in this way, it is better to fix the Spotify DNS problem. Also, we will share the solutions on both Windows and Mac users.
Solution For Windows:
Step 1. Right-click your network in the bottom right corner and tap on "Network & Internet Settings".
Step 2. Under "Network status", click on "Change adapter options".
Step 3. Right-click the "Ethernet" and choose "Properties" in the bottom-left corner.
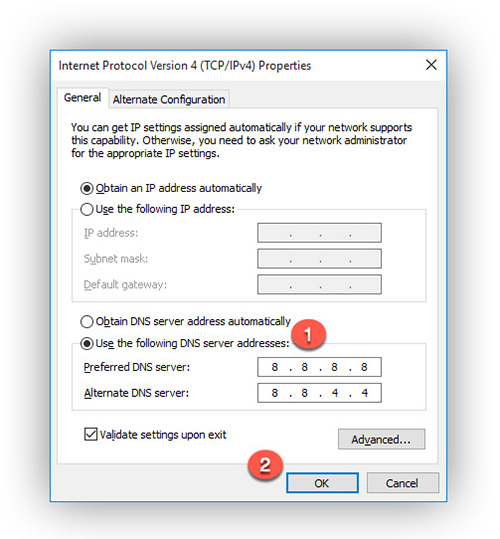
Step 4. Double-click on "Internet Protocol Version 4".
Step 5. Tick the circle saying "Use the following DNS server addresses".
Step 6. Input 8.8.8.8 into the "Preferred DNS server" box and 8.8.4.4 into "Alternate DNS server".
Step 7. Press "OK" to confirm.
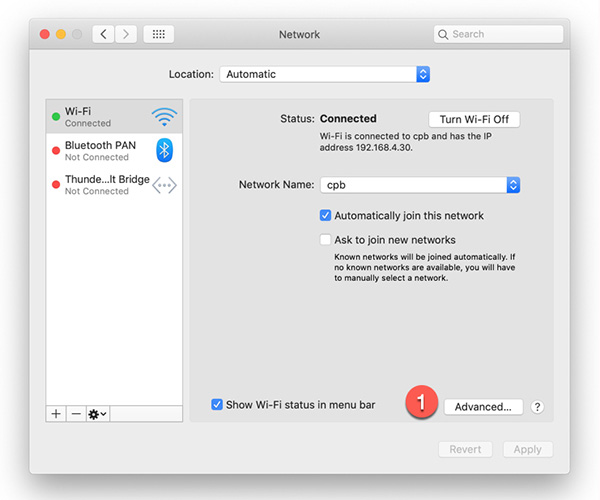
Solution For Mac:
Step 1. Tap "Apple" > "System Preferences" > "Network".
Step 2. Select the connection that you want to configure and click "Advanced".
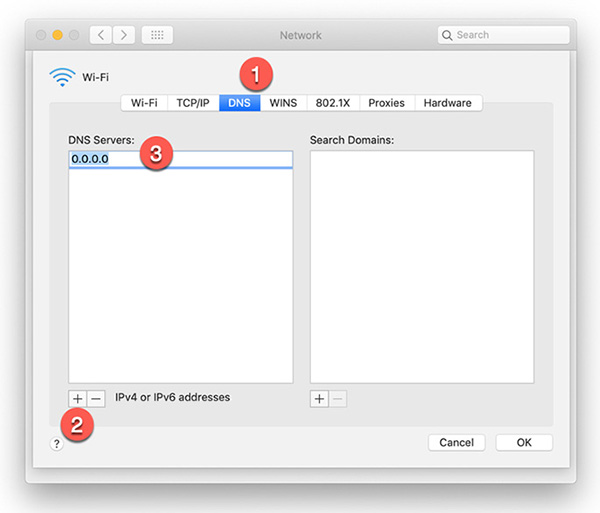
Step 3. Select the "DNS" Tap.
Step 4. Click "+" to replace any listed addresses or add the new addresses 8.8.8.8 and/or 8.8.4.4 at the top of the list.
Step 5. Click "OK" to confirm.
Generally speaking, the majority of people meeting Spotify Error 4 problem is because of no WiFi connection. But few users said the Error code 4 problem they met refers to a crash problem. If you are one of them, you can go here to see if it works for you.
Method 3. Reinstall Spotify App and Backup Downloads with TuneFab
If the above 2 methods still fail to fix the Spotify Offline Error Code 4 that appears when enjoying Spotify Music, you can try a quick and fast method, that is to delete and reinstall the Spotify App, as there might be something indiscoverable wrong with your Spotify App.
But before you do so, note that if you have downloaded songs within the Spotify app, those offline tracks will all disappear if you reinstall the app. You can choose to re-download all the songs after reinstalling the app, or adopt a more efficient method — back up your Spotify music locally to prevent any loss.
Under this demand, TuneFab Spotify Music Converter is the tool you need. Whether you have Spotify Premium or not, it can help you convert OGG format Spotify songs to DRM-free MP3, M4A, WAV, FLAC, AIFF, AAC, and ALAC without quality loss. Also, it offers up to 35X faster download speed, and preserves all ID3 metadata info for downloads, so you can easily manage them as safe backups, and listen to Spotify offline freely.
Let's check out how it works on backup Spotify Music.
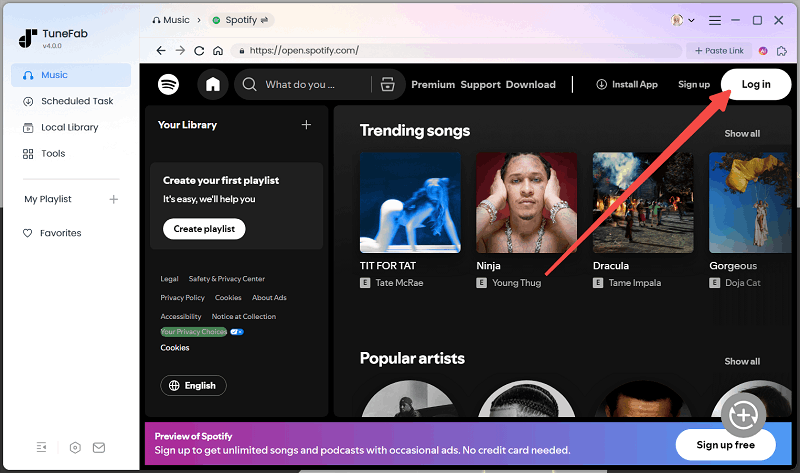
Step 1. Install TuneFab and Log into Spotify
Click the "Try It Free" button to download the TuneFab Spotify Music Converter on your Windows/Mac computer. When it's launched, log in to your Spotify account to access the embedded Spotify web player.
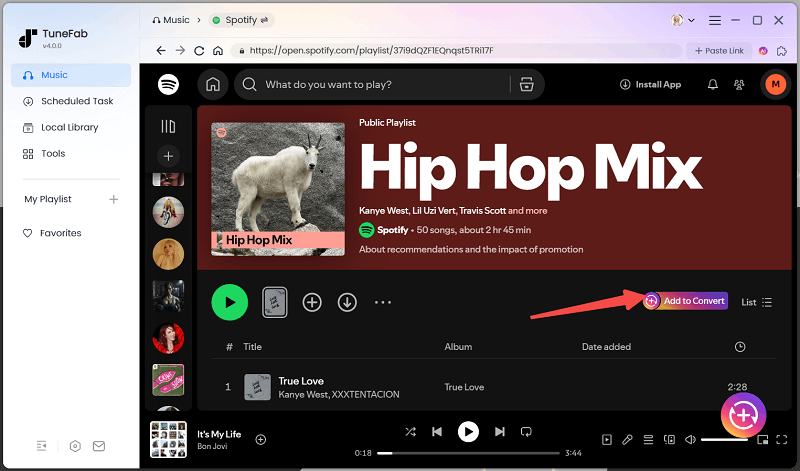
Step 2. Add Spotify Songs to Convert
Here on the Spotify web player, you can directly add Spotify playlists/albums with the "Add to Convert" button to add songs to the converting list.
Step 3. Adjust Output Settings Before Conversion
Before converting Spotify Music, you can tweak output parameters under "Audio Quality" on the pop-up window.

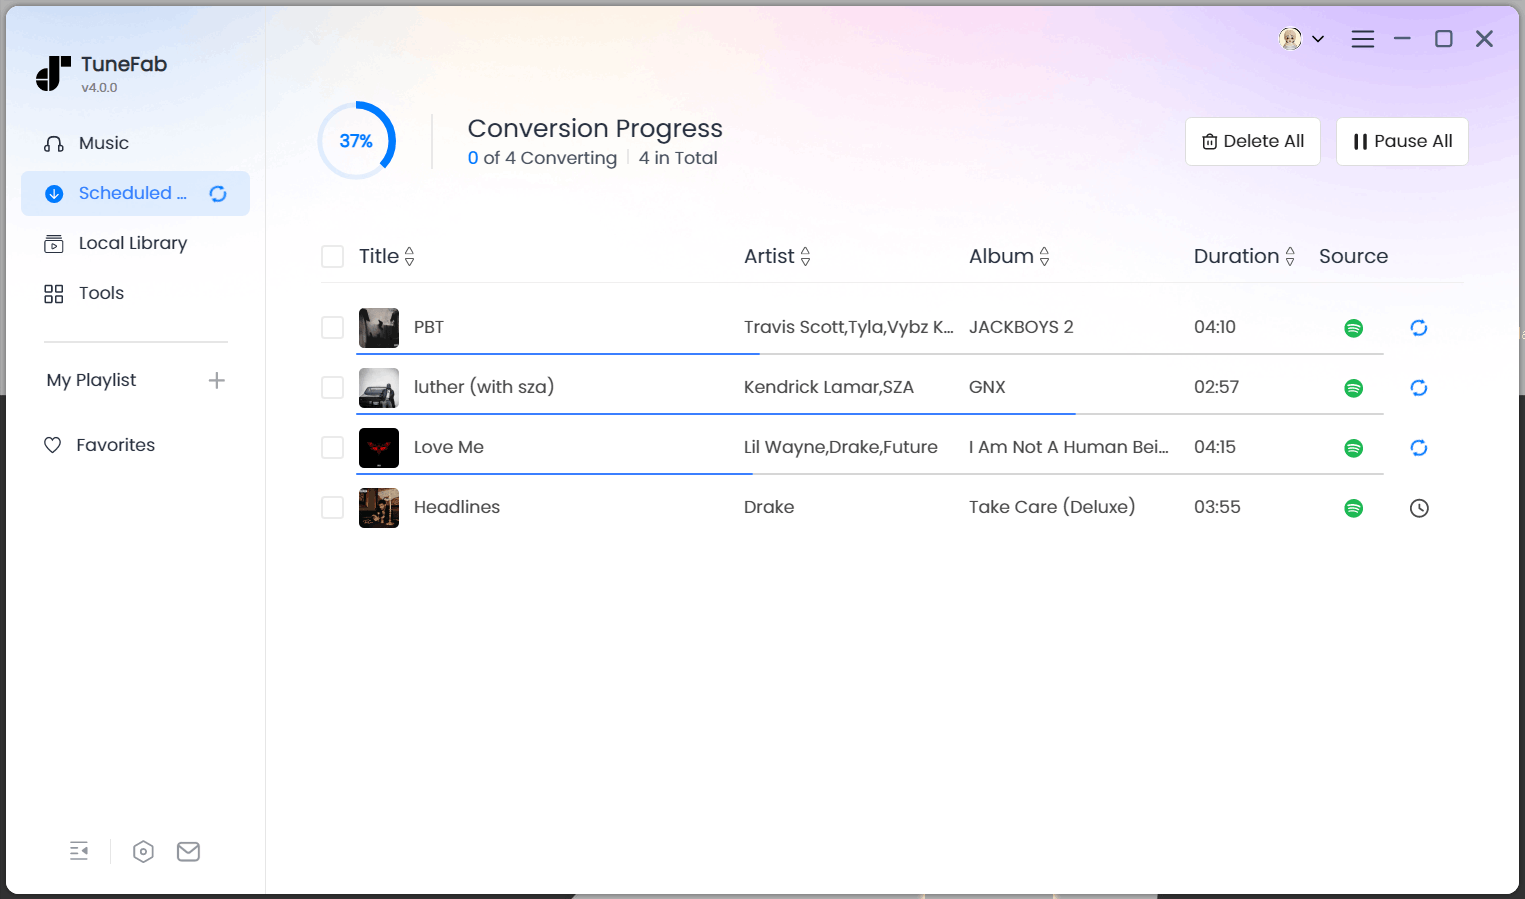
Step 4. Begin Converting to Enjoy the Songs
After all the settings, hit "Convert Now" to convert Spotify songs immediately. If you need to, you can pause the conversion anytime during the process.
Once finished, you can now click "Local Library" or directly navigate to the output location to check your downloaded backup music files, without worrying about losing them anymore!
Conclusion
In short, this post can be a good guide for helping you fix the Spotify Error Code 4 problem. If you need to reinstall the app, you can use TuneFab Spotify Music Converter mentioned above to save songs locally. Or, you can even use it as a replacement for the Spotify app, as it not only has an embedded Spotify player but also offers more stable and powerful features than Spotify. Hit the button to try it!

TuneFab Spotify Music Converter
Batch convert Spotify to MP3 320kbps at 35X speed
