

Want to create viral videos on TikTok, YouTube, or Instagram? The perfect BGM is often the key. When the built-in CapCut music library can’t meet your creative needs, Spotify offers the perfect selection, boasting over 100 million tracks.
If you want to add music to CapCut from Spotify to create a more catchy video, this is the guide you need. We will show you how to add music from Spotify to CapCut on PC, Mac, iPhone, or Android step-by-step, helping make your videos more engaging and stand out from the crowd. Let's read on.
The tool used in this guide: streaming music converter for content creators.
- Can You Add Spotify Music to CapCut Directly?
- How to Download Spotify Music to CapCut Compatible Format
- How to Add Music from Spotify to Capcut on PC/Mac
- How to Add Music to Capcut from Spotify on iPhone/iPad/Android
- How to Get Songs from Spotify to Capcut Online
- CapCut Audio Editing Tips & Tricks
- Final Words
Can You Add Spotify Music to CapCut Directly?
The short answer is no. Spotify imposes strict DRM protection on all its music, which prevents you from directly dragging downloaded Spotify songs into the CapCut editor.
To successfully add Spotify songs to CapCut, you will need the help of a professional third-party Spotify music downloader to first bypass Spotify download limits and then save the music in a CapCut-compatible format, including MP3, AAC, WAV, FLAC, and WMA.
Luckily, TuneFab Spotify Music Converter is such a tool that can make the process quick and easy! Scroll down for more information and detailed steps on how to download Spotify songs for CapCut by using it.
How to Download Spotify Music to CapCut Compatible Format
As mentioned earlier, Spotify music is protected by DRM and uses the OGG Vorbis format, which is not supported by CapCut. That is why you need the TuneFab Spotify Music Converter! Designed for content creators, it can easily remove DRM protection and convert songs, playlists, or albums from Spotify to common formats like MP3.
This ensures you can import Spotify music into CapCut for any video project. Plus, it perfectly preserves the original sound quality and ID3 tags, so you not only get high-quality sound files, but you can also easily organize your Spotify music in CapCut without having to play each track individually to figure out what it is!
Explore More Features of TuneFab Spotify Music Converter:
- No need for Spotify Premium to download Spotify songs on your computer.
- Convert Spotify music into CapCut-compatible formats like MP3, AAC, WAV, and FLAC.
- Accelerate batch conversion speeds to up to 35X faster.
- Ensure high audio quality with customizable options up to 320kbps and 48kHz.
- Include an Intuitive interface with an integrated Spotify web player.
- Preserve all original ID3 tags and metadata info for easy management.
Note: This software is designed exclusively for personal creative works. Any commercial use or illegal distribution of the converted Spotify music is strictly prohibited.
With that covered, getting started with TuneFab is incredibly easy and requires a few steps to get DRM-free tracks from Spotify. Below, we have explained how to use this tool to convert Spotify songs for CapCut editing:
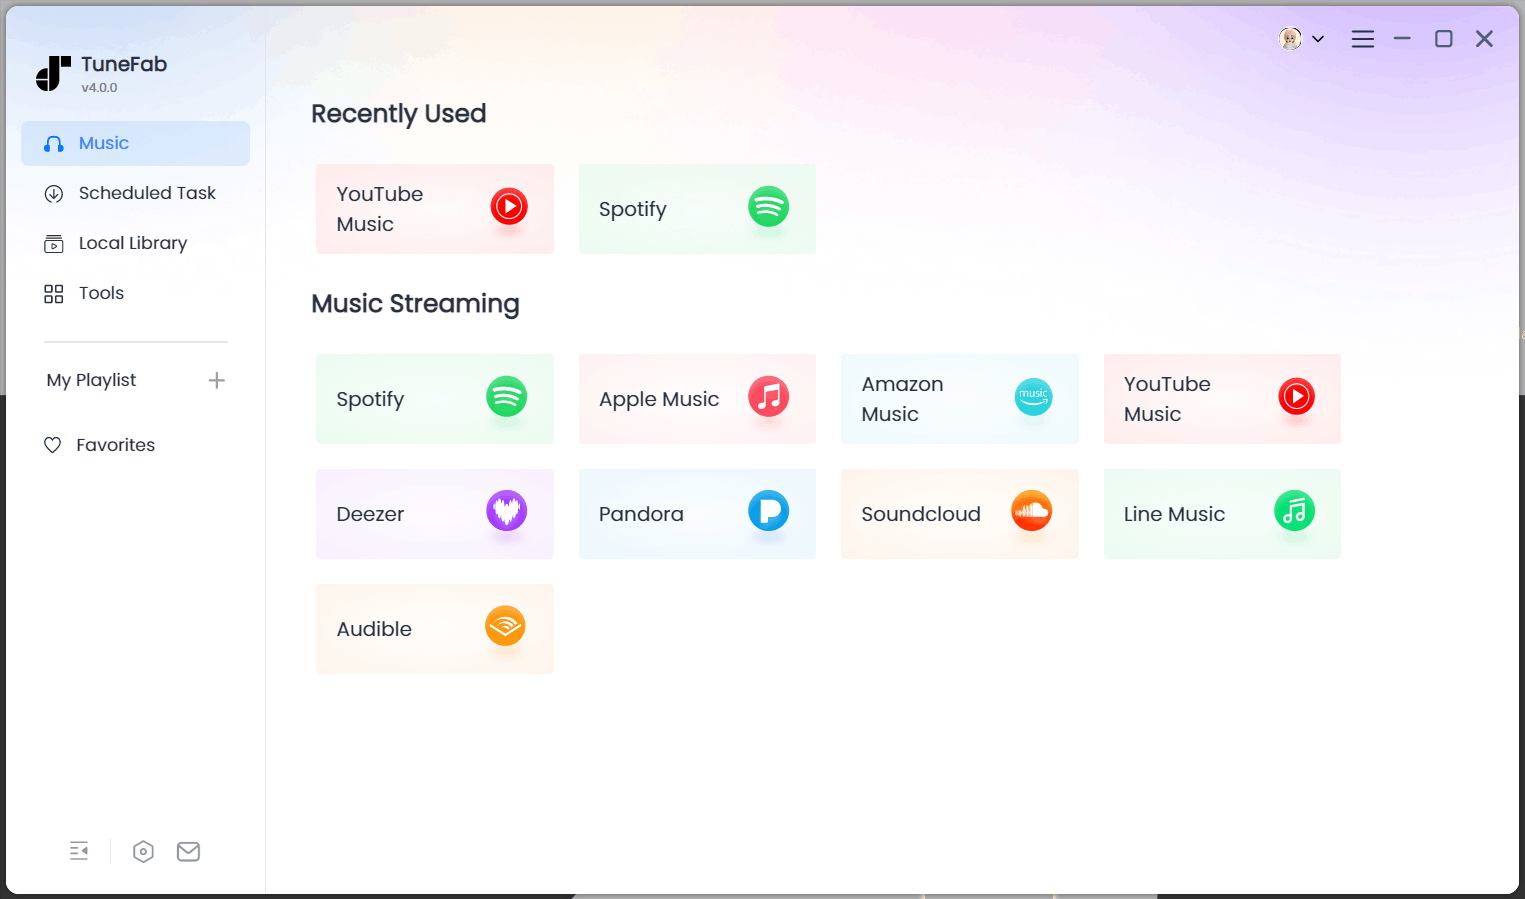
Step 1. Install and Launch TuneFab Spotify Music Converter
Get TuneFab Spotify Music Converter installed on your computer first. When you open it, select the Spotify service and log in with your Spotify account to access the entire music library.
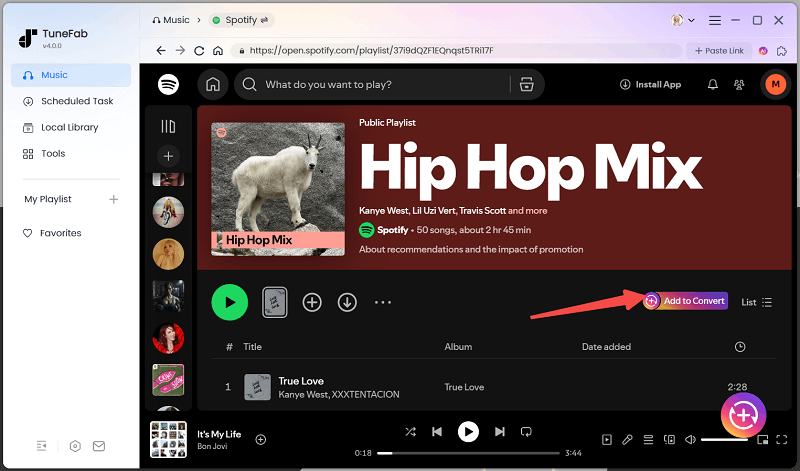
Step 2. Add Spotify Songs or Playlists to Download
Browse the built-in Spotify web player and find the song, playlist, or podcast you need. Open it and then hit the "Add to Convert" button. TuneFab will automatically fetch music information.
Step 3. Confirm Output Selections
When you see a pop-up show up, customize the proper output format, bitrate, and sample rate based on your needs. Also, click the checkboxes to choose the song you want to upload from Spotify to CapCut.

Step 4. Download Spotify Songs as DRM-free Files
Click "Convert Now" to start downloading songs from Spotify. Once it ends, you can find all DRM-free Spotify downloads in the "Local Library" tab. You are now ready to import music to Capcut and any video editor like iMovie, Premiere Pro.
Related Article:
How to Add Music from Spotify to Capcut on PC/Mac
Once the Spotify music conversion is complete, the next step is to import and use these audio files right on your desktop CapCut app! By doing this, you can effortlessly add Spotify music into your videos for truly engaging creations. Below, we will guide you through how to upload Spotify songs to CapCut on PC and Mac.
Step 1. First, head to Capcut's official website to download the software for your computer. Once installed, sign up or sign in with your account.
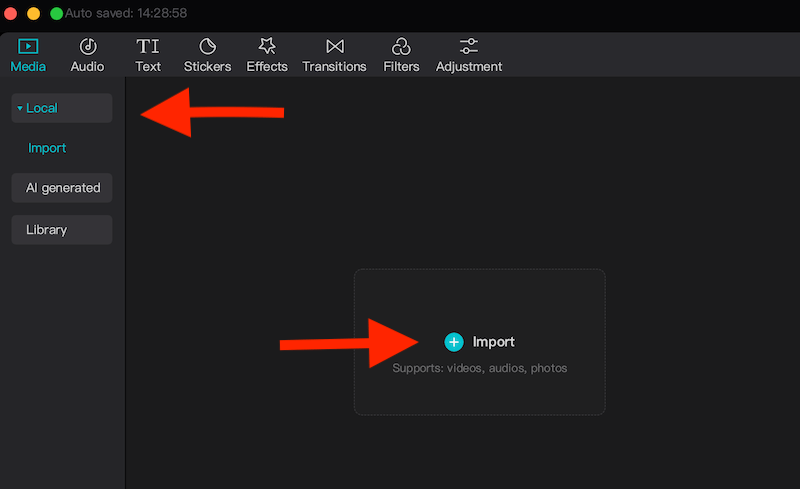
Step 2. Once everything is set, click the "New Project" button, and a new project window will open. In the top left corner, click "Media" > "Local" > "Import".
Step 3. Click the "+ import" tab and browse to the same location on your computer where you previously saved the converted Spotify media files. You can effortlessly add music to CapCut from Spotify to start editing.
How to Add Music to Capcut from Spotify on iPhone/iPad/Android
For creators who prefer to edit videos while traveling or anywhere on the go, the CapCut mobile app is undoubtedly the more convenient choice. However, you first need to transfer the converted Spotify music files to your mobile device. Below, we will detail how to put music to CapCut from Spotify on iPhone, iPad, or Android.
Step 1. Launch your Capcut app on your iPhone, iPad, or Android. Once open, tap the "New Project" tab. If you made a project before, you can tap the ones in the recent project panel.
Step 2. In the bottom navigation bar, choose "Audio" > "Sounds". Then, tap "Your Sounds" > "From Files" > "Import from Files" to select your converted Spotify songs.
Step 3. Tap "Open" and then the "+" button next to the song. Now, you have successfully imported Spotify music to CapCut for video editing.
 Want to see exactly how it's done on your PC or mobile? Watch this beginner-friendly video to learn how to add Spotify music to CapCut in just a few minutes.
How to Get Songs from Spotify to Capcut Online
If you prefer not to install the CapCut app on your computer or phone, you can opt for its online editor. Using the CapCut online video editor, you are still able to use your converted Spotify music. Follow the steps below to learn how to add Spotify music to Capcut on Chrome, Safari, Edge, and Firefox:
Step 1. Go to the official website of Capcut Online Video Editor and sign in with your account.
Step 2. Create a new project or access an existing one.
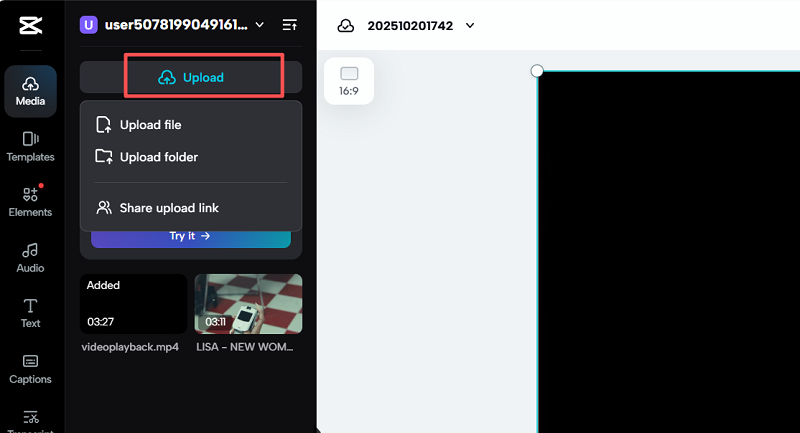
Step 3. On the "Media" tab on the left top side, tap "Upload" > "Upload file"/"Upload folder".
Step 4. Head to the saving location of DRM-free songs on your computer. Select the track of your choice and effortlessly get songs from Spotify to CapCut online.
CapCut Audio Editing Tips & Tricks
1. How to separate audio from video in CapCut mobile
Separating the audio from your video is a breeze on the CapCut mobile app. This feature is handy when you want to edit or replace the original soundtrack independently. Here are the steps:
Step 1. Open the CapCut app and import the video that contains the audio you want.
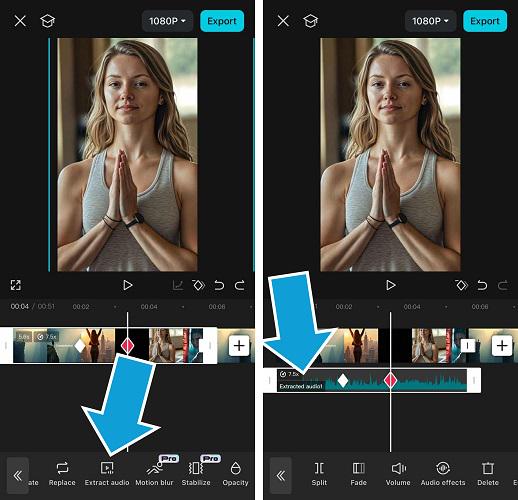
Step 2. Select the video clip on the timeline. Then, swipe left on the toolbar below to tap the "Extract Audio" button.
Step 3. The original video sound will automatically be separated into an individual audio track, which you can then delete, move, or edit independently.
2. How to trim and move Spotify music in CapCut
Once you've converted Spotify songs to MP3 using TuneFab Spotify Music Converter and successfully imported them into your CapCut project, trimming and moving them is incredibly simple.
Step 1. Insert Spotify music into the CapCut timeline.
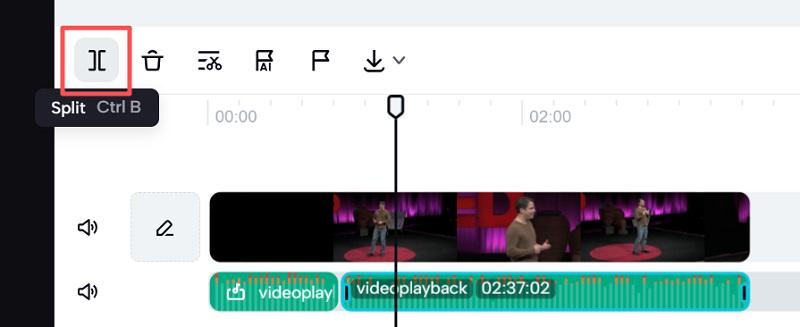
Step 2. Select the music clip. Drag the white handles at both ends of the clip to your desired start and end points to easily trim off the unwanted sections. If you need to cut out a section from the middle, move the timeline indicator to a precise location and click the "Split" button below.
Step 3. Select the Spotify music clip on the timeline, then drag it anywhere along the timeline to match your video footage or voiceover.
Final Words
By reading this detailed guide, you have now mastered how to add music to CapCut from Spotify. While DRM protection brings challenges, using a professional tool like TuneFab Spotify Music Converter can easily remove restrictions and convert Spotify OGG files into CapCut-compatible formats such as MP3, WAV, or FLAC. This way, you can freely add music from Spotify to CapCut on PC, Mac, Android, iPhone, or iPad.
Download TuneFab now and try it today!
