

Apple Music feels easy enough until you try to make it work with Kodi. That is when people start asking questions like the one raised on Reddit: “Is there an add-on that allows you to put Apple Music with a paid account on Kodi?”
Not an official one. So before getting into methods, the first thing to clear up is simple: what can Kodi actually do with Apple Music? From there, it becomes easier to see why most users end up relying on either AirPlay or local files instead.
Does Kodi Support Apple Music?
No, Kodi does not offer native Apple Music support, and there is no official Apple Music add-on that lets you sign in with your paid account and stream your library directly inside Kodi. That is why so many users end up asking whether Kodi can handle Apple Music at all.
What Kodi does support well is local media playback. Kodi can play many common audio formats, add music sources, and scan music files into its library. That is very different from how Apple Music works as a subscription-based streaming service inside Apple’s own apps. In other words, Kodi is good at managing playable music files, but it is not built as a native Apple Music client
That is why this topic usually leads to workarounds instead of a direct setup. Some people use AirPlay when they only want to stream music from an Apple device to Kodi. Others go with local files when they want more stable playback or a music library that works more naturally inside Kodi. Kodi’s own documentation describes AirPlay support as very limited, so these methods are best understood as alternatives, not built-in Apple Music support.
How to Use Apple Music on Kodi: AirPlay vs. Local Files
If you are trying to choose the easier way to get Apple Music on Kodi, the difference usually comes down to speed versus control.
| Option | Good for | Trade-off |
| AirPlay | Quick streaming | Less stable, more limited |
| Local Files | Offline playback and library use | More setup |
If you only want to play a song or playlist on Kodi without much setup, AirPlay is the easier starting point. If you want something that works more like a real Kodi music library, especially for offline use, local files are the better fit.
Method 1. Stream Apple Music to Kodi with AirPlay
If you just want a quick way to play Apple Music through Kodi, AirPlay is the easier option. It does not turn Kodi into a real Apple Music app, but it can work for simple streaming on the same network. Kodi’s own documentation also notes that its AirPlay support is very limited, so this method is better for temporary playback than for long-term library use.
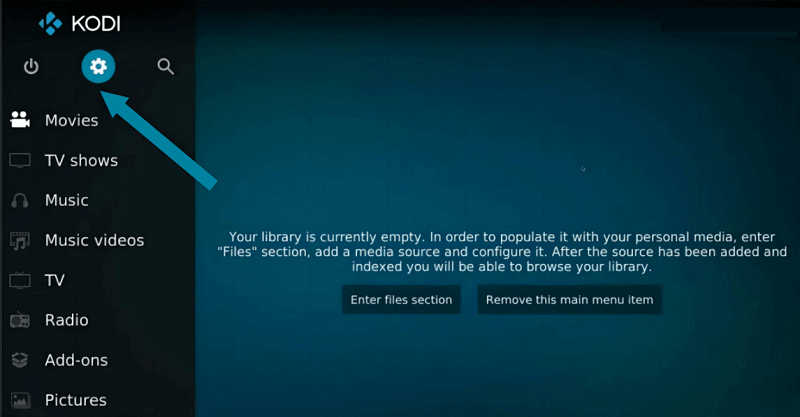
Step 1. Launch Kodi, click the Settings icon on the main screen, then open Services.
Step 2. Under Services > General, enable Announce Services to other systems in Zeroconf. Kodi uses this setting to let devices on the network discover enabled services

Step 3. In the left-side AirPlay section under Services, turn on Allow Kodi to receive AirPlay content. If needed, also turn on Allow volume control.

Step 4. Make sure your iPhone, iPad, or Mac is on the same Wi-Fi network as Kodi, then play the song, album, or playlist you want in Apple Music.
Step 5. Open the AirPlay output menu on your Apple device and choose your Kodi device. Once the connection is made, the music should play through Kodi.
Method 2. Add Apple Music to Kodi as Local Music Files
AirPlay is useful when you only want to stream something quickly, but it does not give you a music library inside Kodi. If you want music that is easier to keep, organize, and play inside Kodi, local files are the more practical option.
To make that possible, you need to save Apple Music in a format Kodi can read as a regular audio file. TuneFab Apple Music Converter is useful here because it helps turn Apple Music tracks into files you can add to Kodi more easily for offline playback and library use.
Why TuneFab works better before importing to Kodi
- Save Apple Music in Kodi-friendly formats like MP3, M4A, WAV, and FLAC
- Convert songs, albums, and playlists in batches
- Keep ID3 tags for easier browsing in Kodi
- Use the built-in Apple Music web player to manage the download process
Step 1. Open TuneFab and sign in with your Apple Music account
Open TuneFab Apple Music Converter and sign in with your Apple Music account so you can access the songs, albums, or playlists you want to use.
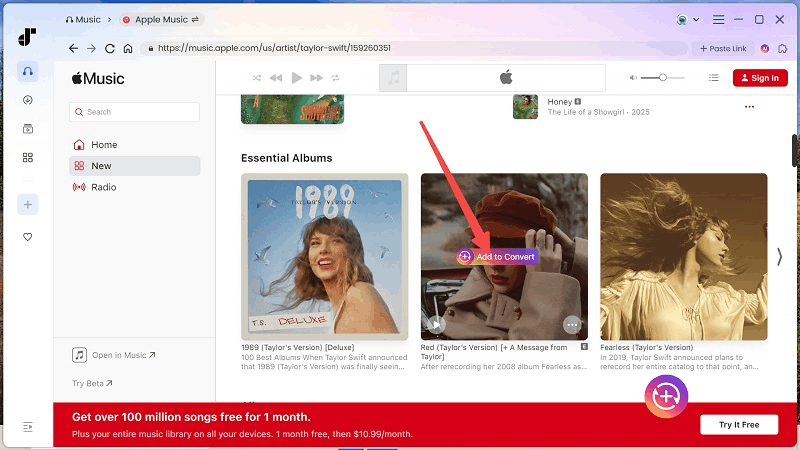
Step 2. Add the Apple Music tracks you want to convert
Choose the songs, albums, or playlists you want, then add them to the conversion list.
Step 3. Choose a format Kodi can read and start the conversion
Select an output format such as MP3, M4A, WAV, or FLAC, then start converting the tracks into regular audio files.

Once the files are ready, the last step is to import them into Kodi so they can work more like normal music in Kodi’s library.
📒 How to Import Apple Music Files into Kodi
Step 1. Go to Music from the Kodi home screen.
Step 2. Choose the option to add a music source, then browse to the folder where your converted Apple Music files are saved.
Step 3. After adding the folder, allow Kodi to scan the files so you can browse them later by song, album, or artist.
Method 2 takes more setup than AirPlay, but it works better if you want a more stable Kodi setup that does not depend on streaming from another device every time.
If your goal is to keep Apple Music playable outside Apple’s apps, you may also want to learn how to download Apple Music on Mac or save Apple Music on PC for easier library management.
Kodi Apple Music FAQ
Is there any add-on support for Apple Music through Kodi?
Not an official one. This is also the exact question users are still asking on the Kodi forum, including people who specifically say they do not want to rely on AirPlay. That is a strong signal that Kodi still does not offer built-in Apple Music access the way users expect.
Can I use Apple Music on Kodi without AirPlay?
Not through an official Apple Music add-on. If you do not want to stream from another Apple device, the more practical option is to use local files instead.
Does AirPlay in Kodi only work for audio?
Yes, that is the practical limit discussed in Kodi’s forum. Kodi’s AirPlay support works on the receiver side, and mirroring is not supported, so it is mainly useful for receiving audio from Apple devices.
Is AirPlay to Kodi reliable enough for regular Apple Music listening?
Not always. Users on Reddit and the Kodi forum have reported that AirPlay can work inconsistently or break after restarts and version changes, which is why it is better treated as a quick workaround than a long-term Apple Music setup in Kodi.
Is there a more permanent Kodi setup than just streaming Apple Music over AirPlay?
Yes. That is why many users move to local files. A local-file workflow fits Kodi better because Kodi is built to add, scan, and organize playable music files in its library. If you want to build that kind of setup more easily, a tool like TuneFab Apple Music Converter can help you save Apple Music as files Kodi can work with.
Conclusion
Kodi does not offer a direct way to use Apple Music, so the real choice is between a quick workaround and a setup that works better over time. If you only want to stream music from an iPhone, iPad, or Mac once in a while, AirPlay is the easier option. But if you want offline playback and a Kodi music library that feels easier to manage, local files are the better long-term fit.
If the local-file method sounds like the better fit for your Kodi setup, TuneFab Apple Music Converter can help you save Apple Music in formats Kodi can read, so you can build a music library that feels more stable and more usable inside Kodi.
