

As long as you become an Apple Watch user, you may want to listen to music with your Apple Watch. Apple Watch can support many online music platforms, especially Apple Music, which means that you can select different music on it, or use your phone to upload your chosen music to it. After that, your Apple Watch will be like a super handy smaller iPod on your wrist, and you can listen to music easily without phones.
So today, we will show you how to add music to your Apple Watch. This article takes Apple Music as an example.
Note:
No matter which way you choose, an Apple ID with Apple Music Membership Plan is required. Please make sure you have one before following the steps.
Part 1: Download Music to Apple Watch Directly (WatchOS 5 or Later)
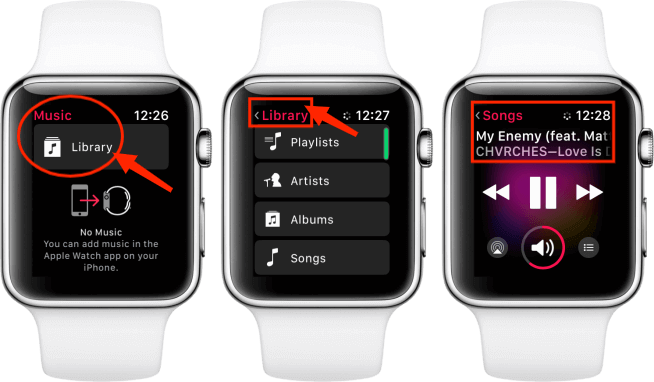
The first and official way to add music to Apple Watch, is to use the Apple Music app on your Apple Watch. Here are the steps for you to follow.
Step 1: Run the Apple Music app on your Apple Watch.
Step 2: Tap "Listen Now" or browse your music to add to your Library.
Step 3: Select the playlist or album you want to add to your Watch and tap the Three-dot Button.
Step 4: Tap "Add to Library" to add the music to your Watch.
Step 5: Tap the Three-dot Button again and select "Download" to play the song on your Watch without an internet connection.
This way of adding music to Apple Watch is pretty convenient, but there is something that you should know about.
1. It is essential to check whether your Apple Watch supports network connection. Some earlier models, for example, the 1st generation that runs with watchOS 1 to 4, didn’t provide network features, making it impossible to stream online music on your Apple Watch. Therefore, only when your Apple Watch supports Wi-Fi or cellular data can you enjoy the benefits of streaming music platforms. Also, you can check the Apple official support website to learn more about how to connect your Apple Watch to Wi-Fi.
2. What's more, if you have subscribed to Apple Music Voice Plan but not others, this way may not be available.
Before adding your selected songs, you can download them in advance if you want to listen to them offline whenever you want to, and TuneFab Apple Music Converter is the tool that you may need. You can check "Part 3: Can You Still Listen to Music on Apple Watch After Canceling Apple Music Plan?" for more details.
Note:
Besides Apple Music, other different online music platforms can also be supported by the method above, including Spotify, Pandora, etc.
Part 2: Add Music to Apple Watch Using Phones (Any WatchOS)
Once you've added or downloaded Apple Music to "Library", it becomes available to upload to your Apple Watch, which means that you can listen to Apple Music tracks without having your iPhone in range. Here is how it's done.
Step 1: Take off your Apple Watch and place it on its charger.
Step 2: On your iPhone, launch the "Watch" app.
Step 3: Tap "My Watch".
Step 4: Tap "Music" in the app list.
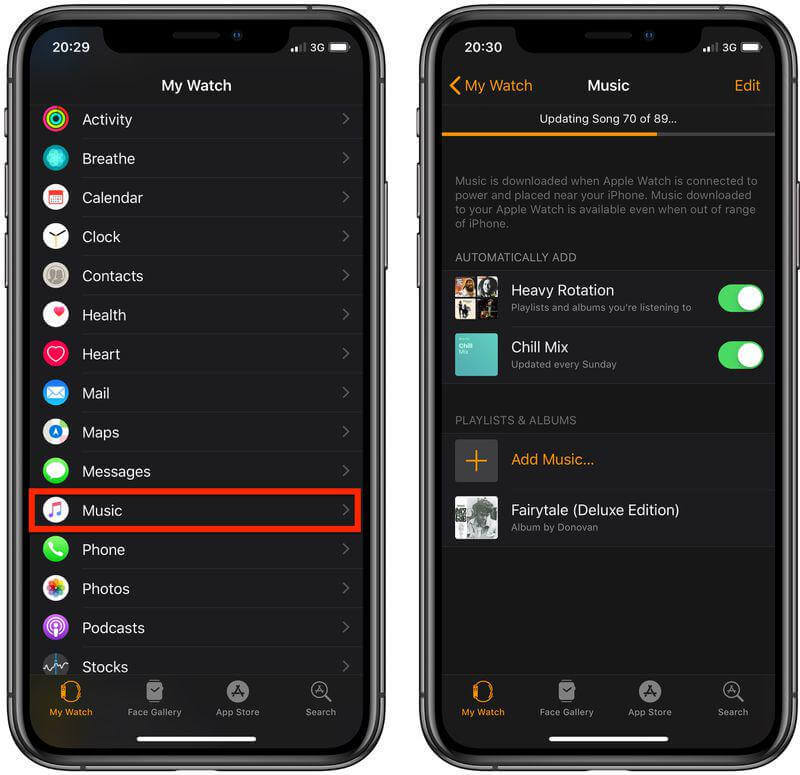
Step 5: Tap the "toggle switches" next to any of Apple Music's personalized mixes to add them to or remove them from your Apple Watch.
Step 6: Under "Playlists & Albums", tap "Add Music...", then select the playlists and/or albums from your music library to upload to your Apple Watch.
The official way of adding music to Apple Watch is easy to understand. But unfortunately, its disadvantages are also very obvious.
1. It requires you to keep purchasing the Apple Music Plan.
2. The directly downloaded music from Apple Music will only allow you to play them offline through its official app and your own Apple devices, which becomes not available when Apple Music Plan has expired.
3. The steps that it requires are still too complex for you to handle.
Part 3: Can You Still Listen to Music on Apple Watch After Canceling Apple Music Plan?
According to what we mentioned above, is there a solution to help you still listen to those melodies after the Apple Music Plan is canceled? The answer is: Of course yes! You don't need to do anything else, just download the TuneFab Apple Music Converter, and this app will help you out with all other problems.
Here are the key benefits that TuneFab Apple Music Converter offers you.
● It removes DRM restrictions for all devices. As we know, downloaded Apple Music can only be played on the iOS system and Apple devices. But with TuneFab Apple Music Converter, songs can be played almost everywhere, including Android phones, MP3 players, etc.
● It offers high-quality music in different formats with efficiency. TuneFab Apple Music Converter has a built-in Apple Music web player, which offers you multiple mainstream formats including MP3, WAV, M4A, AIFF and FLAC. The maximum conversion speed is even up to 35 times faster when the network is stable.
● It keeps the original ID3 information for you. During converting music, the ID3 tags such as artists, albums, and titles will be saved completely for you to manage your downloaded music.
Here is the way for you to enjoy your music.
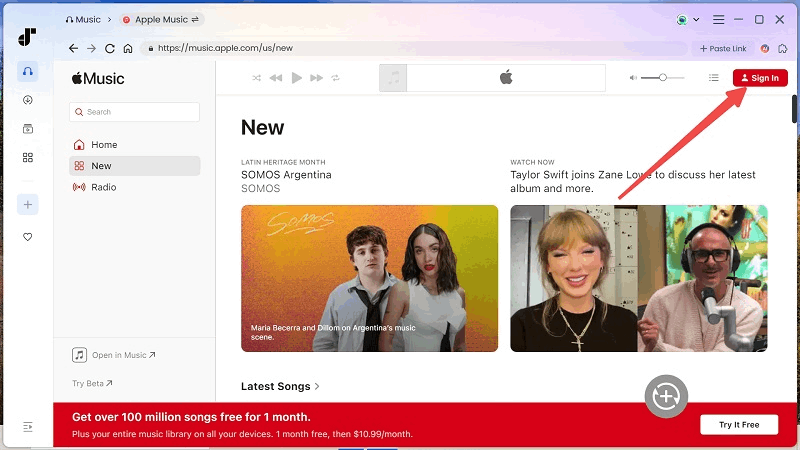
Step 1: Download TuneFab Apple Music Converter, and run it on your PC.
Step 2: Sign in with your Apple ID to start. Make sure you have purchased the Apple Music Plan.
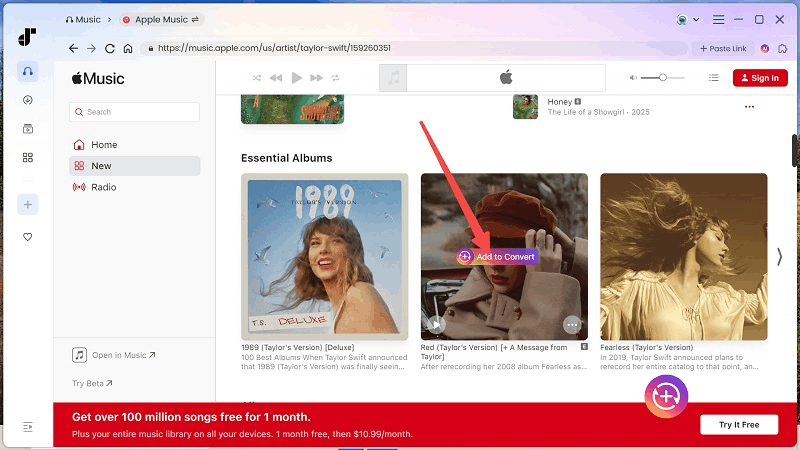
Step 3: Now, you can search for the music you like to download. You can drag and drop a song or playlist to the conversion list on the right side, and they will be dropped into the converting list.
Step 4: Expand the conversion list, then adjust the output parameters. When it's done, hit "Convert All".

Step 5: Check your converted works on the "Finished" screen. You can click the file icon to check them.
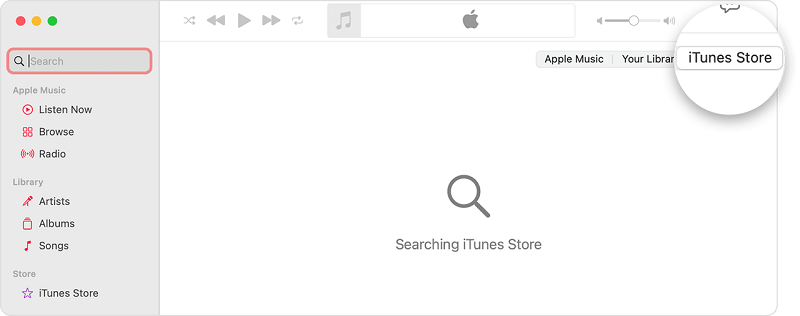
Step 6: Run iTunes on your PC, and upload your downloaded music to the "Library". Make sure to connect the Apple Watch and PC to the same Wi-Fi network, and log in with the same Apple ID on these devices.
Step 7: Run the music app on your Apple Watch, go to the "library" to wait for it to sync, and then download the music for offline listening.
FAQs about adding music to Apple Watch
How to remove music from Apple Watch to free up space?
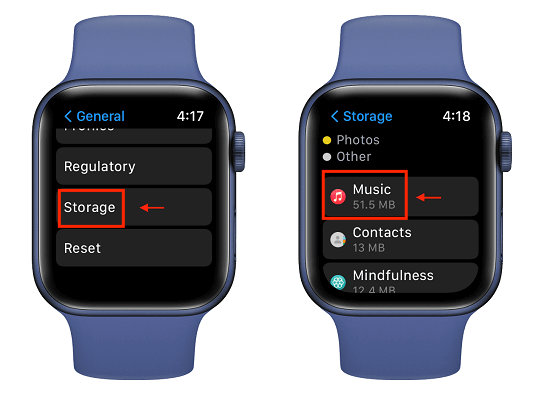
If you’re running out of room to store music on your Apple Watch, you may want to remove the music that was automatically added to your watch or music that you no longer listen to, because the music storage on Apple Watch is only 2GB, and there are usually dozens of songs imported into the Apple Watch, which will take up more memory when the sound quality is high.
You can check the Apple Watch storage on both iPhone and Apple Watch: "Settings" > "General" > "Storage".
After you check the storage, you can use both your iPhone and your Apple Watch to remove music from your Apple Watch.
Using iPhone:
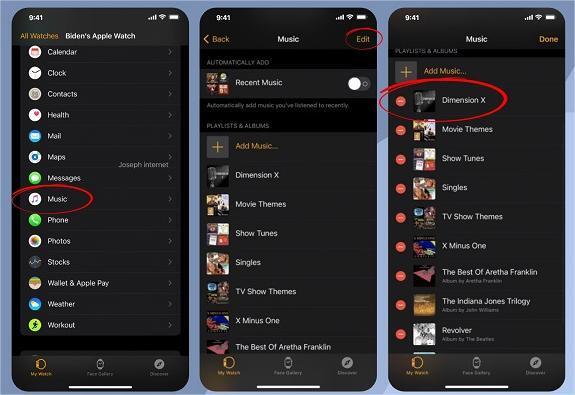
Step 1: Open the Apple Watch app on your iPhone.
Step 2: Tap "My Watch", go to "Music", and then tap "Edit".
Step 3: Tap the "minus" pattern on the left of the items you want to remove.
Note:
The music you’ve recently played won’t be automatically added to your Apple Watch until you turn on Recent Music again.
Using Apple Watch:
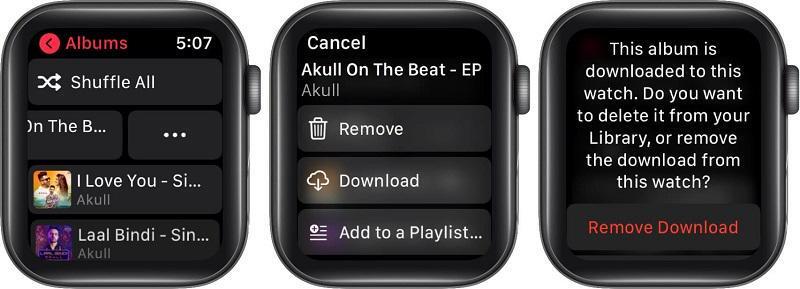
Step 1: Open the Apple Music app on your Apple Watch.
Step 2: Tap "Library", scroll down, tap "Downloaded", then check Playlists or Albums.
Step 3: Swipe left on a playlist or album, tap the Three-dot Button, then tap "Remove".
Summary
Above all, you can learn that the official way to download Apple Music to your Apple Watch is not suitable for everyone, with so many limitations (as you just read in Part 2 of this article).
So, if you want to play Apple Music offline freely on your Apple Watch and other devices, then the TuneFab Apple Music Converter will be your best choice. You can use TuneFab to download Apple Music and convert your music to Apple Watch, MP3 players, and many other devices.
Hit the button below to download TuneFab Apple Music Converter and start to enjoy your favorite music!
