


How to Register TuneFab Spotify Music Converter
Step 1. Install Spotify Music Converter on Your Computer
Download the latest version of TuneFab Spotify Music Converter to your computer.
Launch TuneFab Spotify Music Converter, and the converter is integrated with Spotify web player. Enter the built-in web player by clicking "Open the Spotify web player" from the startup page. Subsequently, please make sure that you've logged in to Spotify with your Spotify account to access Spotify's music library successfully.
Step 2. Activate TuneFab Spotify Music Converter (Optional)
Have a license? Please enter your licensed email and license key in the pop-up free trial window to fully activate the software.
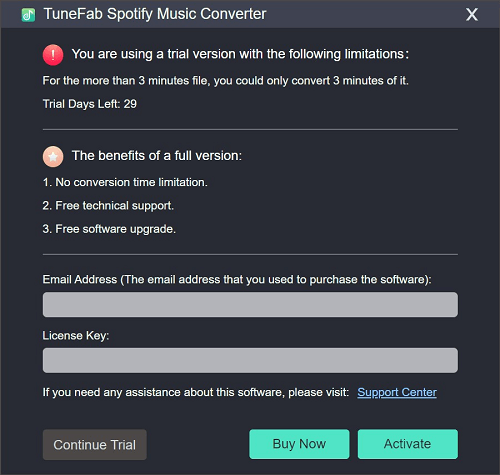
Don't have a license? Please click "Continue Trial" to keep using the software for free. The limitations of a free trial version are as below:
1. You can only convert the first 3 minutes of each song.
2. You can try TuneFab Spotify Music Converter for free for 30 days.
How to Convert Spotify Music/Playlist/Podcast to MP3/M4A/FLAC/WAV/AIFF/ALAC
Step 1. Add Spotify Music Songs to the Converting List
Once you log into the embedded Spotify web player in TuneFab Spotify Music Converter, you can access the music library to browse and select any song, playlist, album, or video/audio podcast you like to download later. When you access any resource wishing to download offline, simply drag them to the Add button. You are also able to click it to import the songs or playlists to the converting list.
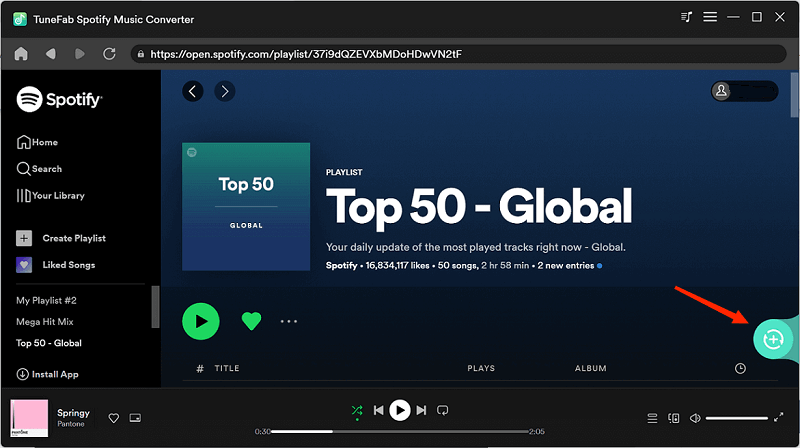
You can also multi-select the songs from the playlist you want to convert and then drop them to the blue icon.
Step 2. Select Output Format
When entering the converting list, you just need to tick the songs you want to convert. If you want to convert all songs to the same audio format, go to "Convert all files to:" and then select your desired audio format, such as MP3, M4A, FLAC, WAV, AIFF, or ALAC.
What's more, on this page, you can see song information like album, artist, and length of each song. All the information will also be retained in ID3 tags after conversion. This feature helps you better manage the output files.
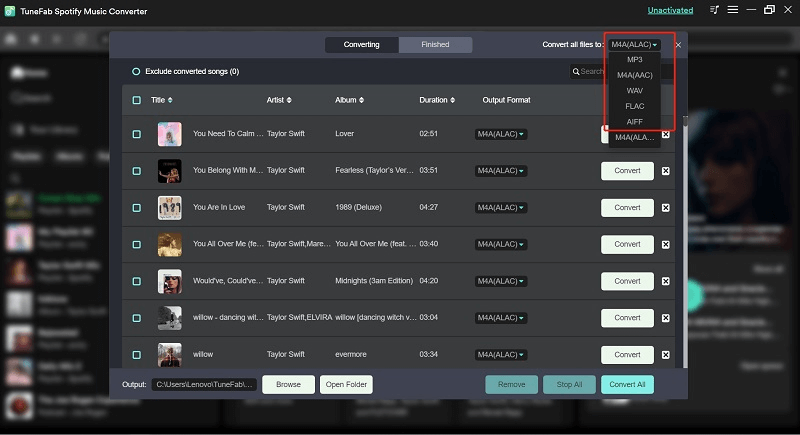
Of course, if you want to convert them into different formats respectively, you can choose the output format for each item. It is also equipped with a play icon allowing you to pre-play the song to check if it is the one you want to download offline.
When everything is ready, click the "Convert All" button on the down-right corner to start conversion.
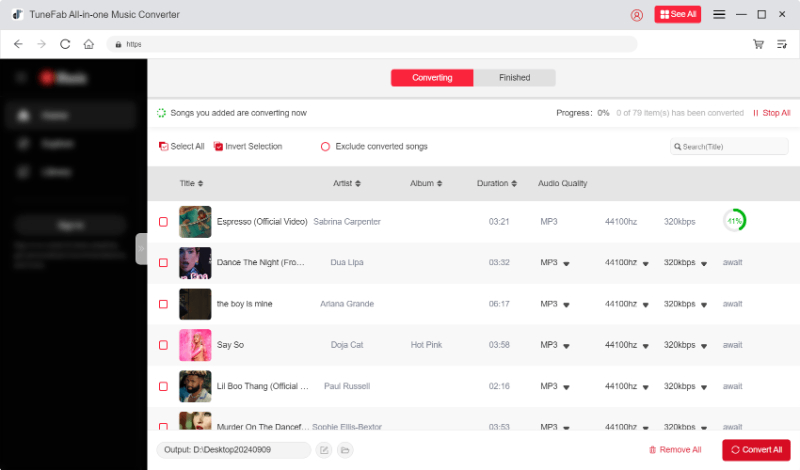
You can stop the conversion at any time by clicking the Stop button after the download is processed. However, it is noted that while restarting the conversion, you have to start from the beginning.

Note: According to our test, it takes less than 10s to convert the 3-minute song. For a 50-minute episode of a podcast, the entire conversion takes less than 2 minutes. Also, it is worth mentioning that the converting speed is largely related to your network condition and computer performance. A good network and performance can help the conversion reach an astonishingly high speed.
Step 3. Finish Converting All Spotify Tracks
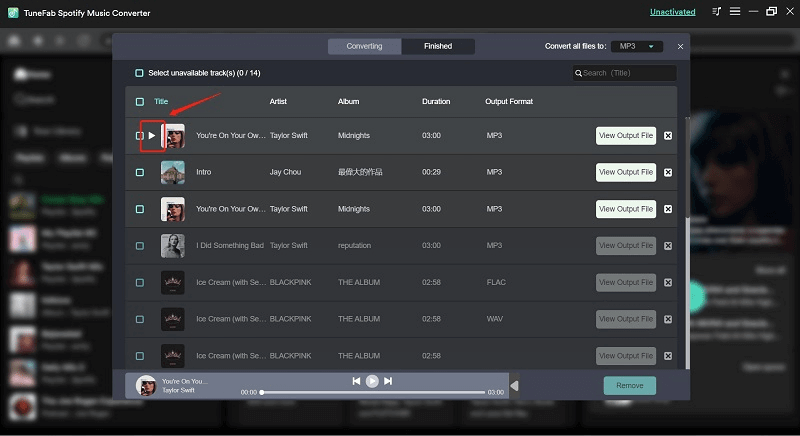
When the conversion is completed, please go to the "Finished" section and click "View Output Files" to get the converted MP3/M4A/FLAC/WAV/AIFF/ALAC tracks.

How to Customize Audio Parameters
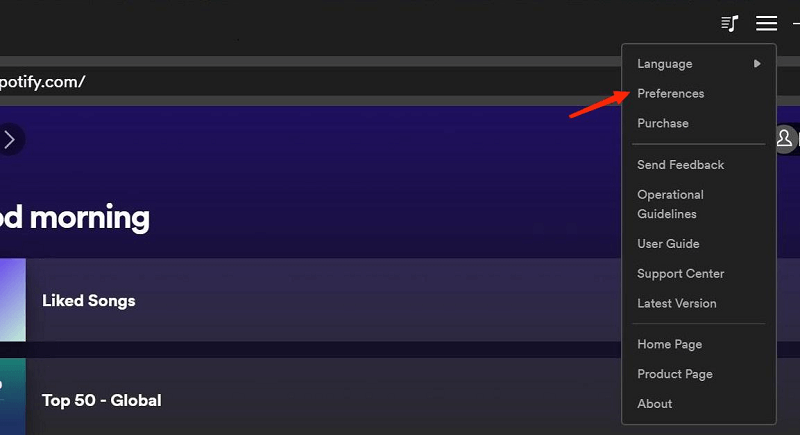
TuneFab Spotify Music Converter allows you to adjust the parameters according to your own needs, like bitrate and sample rate. You can customize them in the "Preferences" section in the top-right corner of the interface.
You will find "Bitrate" and "SampleRate" in the "Advanced" column.
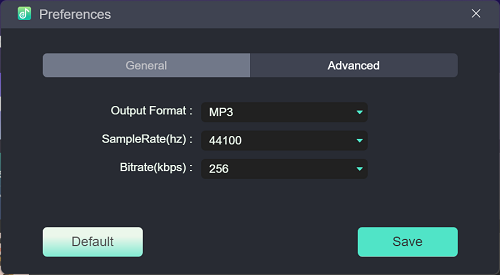
As you can see, by default, the sample rate is set to be 44.1kHz and the bitrate 256 kbps; but TuneFab Spotify Music Converter can provide you with the highest sample rate of 44.8kHz and the highest bitrate of 320 kbps.
Usually, the default setting can offer you a good listening experience, and you can also get the music files of higher quality by selecting a higher sample rate and bitrate. But this setting will occupy much more storage space.
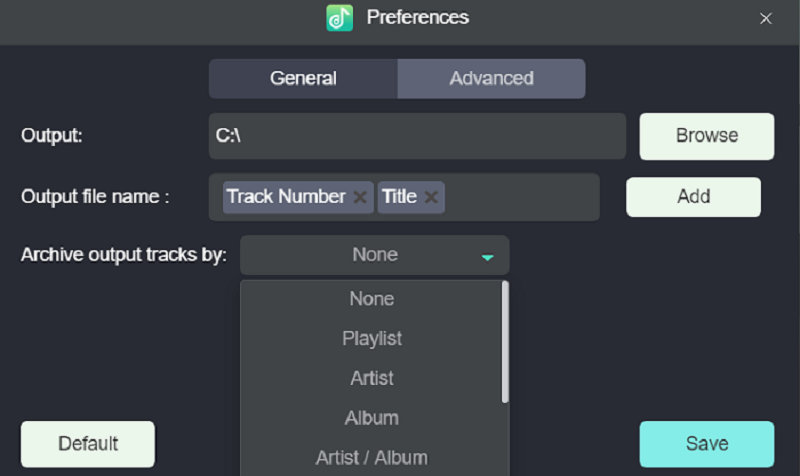
To enable a more convenient music offline management experience, under the "General" tab, you can customize file names before processing Spotify music download. Simply select tags to name the songs in preferences.
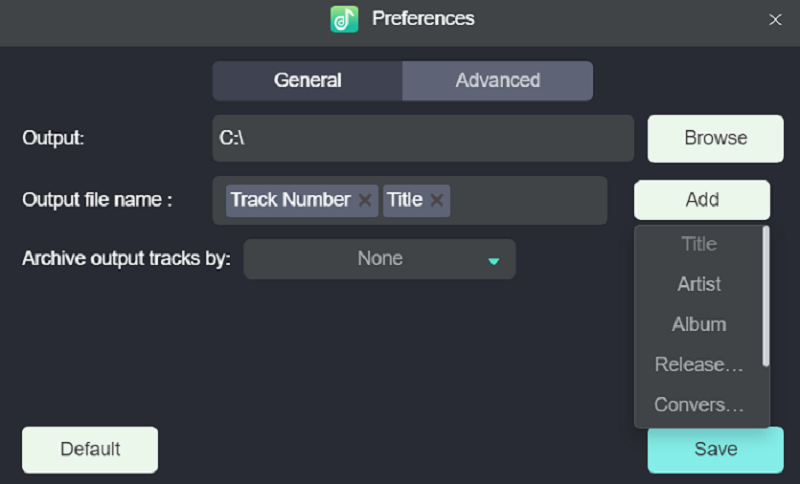
In addition, by selecting a tag to archive output tracks, TuneFab Spotify Music Converter will automatically sort the music downloads in different folders for you. While downloading a batch of songs at once, you don't need to worry about wasting time managing the downloads anymore!
Video Tutorial
You can check this video for a detailed guide.

