


"Can I burn my Apple Music Songs to CDs for offline listening while driving to work?"
You may want to burn songs from Apple Music to a CD, not only to create a physical backup of your favorite music without audio quality loss, but also to make it more convenient to share music with friends or families who don't have access to Apple Music platform.
Unfortunately, songs downloaded from Apple Music come with DRM protection. It makes them incompatible with CDs, which recognize only common formats like MP3, WMA, WAV, etc. Therefore, directly burning Apple Music songs to a CD becomes a challenge.
But not to worry, this article is here to help. All you need is to use an Apple Music converter - TuneFab Apple Music Converter, to convert songs from Apple Music to CD-compatible MP3 format, and then you can easily get a burned CD with the help of lots of CD burners. Follow the instructions in the post to burn Apple Music to CDs within minutes!
100% Secure
100% Secure
Part 1. Convert Apple Music to MP3 Before Burning CDs
TuneFab Apple Music Converter is a professional application designed to convert Apple Music tracks to MP3, M4A, WAV, and FLAC common formats, which can be recognized by CD discs. Except for burning to CD from Apple Music, the downloaded Apple Music songs can also be transferred and played on multi-devices as you like.
As a professional Apple Music Downloader for removing Apple Music DRM protections, there are also many other sparkling features that you can explore and utilize.
👍 Key Features of TuneFab Apple Music Converter:
● The batch conversion feature enables you to convert multiple songs simultaneously.
● Up to 320kbs of high-quality converted songs deliver a lossless listening experience.
● A conversion speed of up to 20X allows you to download an entire playlist in a few minutes.
● Offer personal output presets for audio file title and folder archive.
● Help you manage converted songs with ease by preserving original ID3 tags and meta info.
Now, you can begin the process of converting Apple Music to MP3 in order to burn the converted songs to CD successfully.
Step 1. Get TuneFab Apple Music Converter Ready
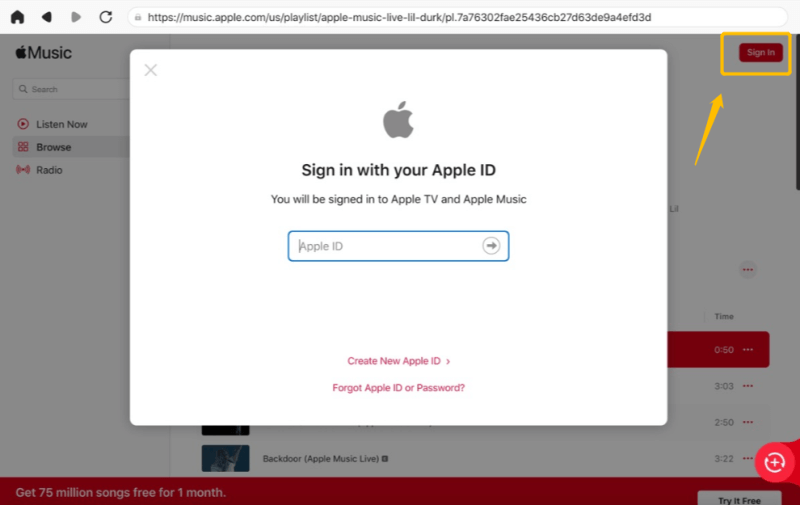
Download and install TuneFab Apple Music on your PC or Mac. When completed, run the app on your computer. Next, click Open the Apple Web Player and sign in with your Apple ID.
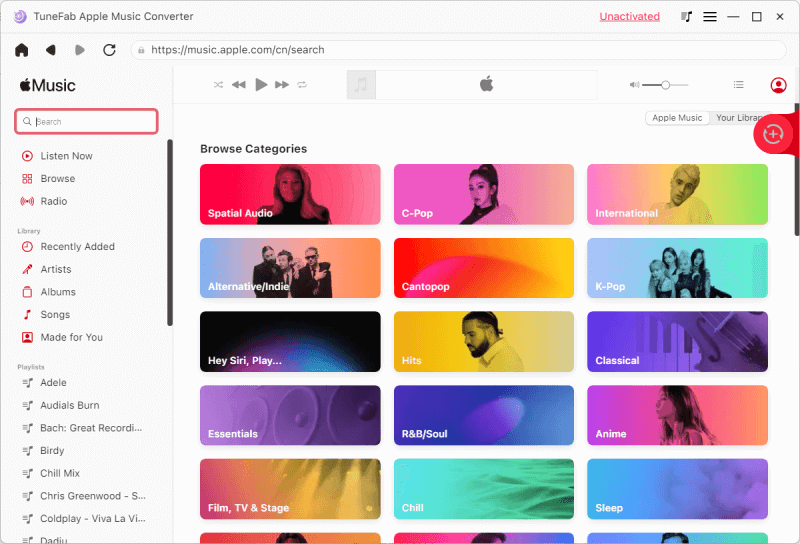
Step 2. Select Songs to Convert
Click the playlist on the left side and then choose those songs you want to burn to CD. Or you can drag and drop an entire playlist to the red “+” button.
Step 3. Select Output Format and Quality
On the conversion interface, you can choose MP3 as the output format, and adjust the bit rate and sample rate as you like for the songs. To keep the original quality, you can set the bitrate to 320 Kbps and the sample rate to 48,000 kHz.

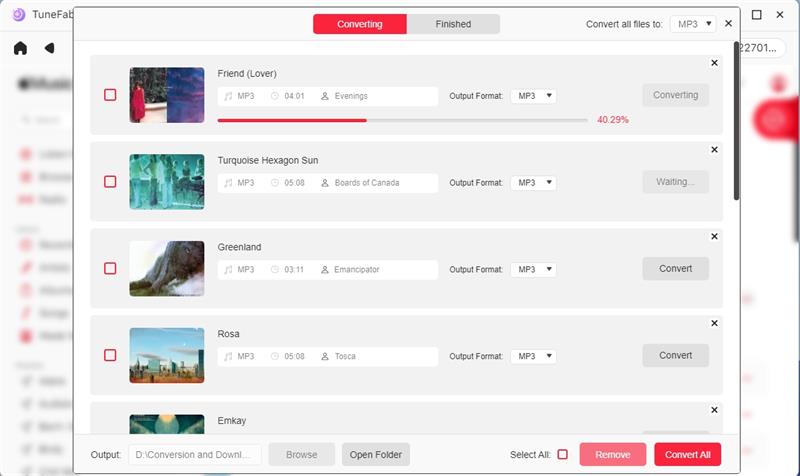
Step 4. Convert Apple Music to MP3
Click Convert All to start conversion. After conversion, the MP3 versions of your Apple Music songs will be stored in the destination folder. Click Open Folder in the bottom left corner to access them.
Note: TuneFab All-in-One Music Converter is now available! It is capable of converting music to MP3/WAV/M4A/FLAC from music platforms (i.e. Apple Music, Spotify) If you are using multiple platforms, don't hesitate to give it a go!
100% Secure
100% Secure
Part 2. Multiple Ways of Burning CDs from Apple Music
Once you finish downloading DRM-free Apple Music songs on your computer, the next step is to burn Apple Music to CD using disc-burning apps like iTunes, VLC, Burn, Windows Media Player, and ImgBurn. Keep reading to find which one works best to burn Apple Music albums to CD.
1. Burn Apple Music to CD via iTunes/Apple Music (Windows & Mac)
To burn Apple Music to a CD on Windows/Mac, the easiest method is to use iTunes and Apple Music. Both apps are capable of helping you easily accomplish this task without the need for an additional CD burner. In this guide, we'll explore how to burn a CD from Apple Music using iTunes as an example. The process is quite similar when using the official Apple Music app on a Mac. If you need help, you can check Apple's official guide for more info.
Now, keep reading and learn how to burn a CD from Apple Music using iTunes immediately.
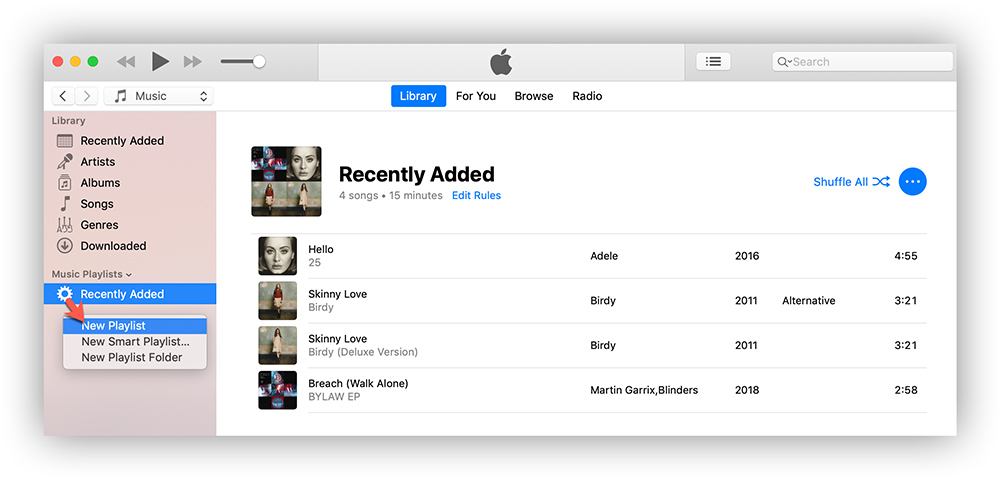
Step 1. Open iTunes, create a new playlist (click on File > New > Playlist), name it and then drag and drop these converted Apple Music songs to this playlist.
Step 2. Insert a blank CD disc into the disc drive. Then a pop-up window will tell “You’ve inserted a CD or DVD”. Click OK.
Step 3. Right-click the playlist and select File > Burn Playlist to Disc.
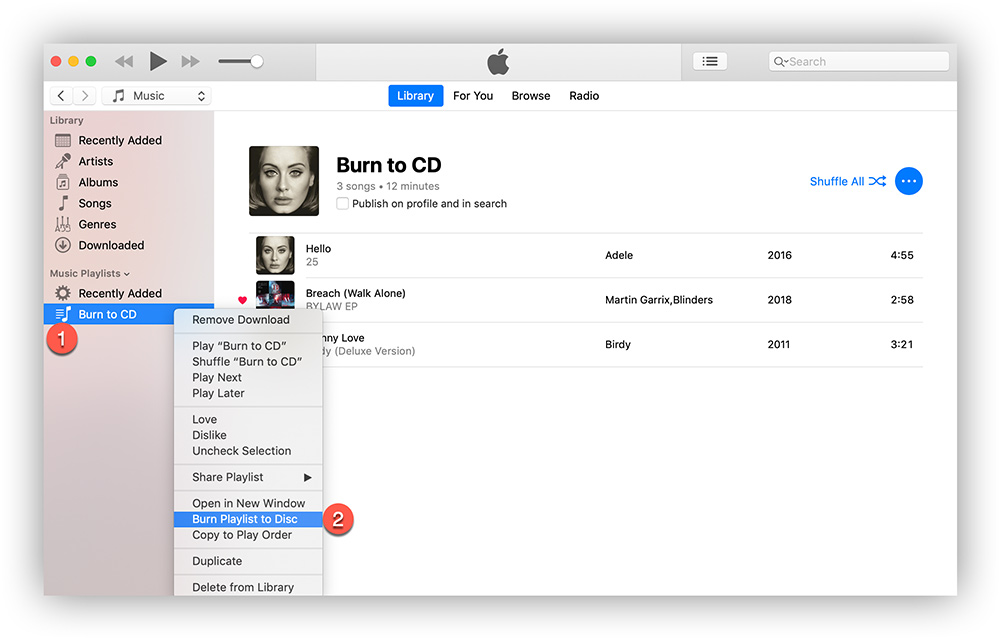
Step 4. Choose Audio CD so that you can play this disc on any standard CD player. Then, click Burn. Then iTunes will start burning all the Apple Music songs in the playlist to the CD.
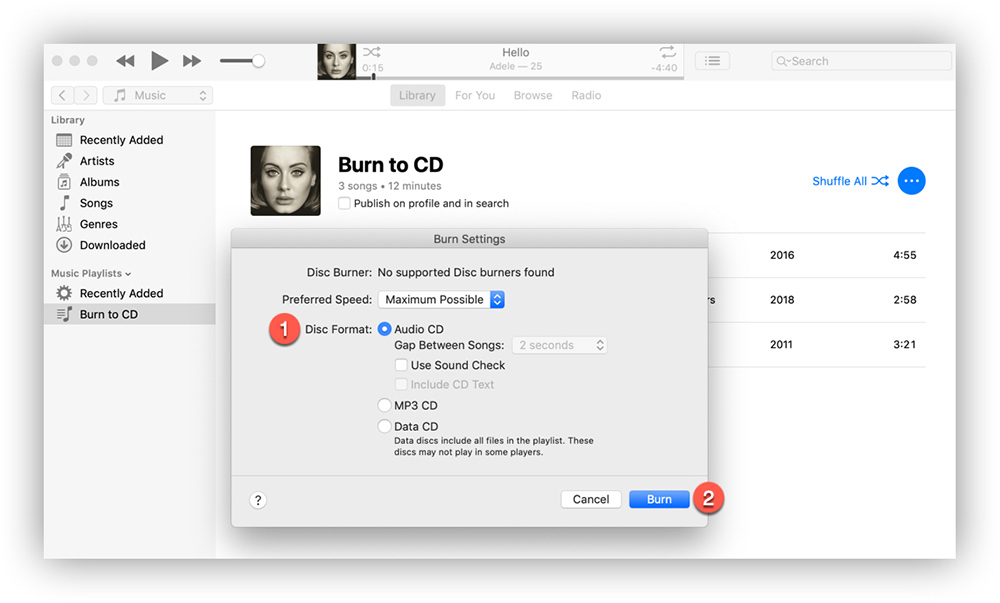
💡 Tips: Be sure to select “Audio CD” or “MP3 CD” rather than “Data CD”. Data CD is selected unless you want to use this CD to store and transfer files.
2. Burn Apple Music to CD via VLC (Windows & Mac)
VLC (VideoLAN Client) is a free and widely-used media player known for its ability to play a variety of multimedia files, including audio and video formats. Its user-friendly interface and additional CD-burning features make it a handy all-in-one solution for media playback and CD burning. Also, it works on both Windows and Mac devices, so you can easily burn CDs from Apple Music downloads on your computer.
Step 1. Insert a blank CD into the disc drive. Download and launch the VLC player on your computer.
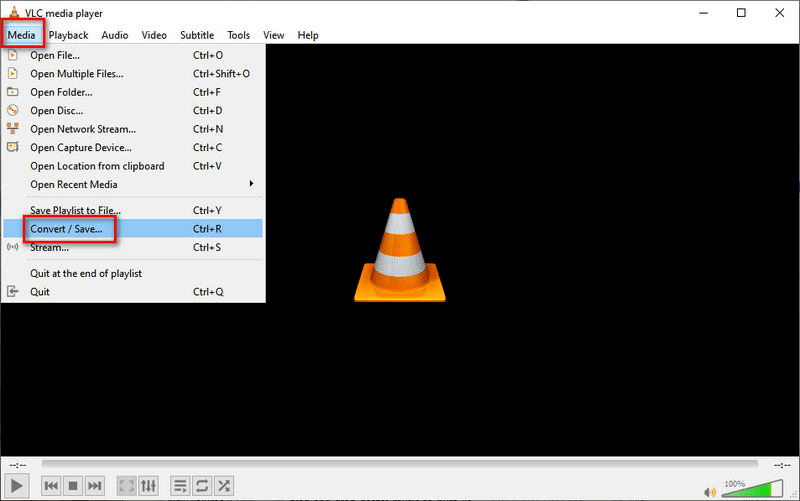
Step 2. Click Media in the upper left corner to open a drop-down list where you choose Convert/Save.
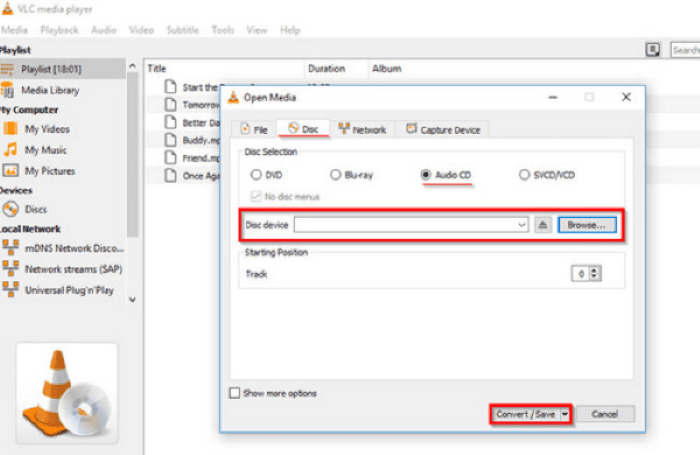
Step 3. An “Open Media” window will appear. Click the Disk tab at the top. Check the Audio CD box. Click Browse to select the CD drive. Click Convert/Save.
Step 4. Then, the Convert screen will appear. Click the tool icon to choose MP3 as the desired format and click Save.
![]()
Step 5. Click the Browse button to add the folder that stores your converted Apple Music songs. The final step is to hit the Start button to start burning Apple Music songs into a CD.
3. Burn Apple Music Songs to CD via Media Player (Windows)
If you mainly use a Windows PC, there actually is a default Apple Music to CD transferring tool available for you to burn Apple Music to CD without installing other software anymore, which is Windows Media Player. As the software will not be difficult to use, and it is completely free of cost, you can open it and just start burning music to CD from Apple immediately. Now, read the steps and see how to do it.
Step 1. Insert the blank CD. And launch Windows Media Player.
Step 2. Go to the Burn tab. Open the music folder that stores previously converted Apple Music songs, then drag and drop them to the burning list on the right side.
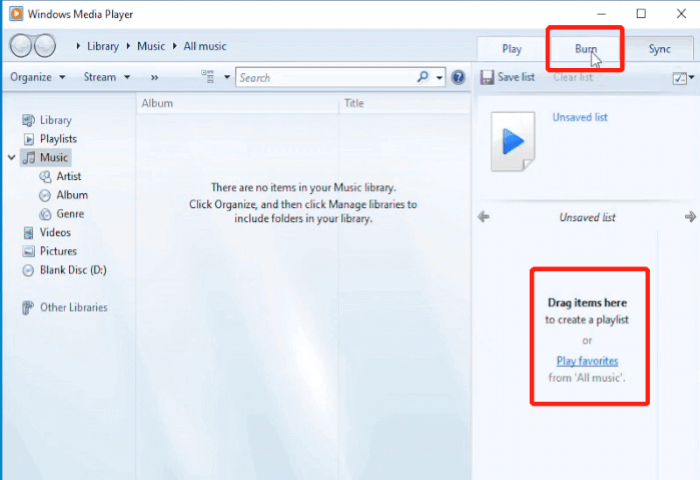
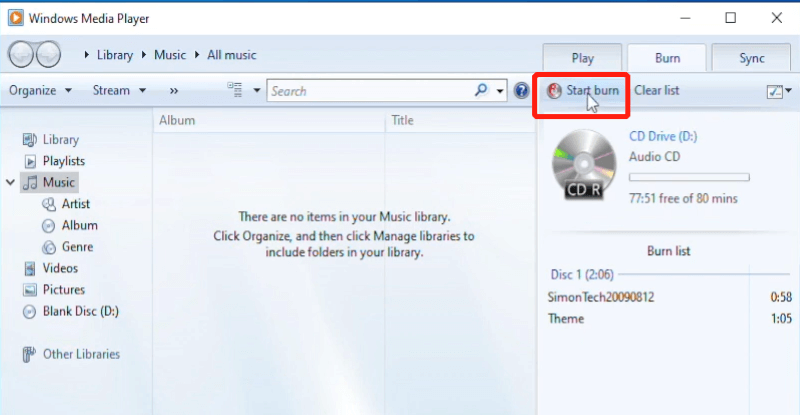
Step 3. Click the “√” icon to open a drop-down list where you can make sure Audio CD is selected.

Step 4. Click Start Burn. Once the burning process is finished, Apple Music songs will be stored in the CD.
4. Burn Apple Music Songs to CD via ImgBurn (Windows)
In addition to using iTunes, there are other professional apps that are helpful when it comes to burning Apple Music to CD on Windows, one of which is ImgBurn which supports lots of audio formats such as AAC, APE, FLAC, M4A, and MP3. Besides CD, you can also burn files to DVD, HD DVD, or Blu-ray on this tool. Moreover, it's totally free to use. Here's how to burn a CD from Apple Music with this free CD-burning program on Windows.
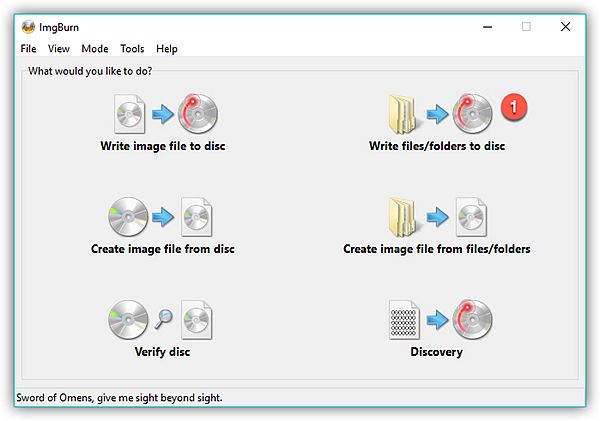
Step 1. Download ImgBurn, get it running, and select "Write files/folder to disc" from the main interface.
Step 2. Click Browse for a folder to import a bunch of Apple Music files at a time. You can save all the songs you want to burn onto a disc in the same folder.
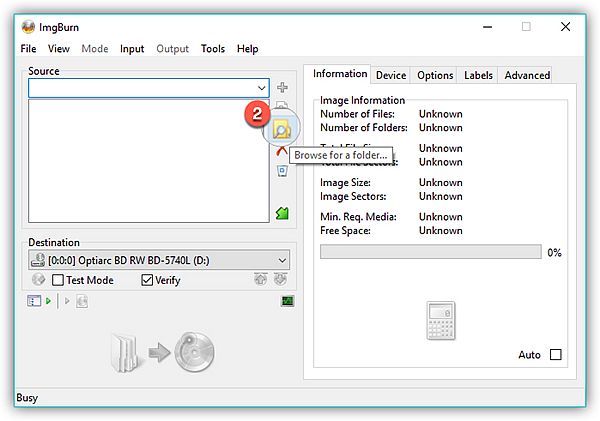
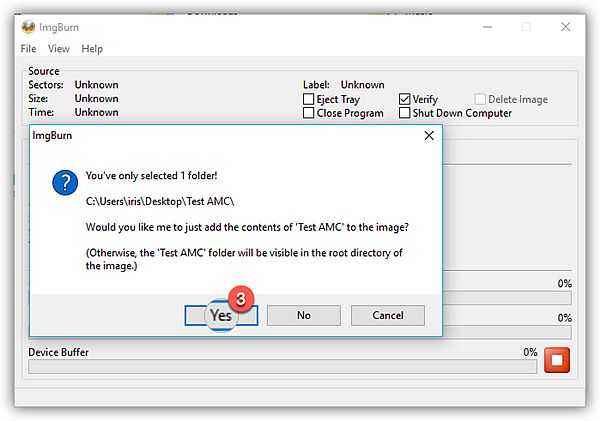
Step 3. Hit the Folder-to-Disc button to start creating your own CD. You will see a pop-up window. Click Yes to continue.
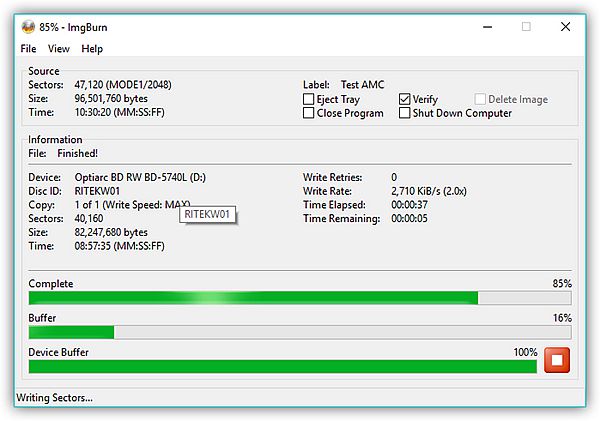
Wait until burning is completed. After that, you can play Apple Music on a CD with your car CD player.
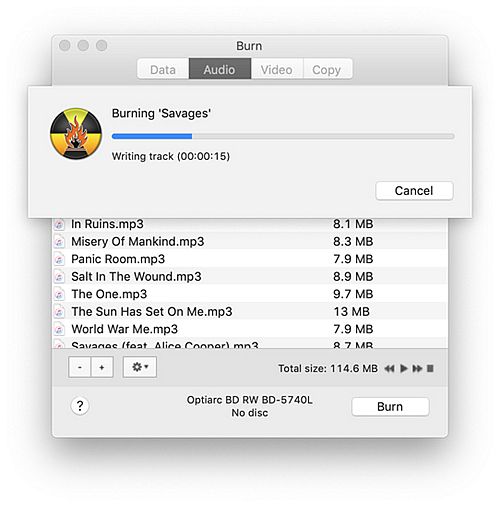
5. Burn CDs from Apple Music Playlist via Burn (Mac)
After downloading Apple Music tracks on your Mac computer using TuneFab Apple Music Converter, there are also other excellent programs to burn Apple Music to CD Apart from iTunes and the default Apple Music app. The app Burn is an easy-to-use tool that can help. Supported by macOS 10.9 or higher, it's safe and open source that offers CD-Text and mp3 tag editing features, definitely a decent choice for CD burning.
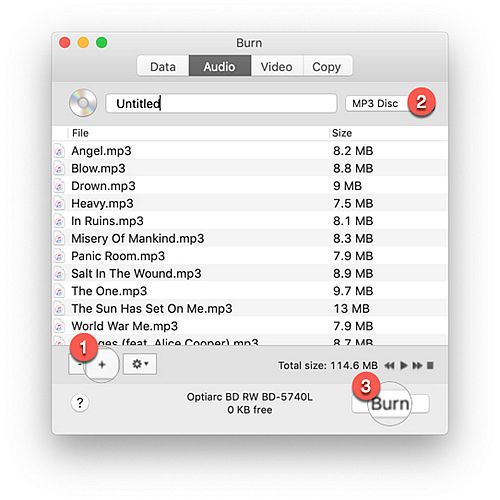
Step 1. Run Burn on Mac then you can see the main interface as below.
Step 2. Choose Audio and click the "+" button to add your music files to the program. Next, select MP3 disc or Audio CD as the CD type from the upper right corner, then click Burn to continue.
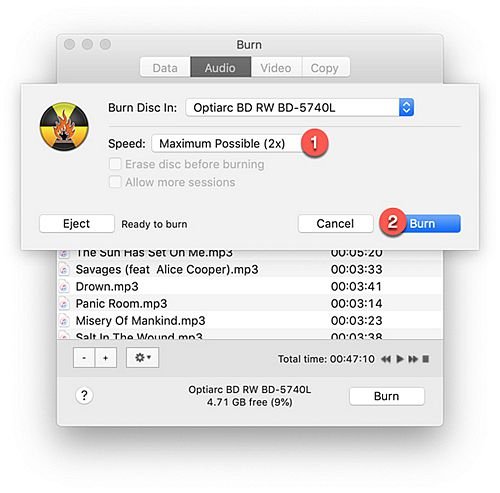
Step 3. Then a window will pop up to ask you to select the Speed where you can choose Maximum Possible (2X) and click Burn to start burning Apple Music playlists to the CD.
After a few minutes, Apple Music tracks will be successfully added to a CD and you can enjoy Apple Music on any CD player with ease.
FAQs About Burning Apple Music to CD
Q1: Is It Illegal to Burn Apple Music to a CD?
Whether it is legal to burn Apple Music to CD would be based on how you will use the burned CD. As the official also provides a direct way for you to burn a CD from iTunes, it would be totally legal if you only do it for personal use. But pay attention that if you burn Apple Music to CD for any commercial activities without getting permission from the authors of the songs, you will be warned and this can be an illegal action.
Q2: How Many Apple Music Songs Can You Burn on a CD?
This would depend on both the file sizes of the songs you want to burn to the CD and the capacity of the disc. For example, a CD of around 650MB storage can keep around 74 minutes of music, or about 150 MP3 files on it. When the disc storage gets larger, it can save more MP3 files for you.
Q3: How to Choose the Right Type of CD to Burn Apple Music on?
Choosing the right type of CD depends on your needs and the capabilities of your CD player. You'll likely want to use a standard CD-R (Compact Disc Recordable) or CD-RW (Compact Disc Rewritable) disc for burning Apple Music. Here are their differences.
● CD-R: They can only be written to once. Once you've burned your Apple Music onto a CD-R, you can't erase or re-write it. However, they are more compatible with a wider range of CD players.
● CD-RW: They can be rewritten multiple times. If you want the flexibility to add or remove tracks from your CD, later on, CD-RWs might be a good choice. But, not all CD players support CD-RWs so that compatibility could be an issue.
Therefore, before burning Apple Music songs to CDs, make sure your CD player supports the type of disc you choose. If you create a CD for long-term use and don't need to modify it later, a CD-R is often a safer bet. Double-check the specifications of both your CD burner and CD player to ensure compatibility.
Q4: Can I Burn Apple Music to CD Without iTunes?
Beyond using iTunes or the Apple Music App, there are various methods to burn Apple Music to CD after using TuneFab Apple Music Converter to download them in CD-recognizable formats. If you're looking for a free CD/DVD burning tool, VLC, as mentioned in this article, is a great option. For those seeking more professional and powerful software, alternatives like VideoByte DVD Creator can be explored. These programs allow you to quickly and efficiently burn your converted music files to CDs of high quality, without using iTunes.
Final Words
The most important step in burning Apple Music to CD involves DRM removal and MP3 conversion processes, which ensures that Apple Music songs become compatible with CD discs. Therefore, if you need to burn Apple Music to CD, you can use a tool like TuneFab Apple Music Converter for these processes. Only after completing these steps can you successfully create a CD from your Apple Music collection. Hit the download button below and start your work!

TuneFab Apple Music Converter
One click to remove DRM from Apple Music and iTunes Music for burning to CD