


The first method only works with an Internet connection and requires that you make sure your Apple device and Kodi are connected to the same network. Is there any other way to listen to Apple Music offline on Kodi?
You will need to use a music converter. Why? Because Apple Music has a DRM restriction that causes poor applicability and is not supported by a proper Kodi plugin, it is possible to bypass this limitation and convert your favorite Apple music to mainstream MP3 format, and then enjoy it on a Kodi player.
There is one thing that the you shall know, that is, Kodi does not support the Apple Music Format due to its DRM protection. yous cannot directly open the apple music format on Kodi. To play on the Kodi player, the you need to play via the airplay plug-ins or remove the DRM protection and convert it into an MP3 format then play on Kodi. Don't worry, and please read below for step-by-step guidance. We are going to show you how to operate it.
Play Apple Music on Kodi via Airplay (The Easy Way)
Within the available method of playing apple music on the Kodi player, the airplay function is kind of an easy and a time-saving method. And with the assistance of airplay, playing apple music on the Kodi player needs no further conversion. And since the latest version of Kodi is equipped with airplay plugins, now yous can just easily apply this method without much effort. Anyway, you still need to set a few settings first, allowing your Kodi player to acquire an available airplay function. Below are the specific steps:
Considering there is no auto support to launch the airplay on the Kodi media player, you need to enable it first. And first, you need to follow the below steps to enable airplay support.
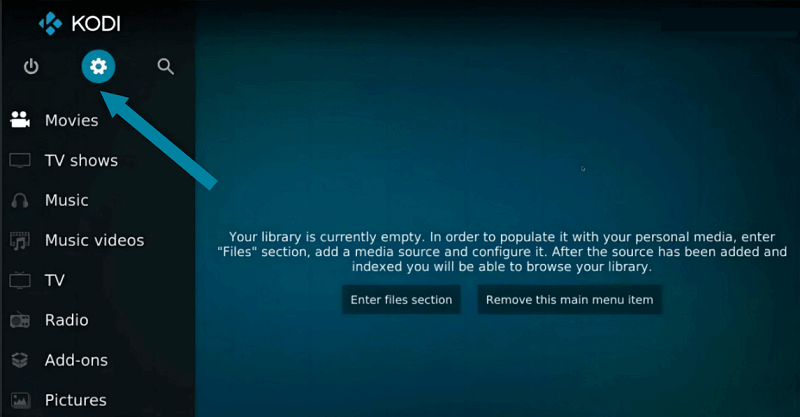
Step 1. Launch the Kodi media player, and go find the settings options on the upper left of the main interface, and click it.
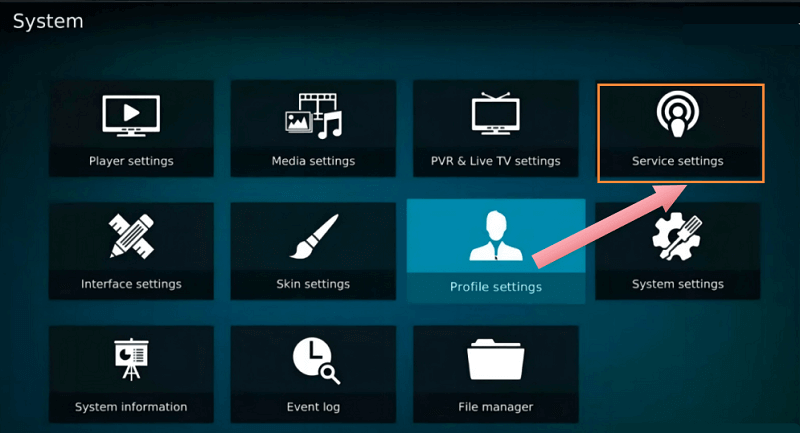
Step 2. Find the Service settings options in the upper right corner and tap on them.
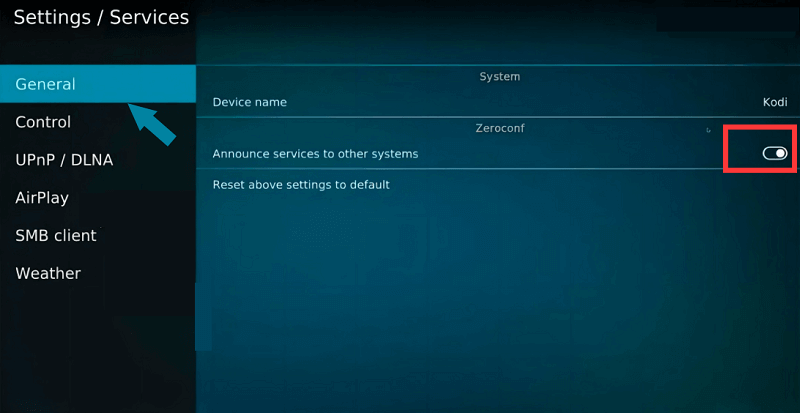
Step 3. Clicking on “General”>Enable the option “Announce Services to other Systems” in Zeroconf.
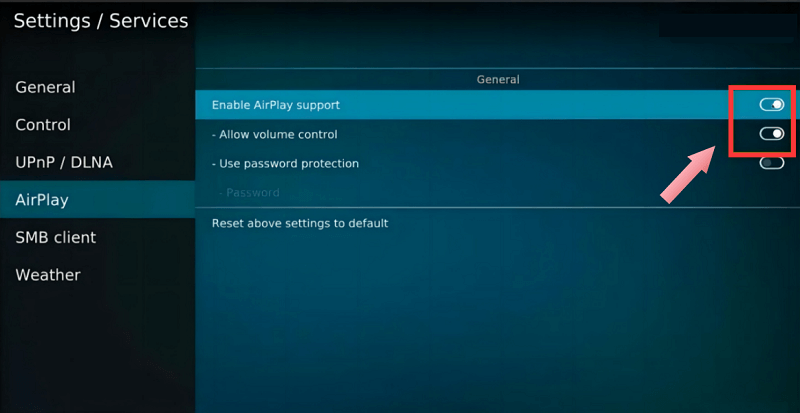
Step 4. Then you can find the Airplay option on the left side of the Service Settings menu, and you tap on the option and enable airplay support on the Kodi media player.
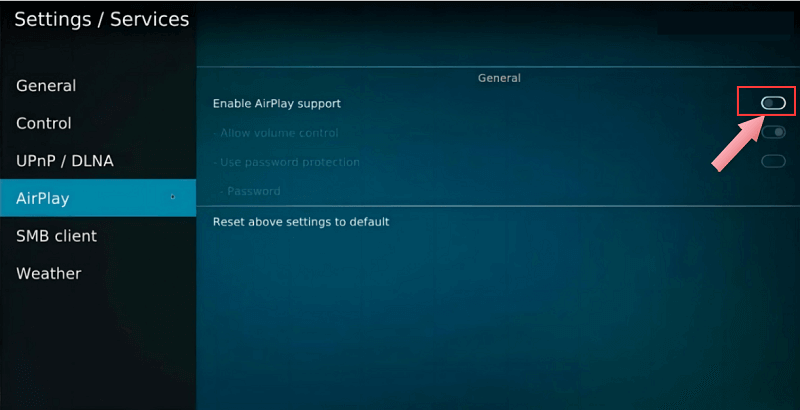
Moreover, do not forget to allow the basic function of the volume control as well.
Step 5. Tap the Airplay icon when returning to the main interface, and you can enjoy the apple music via airplay on Kodi media player.
Enjoy Apple Music on Kodi (The Best Way)
The first method only works with a smooth Internet connection and requires that your Apple device and Kodi are connected to the same network. If you want to find another easy way to listen to Apple Music offline on Kodi, a specialized Apple Music converter is required. Why?
This is because Apple Music has a DRM restriction that causes poor applicability and is not supported by a proper Kodi plugin. Still, it is possible to bypass this restriction by converting your favorite Apple music to mainstream MP3 format, and then enjoying it on a Kodi player.
If you choose to convert into an MP3 format, TuneFab Apple Music Converter is a great choice for you. This application has many bright spots, and you can learn more about its advantages, and the operations guidance of how to get Apple Music on Kodi player, or even some tips on adding apple music to KODI player by reading the details below:
Amazing Features of TuneFab Apple Music Converter:
● Simple operations to crack the encryption of DRM protection in Apple music format and make an easy offline playback on Kodi or any other device, which saves you from worrying about a bad experience that may cause by the poor connection on Apple music.
● Multiple mainstream formats are available for your choice, like MP3, WAV, M4A, FLAC, etc, adapting to a great number of devices on the market.
● Available for batch conversion, with 5 times transferring speed, providing the experience of time-saving conversion.Remaining original sound quality after conversion.
● A practical ID3 tag manager, preserving information about singers and songs, which easily helps yous to identify songs without renaming them.
● Compatibility with Windows devices or Mac devices.
Tutorial: How to Get Apple Music on Kodi?
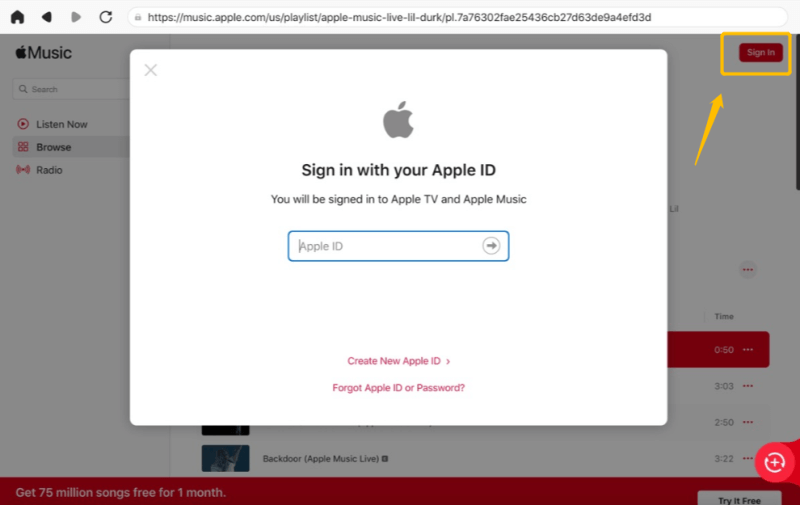
Step 1. Log in with Apple ID
First, you need to launch the TuneFab Apple Music Converter. After you log in with your Apple ID, the application is authorized to access your Apple Music playlist. Then you can import songs to the TuneFab Apple Music Converter.
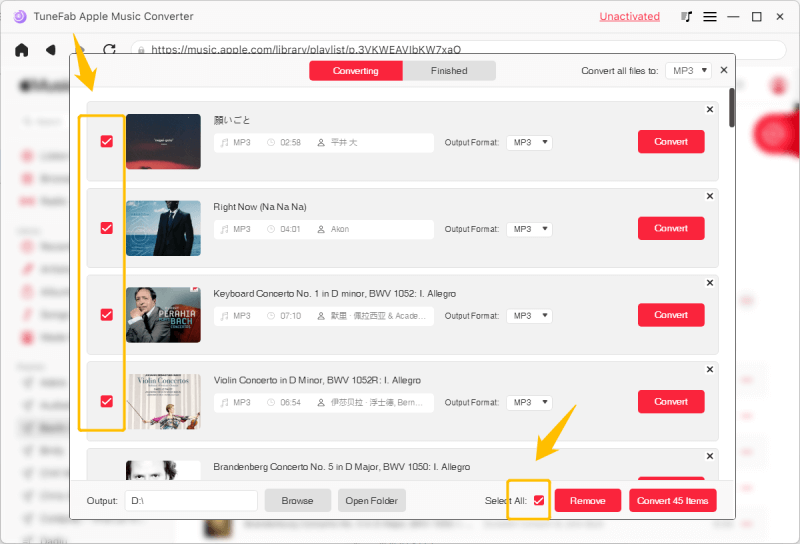
Step 2.Select Apple Music Songs
You can drag the song you want to download to the Red Plus button with the mouse. What's more, you can convert multiple songs, a whole album, or even the whole playlist in one operation by clicking on “Select All” for batch conversion. It helps you easily convert multiple songs at once. That's right, TuneFab Apple Music Converter has a nice batch conversion that can save you from tedious procedures, cutting out the time to convert them one by one.
Step 3. Select Output Format and Other Parameters
Before you start the conversion, an output format and parameters (if needed) shall be set up in advance. But how to find the right place to set up your favorite format and parameters? First, you go to the menu list and click on “Preferences” and a pop-up window will appear.
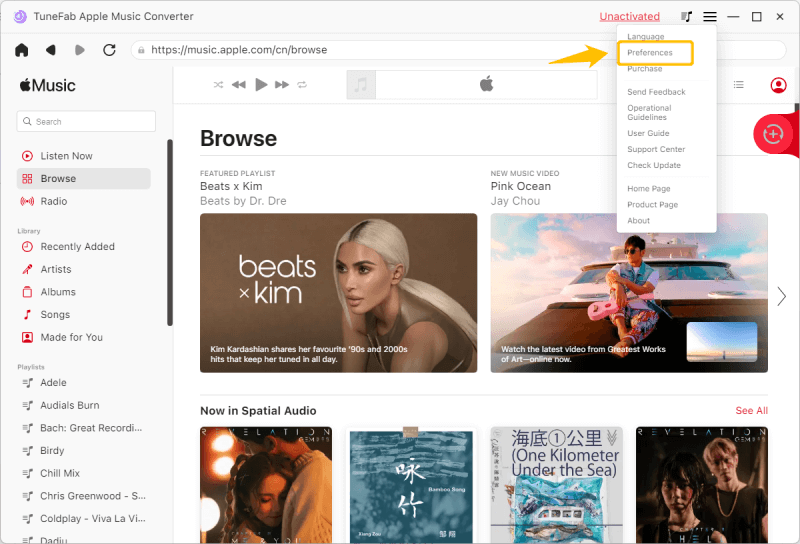
You can select “Advance”, and choose your preferred output format, sampling rate(Hz), and bit rate (kbps). and save it when it all settles.

Step 4. Play Converted Apple Music on Kodi
After you finish the conversion, you can browse the output file and find the MP3 format or other formats you converted. Then you can add them to Kodi or any other devices you want to broadcast and start enjoying yourself.
Bonus Tip: How to Add Music to Kodi
You may are not familiar with how to add Music to Kodi. But you need not worry. In the following, we will show you step-by-step operation guidance.
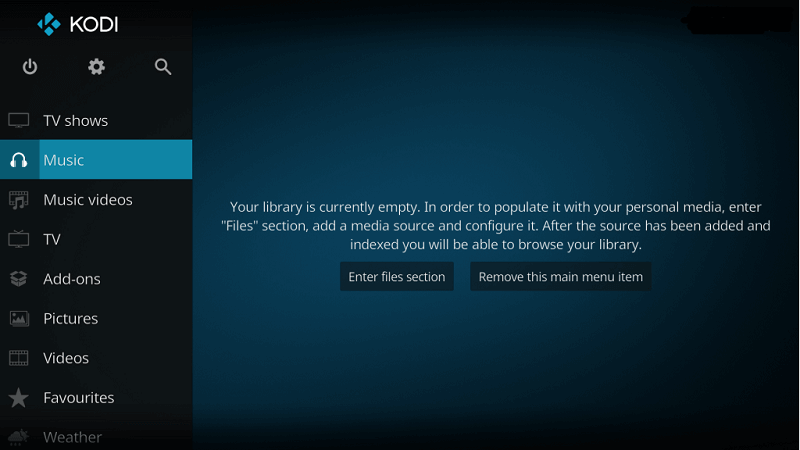
Step 1. Find and select the Music option on Kodi
On the left side of the home page menu, you can find the music option and select it. Then go click on the “Enter files section” to add the music source.
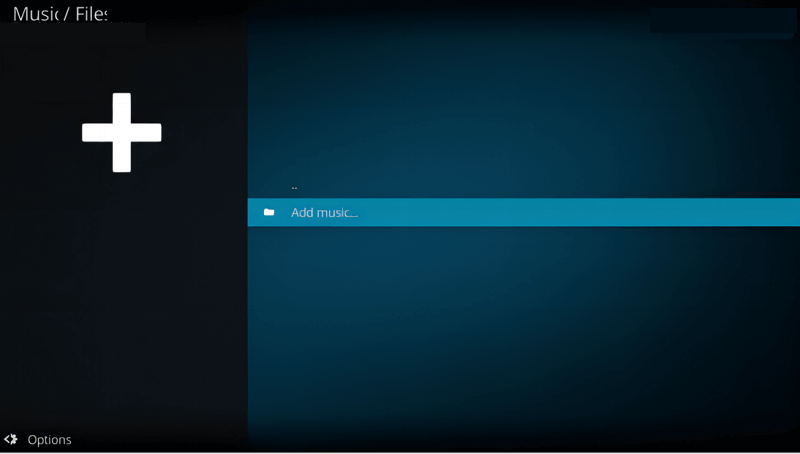
Step 2. Adding music source
Here you will see a big plus icon. You select it, and then a “Add music source” window will show up. There are two available methods for you to navigate to your target music source. One is clicking on the “Browse” option to choose the files you want.
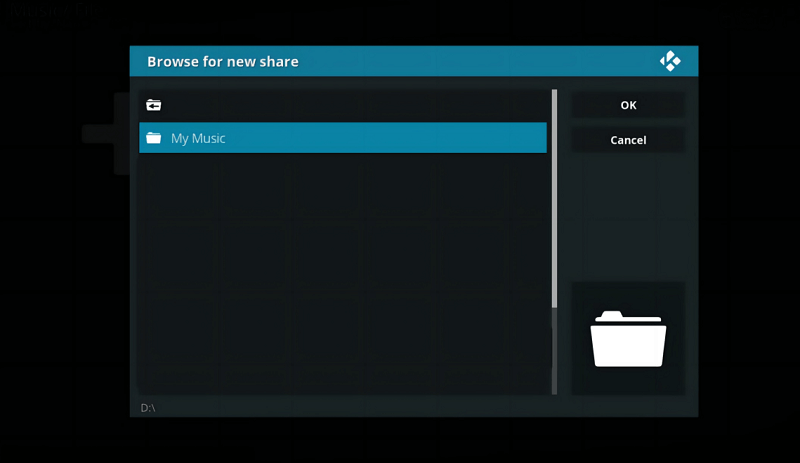
After you hit the browse option, there is a new display window of “Browse for new share”. This window will allow you to navigate to the folder position where your music files are stored. By selecting your target music files or folder, and finally clicking on the OK button, you can have your music source added to Kodi.
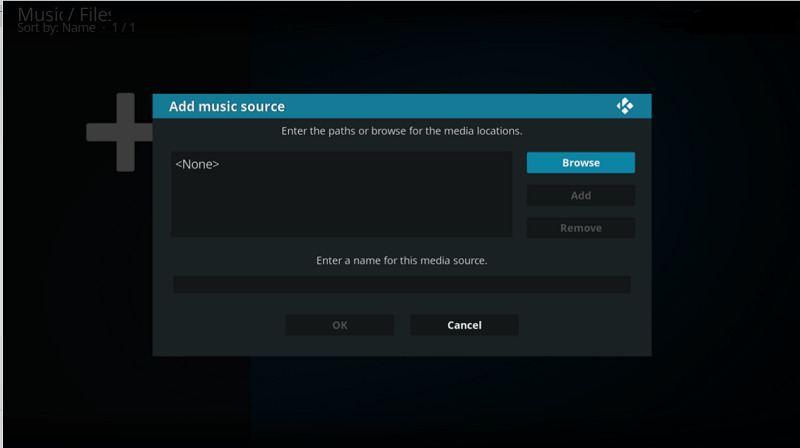
And the second way is directly entering the default path of your music source in the frame of “None”. Please do know that either way you can help add a music source and there is no need for repetitive operation. By the way, Kodi has given you an option by entering a name that you want for your music source instead of an auto-suggested name.
Step 3. Setting media permission for Kodi player
After you add music to Kodi, there is a “add to library” widow that asks permission from the Kodi player to access your media. If you select yes, Kodi will duplicate the default path of your music source and access files in your media to the library. If you select no, Kodi will receive no permission to access your media but only through browsing.
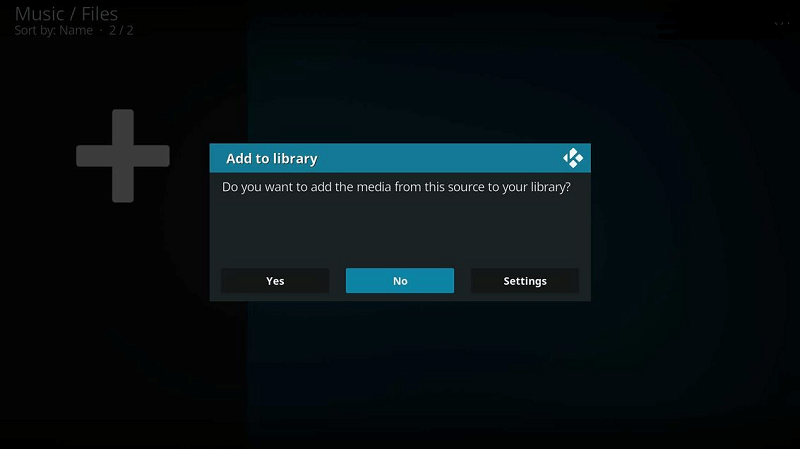
But before you select yes or no, please go choose the setting first and enable you to fetch additional information and art during the scan.

When finish setting, it will lead you back to the window of the Add music source. Then if you selected Yes, there will be a scanning process for adding a source to the library. Here is a warm prompt for you. In this process, it cannot support another addition, which has to wait until this process is completed.
Step 4. Enjoy your music source on the home interface
Once you finish the scanning process, your files or music albums will showcase on the main interface when selecting the music option.
Conclusion
The key point of this article is to lift the yous' confusion on how to play apple music on the Kodi media player. We have offered two methods in the above content. One remains the same format and needs no conversion which basically is an easy operation. Another one is to convert apple music into MP3 formats with the help of TuneFab Apple Music Converter, which can not only use on Kodi but also can be applied on all other devices. yous can choose either method that better meets their music-playing needs. At the end of the article, a tip on how to add music sources to Kodi is also elaborated on in advance in case you do not know how. You shall certainly ease their confusion after reading this article.