


Streaming and downloading songs from iTunes is great but it also means your computer hard drive will be significantly occupied. To spare storage for computer to run smoothly, you may run into a situation where you have to delete some of your favorite songs. It would be great if one could move these music files out of your computer to another portable location, like an external drive. But can iTunes backup to an external hard drive? Fortunately, yes, it's possible to move your iTunes music to a portable hard drive so that you never run out of storage. Let's learn how to do it.
Can iTunes be Backed up to External Hard Drive?
Yes, you can, and it is a rather simple process. iTunes not only does a great favor for backing up data but also for managing the media library. By default, the iTunes library lets users access millions of songs. Users can also download and store media purchased from the iTunes Store. But it is important to note that some iTunes songs are still DRM-protected, which means you can not play the songs outside the app.
To back up the iTunes library, you only need to save the iTunes files on your computer, and then move them to the external hard drive. Below, we are going to introduce 2 easy ways to effortlessly back up iTunes to External Drive.
Method 1. Common Way to Back up iTunes to External Drive
Moving your iTunes from your computer to an external device is quite easy. Follow the steps below to do so:
Step 1. Connect External Drive with Computers
First, connect your external storage device to your Mac or Windows computers with enough storage.
Step 2. Access the iTunes Folder
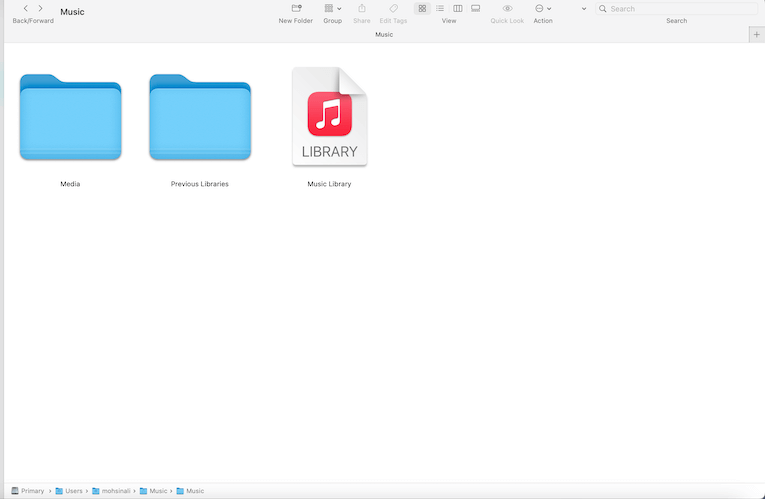
For users with Mac, from your Finder, browse in this sequence: Go > Home > Music > iTunes (older versions of macOSX) and Go > Home > Music > Music (For macOSX Catalina, Sonoma, and above).
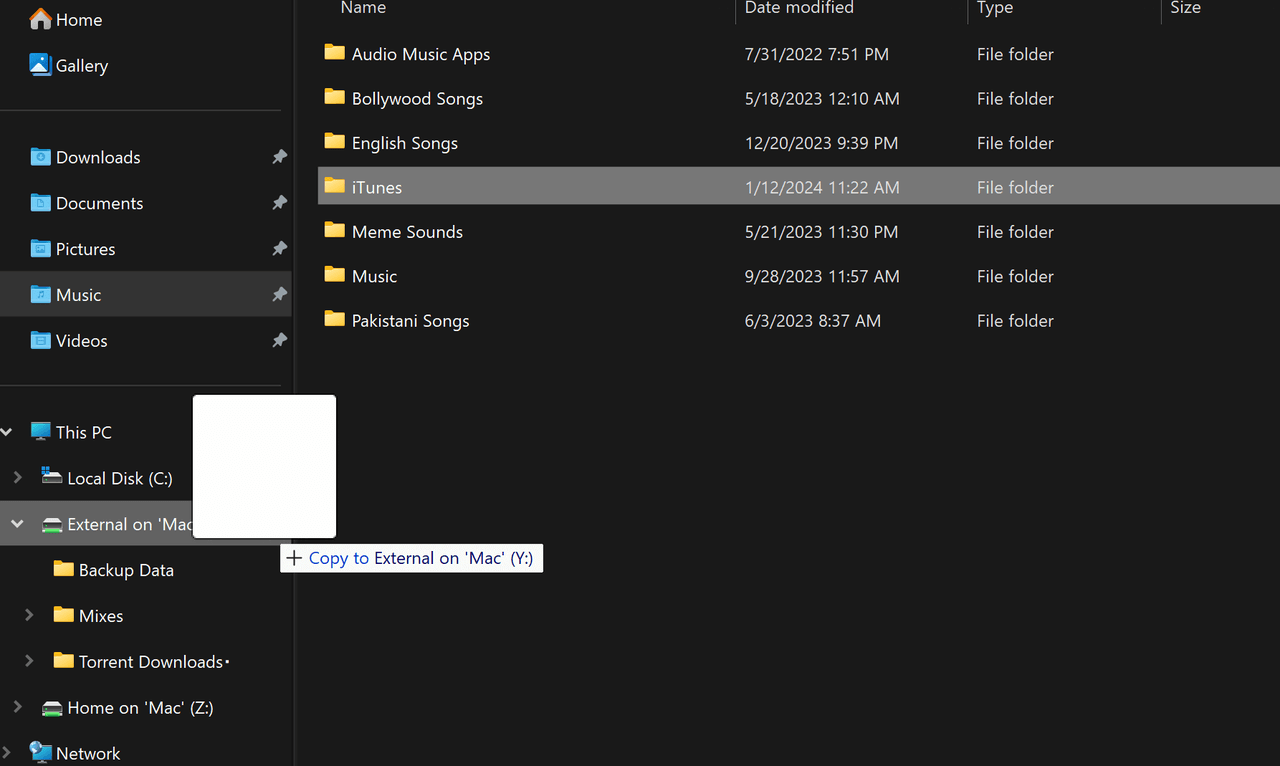
For users with Windows 10/11, this browsing path will be username/music/iTunes/.
Step 3. Consolidate iTunes Library
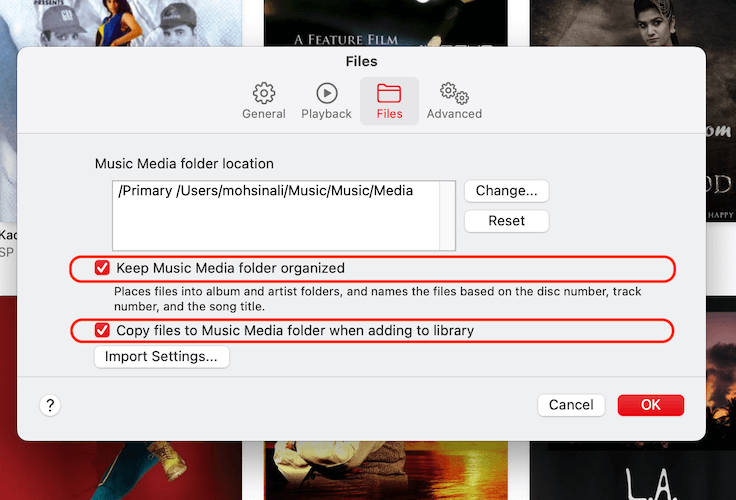
Go to iTunes > Preferences (Mac) or Edit > Preferences (Windows). Then, click Advanced from the Preferences dropdown menu. Check the option of Keep Music Media folder organized and Copy files to Music Media folder when adding to library. With these options, iTunes will consolidate and organize all your music files in one place. Then, click OK and close the preferences window of iTunes.
Step 4. Move iTunes Library to External Drive
Make sure to quit iTunes before doing this step. Head over to your finder, drag and drop your complete “music” folder to your external drive. In the case of Windows, drag your iTunes folder to the external drive.
Backing up your music files from iTunes has limitations as well. First, the process is not convenient as the files can be hard to manage across different devices. Also, users don’t get the ability to convert their files into desired format or audio quality, especially for DRM-protected files. These problems can be solved by using dedicated software designed for backing up music from iTunes.
Method 2. Easiest Way to Back up iTunes to External Drive
Dragging and backing up is easy but not future-proof. TuneFab iTunes Music Converter is a future-packed tool that can easily convert all iTunes songs, no matter if they are DRM-free or DRM-protected, into various formats such as MP3, M4A, FLAC, AAC, and more. Therefore, you can feel free to save the songs in desired formats to your external drive or even other devices.
TuneFab is also capable of accessing other resources from your iTunes library - your beloved Apple Music files, audiobooks, podcasts, and more. Not only that, you also get the ability to rip audio from iTunes M4V videos in formats of MP3, M4A, AAC, etc. The list of features goes on where DRM removal is a great future to have freedom for music lovers.
Key Features of TuneFab iTunes Music Converter
● Seamless backup of Apple Music files, audiobooks, videos, podcasts, & iTunes imports
● Super fast ripping speeds
● Ability to convert both DRM-protected or DRM-free music
● Batch conversions of music files to numerous formats
● Sleek and simple-to-use interface
Moving iTunes library to an external drive using TuneFab iTunes Music converter is super-easy as the entire software is optimized for both macOS 10.11 or above and Windows 7/8/10/11. Follow these steps to learn how to easily convert and backup your iTunes to your external drive:
Step 1. Select Wanted Songs/Albums/Playlists
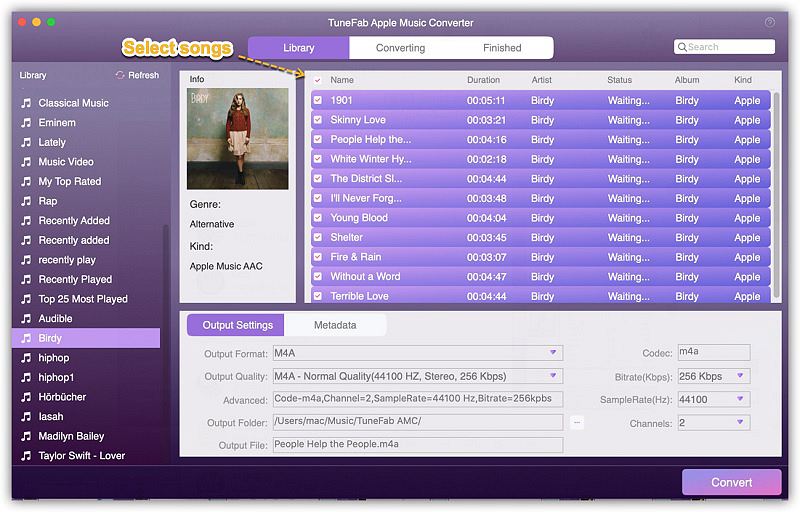
Upon opening the TuneFab iTunes Music converter, the software will automatically sync with your iTunes library. Select any song/album/Playlist you want to convert.
Note: iTunes installation is a must. Before the conversion, make sure you have installed iTunes on your computer.
Step 2. Customize Output Parameters
Click on Output Settings. You can change the output format (MP3, M4A, AAC, FLAC, and more), bitrate (up to 320 kps), Output File, etc to your preferences.

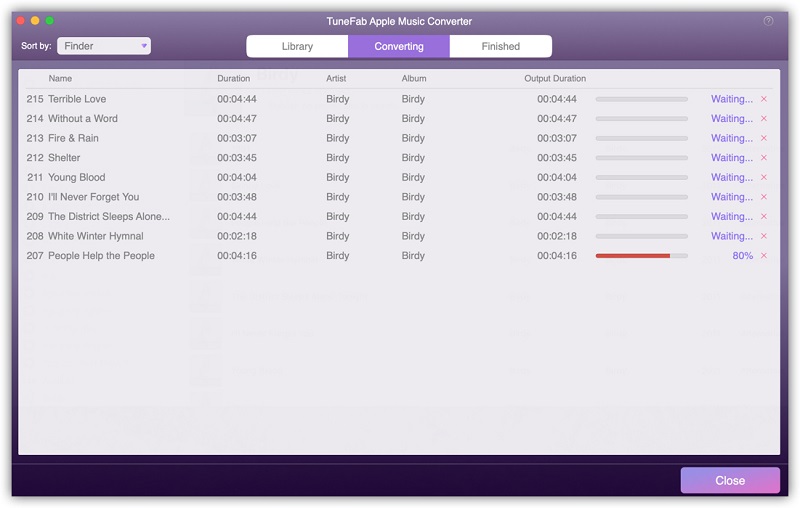
Step 3. Complete the Conversion Process
Once you are ready, press Convert to start the process. When done, go to the History section to view your downloaded iTunes Songs.
The intuitive design and future-packed TuneFab iTunes Music Converter make the entire experience of backing up iTunes to external drive much easier and straightforward. Not only do users get to save storage on their computers but also get to backup media files in the format and audio quality of their choice.
Conclusion
Everyone loves to listen to lossless and latest music from leading music services like Apple Music and iTunes. But no one wants their devices clogged up with too many storage files. Backing up and moving your music media from iTunes to external drive is suitable for those who don’t have a lot of storage on their main devices and for this, TuneFab iTunes Music Converter does the job in the best possible way. It is not only a great tool for backing up/saving up storage, but also gives users many additional functionalities.