


Part 1. Install & Register TuneFab M4V Converter
Step 1. Install TuneFab M4V Converter (Windows)
Click "Try It Free" button to download TuneFab M4V Converter. After that, follow the installation guide to install the software. And please make sure that you are using the latest version of iTunes.
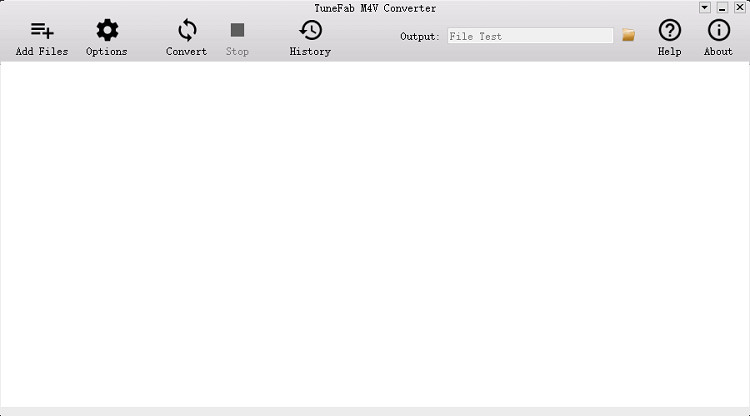
Step 2. Launch TuneFab M4V Converter
Now you can open TuneFab M4V Converter on your computer. And iTunes will be launched automatically along with the program. When TuneFab M4V Converter is launched, you will see the below interface.
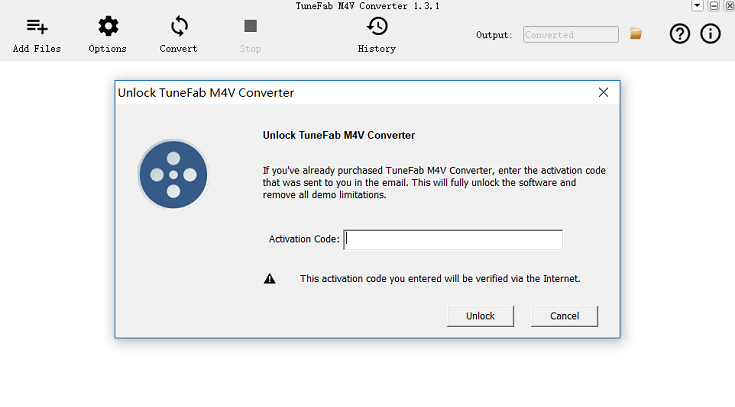
Step 3. Register and Activate TuneFab M4V Converter
Note: The trial version only allows you to convert the first 5 minutes for each video. Purchase the full version of TuneFab M4V Converter and then you can unlock this limitation. Here is how to unlock the software.
Just click menu button (a drop down arrow icon) in the top right corner, and select "Register", then you will see a pop-up window that asks you to enter "Activation Code". Copy and paste the registration code you've received and click on "Unlock" button.
Part 2. Remove DRM and Convert iTunes M4V Files to MP4
Step 1. Purchase or Rent Videos from iTunes Store
Buy movies from iTunes Store and download them to the iTunes Library. To make sure that you can convert movies without obstacle, we highly recommend you to download iTunes movies firstly.
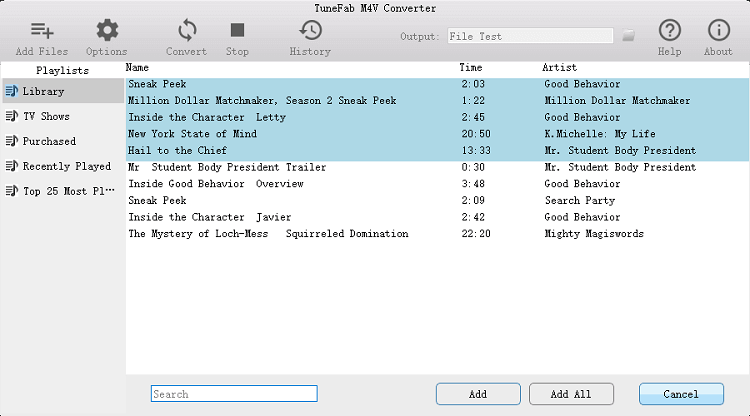
Step 2. Add M4V Videos
Click "Add Files", and all downloaded videos are listed in [Library]. You can choose one or several of those videos, and then click "Add". Or you can click "Add All"; to select all the videos stored in your iTunes library.
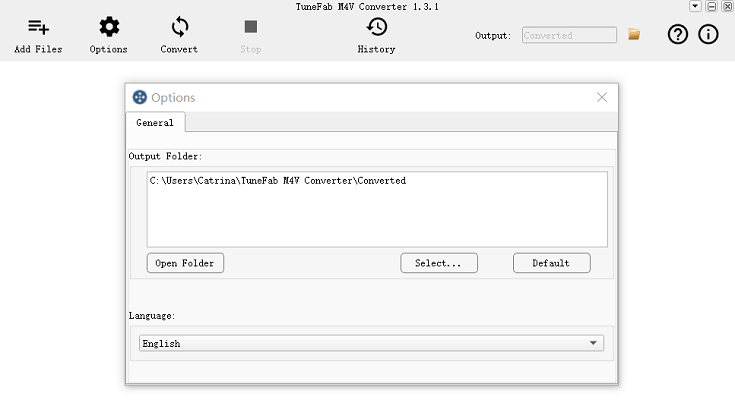
Step 3. Choose the Output Folder
Click "Options" to reset output folder, you can select any folder that you desire to save MP4 files. And it’s okay if you do not change the default save location.
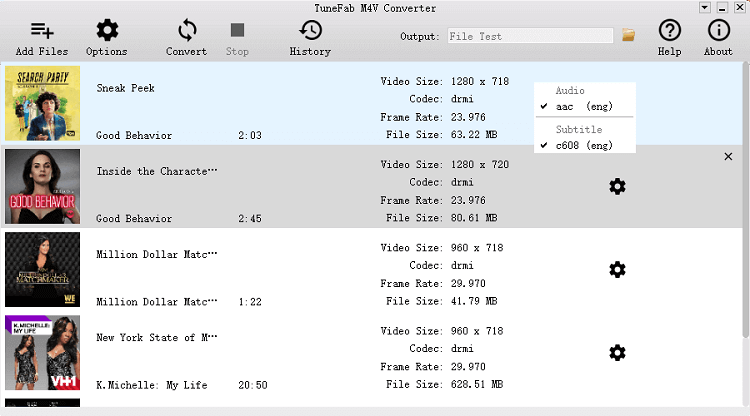
Step 4. Select Audio and Subtitle
Click on the settings button and you are allowed to select the audio tracks and subtitles you want to keep in your converted videos. Or you can skip this part and all audio tracks and subtitles will be saved by default.
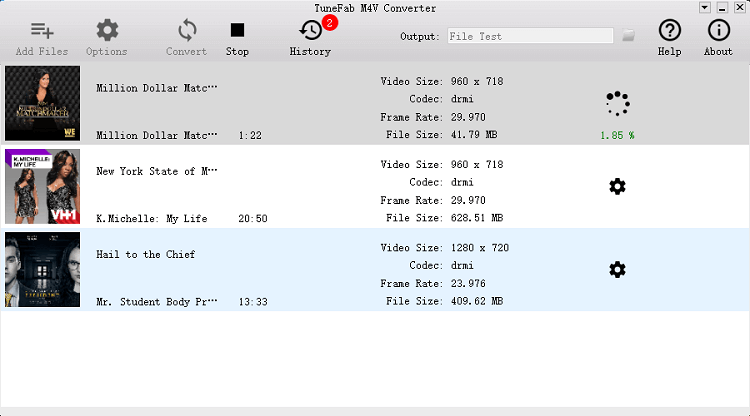
Step 5. Convert iTunes M4V to MP4
Start converting by clicking on "Convert" button. When the process is over, you can get DRM-free iTunes movies and watch these movies on whatever device you like.
Above are all the details of TuneFab M4V Converter user guide. If you have any questions, feel free to contact us.
Part 1. Installation & Registration of TuneFab M4V Converter for Mac
Step 1. Download and Run TuneFab M4V Converter for Mac
Click on the "Try It Free" button or navigate to TuneFab's official Website to download TuneFab M4V Converter for Mac. After downloading TuneFab M4V Converter (Mac), please run the software startup.
Step 2. Installed TuneFab M4V Converter (Mac)
Following the installation instruction of TuneFab M4V Converter (Mac) to get TuneFab M4V Converter (Mac) installed on your Mac. After installing TuneFab M4V Converter, you can catch sight of the interface of TuneFab M4V Converter (Mac).
Note: iTunes will automatically launch together with TuneFab M4V Converter, please remember not to shut down the iTunes program.
Step 3. Registered TuneFab M4V Converter (Mac)
TuneFab M4V Converter provides 2 versions for Mac users, a free version and a paid version. The free version of TuneFab M4V Converter (Mac) allows users to convert the first 5 minutes of each video. Or, you may register and pay to get rid of the time limit.
How to get TuneFab M4V Converter registered?
Go to the TuneFab store and find out TuneFab M4V Converter (Mac) and then click on "Buy Now" to buy an activation code. And the activation code will be sent to your E-mail a few minutes later.
Note: Please check the inbox and junk box of your email if you fail to receive the activation code.
Click on the drop-down arrow icon on the top right corner of TuneFab M4V Converter> "Register" > paste the activation code to the bar > "Unlock". Now you can unlock TuneFab M4V Converter (Mac) and convert M4V files to MP4 with no time restriction.
Part 2. Remove DRM from and Convert iTunes M4V Video to MP4 for Mac
Step 1. Run TuneFab M4V Converter (Mac)
After getting TuneFab M4V Converter (Mac) registered, please launch the program. Purchase or rent iTunes M4V videos first. It will help you better on removing DRM or converting iTunes M4V Videos.
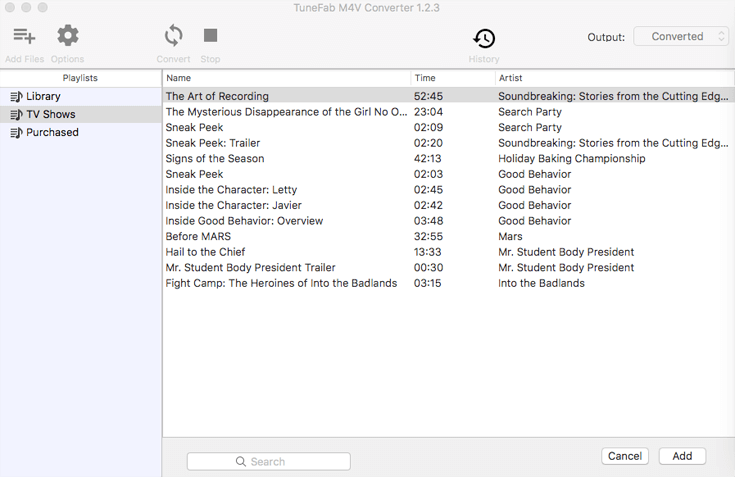
Step 2. Add Files for Removing DRM & Converting
Click on "Add Files", then you will see all the contents in your iTunes Library. TuneFab M4V Converter allows you to batch adding iTunes M4V files for removing DRM or converting. Just select the files that you want to convert and click "Add" to proceed.
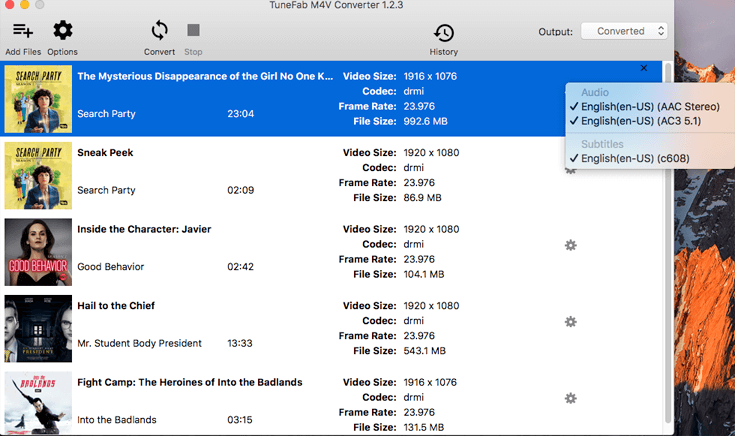
Step 3. Choosing the Audio and Subtitle
After adding iTunes M4V video, you can see all the selected iTunes M4V videos on the interface. click on "Gear" icon then you can select the audio tracks and subtitles of the converted files. If you don't alter the default setting, the audio tracks and subtitles will be kept the same as the original video.
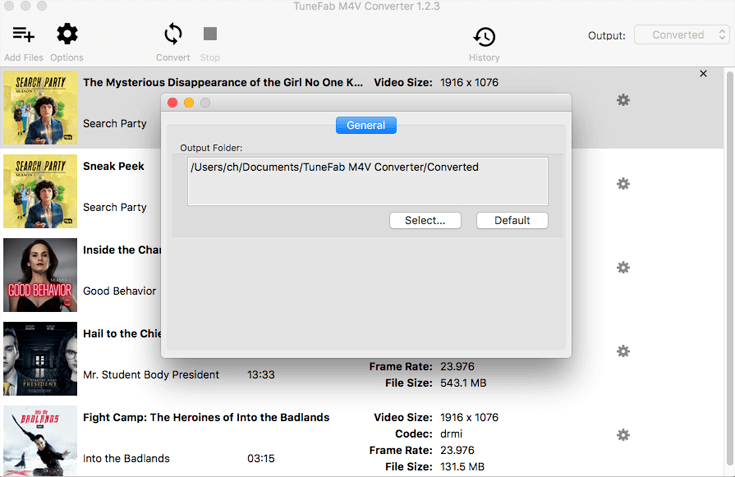
Step 4. Change the Output Folder
Click on "Option" > "Select…" to set the Output Folder. If you don't change it, the output file will be saved in the default file folder.
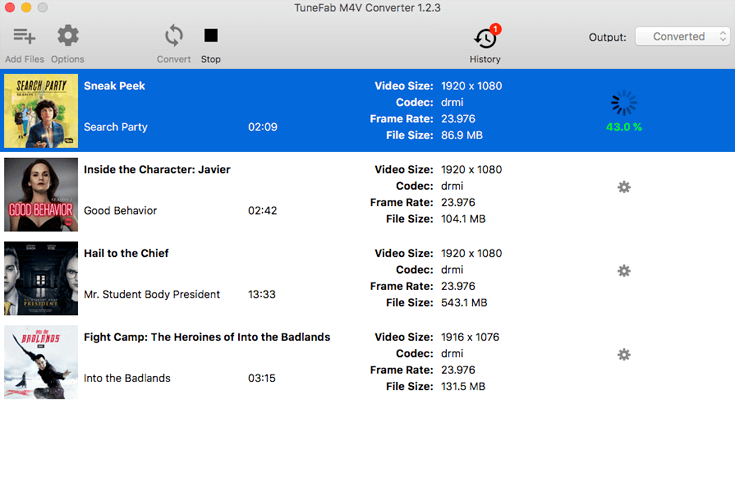
Step 5. Convert iTunes M4V to MP4 on Mac
After setting all the parameter of converted files, click on "Convert" button and then you can get the DRM-free iTunes MP4 files which you can enjoy watching on any device whenever you want.
Above is the complete user’s guide to TuneFab M4V Converter for Mac. If you have any questions, feel free to contact us.
Products
Popular
Newsletter Subscription
Copyright © 2022 TuneFab Software Inc. All rights reserved.
We use cookies to ensure that you get the best experience on our website. Clicking "Accept Cookies" means you agree with our Privacy Policy.


